Thursday 8 June 2017

Choosing Colours

Hello! This week's blog post is all about choosing colours! Colour is of massive importance to me when I'm crocheting and it's often something that people compliment me on, so I thought I would share with you a little bit about colour theory in general before taking a look at how I personally pick colours. I'll also give you some practical tips for choosing colours for your own projects.


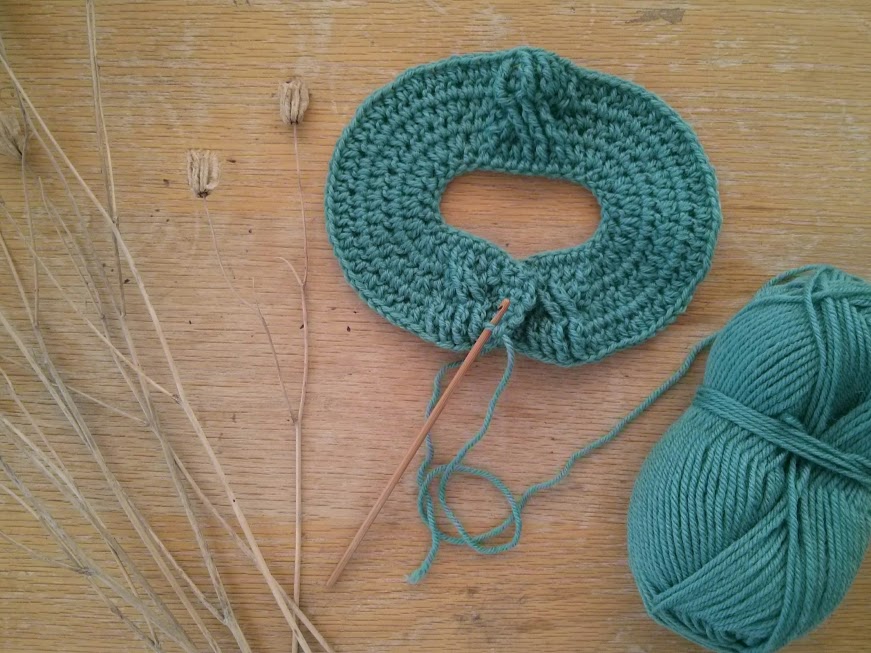
To illustrate my blog post I'm going to use this crocheted hexagon blanket - it's also the source of inspiration for this topic so it seemed appropriate. The information I am sharing in this post is not just for crocheters - anyone who is seeking more advice on how to choose and combine colours should find it useful. 

I've always enjoyed colour and combining colours together but it wasn't until my Portfolio Art Course at Angus College (now Dundee and Angus College) that I began to learn the science of colour theory. This new-to-me teaching and the further guidance and instruction I gained at art college (I studied at Duncan of Jordanstone College of Art and Design, Dundee) gave me the firm foundation that I now base almost all my colour choices on.

The colour wheel is the most common theory which I refer to when choosing colours. Nowadays I don't even think about it, it's like tying my shoelaces, but back then I learnt the principles and applied them every time. So, what is this colour wheel? I decided to have a play about with buttons to create one ...


The colour wheel is a diagram showing where all the colours are in relation to each other. There are 3 primary colours; RED, BLUE and YELLOW. These 3 colours are used in combination to form all the other colours. The secondary colours are ORANGE, GREEN and PURPLE - these are formed by mixing 2 primary colours together. For example, if you look at the colour wheel above, you can see that YELLOW and RED mixed together produces ORANGE. Now, half shut your eyes so that you are squinting at your screen - look at yellow then look at red and watch them blur into orange. 

Complimentary colours (sometimes called contrasting colours) are the colours opposite each other on the colour wheel, ie. BLUE/ ORANGE, RED/ GREEN and YELLOW/ PURPLE. Note that each complimentary colour is made up of 1 primary colour and 1 secondary colour. When choosing colours, complimentary colours go well with each other, they compliment one and other and are usually a safe choice. The two complimentaries which I use over and over are BLUE/ ORANGE and PURPLE/ YELLOW. I tend to have "red and green should never be seen, except on the Christmas tree" in my head when I think of green and red together! However, they do often work; especially pale, lime green with a darker red.


In the image above you can see my clear use of yellow with purple (the most predominant colour combination in this blanket!) and in the centre pale green surrounded by darker reds. 

The colours which are side by side on the colour wheel are analogous colours, ie. PURPLE/ BLUE, BLUE/ GREEN, GREEN/ YELLOW etc. If you are looking for a more subtle colour combination pick analogous colours (these are sometimes referred to as harmonious colours, you can see why!). If your colour scheme requires a trio of colours, choosing 1 primary colour with the 2 secondary colours either side is an excellent combination, ie GREEN/ BLUE/ PURPLE


White, black and grey are used to lighten or darken colours. There is a range called an achromatic scale which can be produced for each colour, starting with the pale, pastel shades through to the very dark, almost black shades. When choosing colours you may wish to stick with colours which are on a similar level of the chromatic scale (eg all pastels or all dark, moody colours) or you may wish to pick colours from different levels on the scale to create greater contrast in tone. I had fun with buttons again and created an achromatic scale for purple ...


So, that's all the basic colour theory that I wanted to share with you - if you're interested in finding out more there is a wealth of information to be found online or in your local library. In the second half of this blog post I want to pass on some practical tips on bringing the theory into your own colour choices. 

One of my favourite ways of looking for new colour combinations is to play around with paint cards from the DIY store! Either keep them as they are (usually 3 to 5 colours in an achromatic colour scale) or cut the strips up to create isolated colour chips. Now try and form some colour trios, basing your 3 colours on the colour theory I have mentioned. There are infinite possibilities and there are no right or wrong answers, go on, explore! You may wish to start a notebook and glue your favourite combinations in it, ready to refer back to when you need inspiration.


Another technique is to create mood boards. Grab a pile of magazines (National Geographic magazines are my favourite for this and are usually fairly cheap in charity shops), some paint cards or fabric samples, scraps of wool, small items from a nature walk - whatever you have to hand - and get creative! If you don't feel like getting hands on, use Pinterest! You can search for millions of different images on Pinterest and if you don't feel like sharing your board with the rest of the world you can set it to "secret".


For colour inspiration the best piece of advice I could give you is to go out and explore! Take photos of colour combinations you find pleasing, draw or record in a notebook things you've seen, collect interesting colours (napkins, leaves, theatre tickets, flower petals, plastic washed up on the beach) - open your eyes, colour is just waiting to be found!


I hope you've found this blog post useful, let me know in the comments if you have! For more colour inspiration, follow me on Instagram.

Marta xx


Thursday 1 June 2017

Exclusive Pattern Release!

Hello! Today I am really pleased to bring news of an exclusive pattern release of one of my very own, completely designed by me, crochet patterns!


I have named this slouchy beanie pattern Cosy Icicles and it will only be available as a kit in Crate Crochet's June subscription box. Crate Crochet is an Australian company which delivers "a monthly box of crochet goodness" directly to your door. The pattern, yarn and everything you need to complete this project will be included as well as a few extra little goodies!


I approached Crate Crochet at the beginning of the year expressing my wish to collaborate with them as a crochet designer for one of their subscription boxes. We agreed on a beanie hat project and I began looking at different Australian wool websites because both Crate Crochet and myself are keen to support local yarn producers. After a lot of thought and discussion back and forward, we chose Morris and Son's Empire - a 10ply merino wool - chosen for both its softness and excellent stitch definition. You can view the entire Morris and Son's range here.


The two colour slouchy beanie hat is crocheted in the round using a mix of double crochet stitches and spike stitches. The hat is worked from brim to the crown and finished off elegantly with a faux fur pompom.

There is currently a giveaway competition on Crate Crochet's Instagram page where you can win a copy of my pattern, the yarn and pompom needed, a Knit Pro crochet hook and a Clover crochet hook. Head over to www.instagram.com/cratecrochet to enter!


I am really excited about the release of this subscription box later this month and seeing everyone's versions of my Cosy Icicles design!

Happy hooking,

Marta xx

Friday 19 May 2017

Yarn Review: Cascade 220 Solids and Heathers

It's been a while since I dedicated a whole blog post to a yarn review so today thought I would share my thoughts on Cascade 220 Solids and Heathers. I have been crocheting a cowl this week using Cascade 220 Heathers and I am loving the feel of this wool!


Cascade Yarns is a family run business based in Seattle, Canada. Established in the 1980s, the company is passionate about producing high quality yarn at affordable prices. I received 2 hanks of Cascade 220 Heathers as part of an Instagram swap package with the theme of #imnotgoingtoeyfswap - for all those who felt they were missing out on the Edinburgh Yarn Festival (EYF) this year. I was partnered with Emma -  @eldenwood_craft - and was delighted to unwrap a completely new yarn that I hadn't come across before! At the time I had way too many WIPs on the go, so I popped the hanks on my wool shelf where I could clearly see them and have a think about what to make. 


Earlier this week I began crocheting a new cowl, following my own design idea, that required two colours and since Emma had sent me Fog Hatt and Mystic Purple I decided to go with these colours. My first task was to wind the hanks into balls and since I don't own a wool winder I set to it using the backs of two chairs. The 100% Peruvian wool felt lovely as it passed through my fingers and wound really easily without any knots or tangles and I knew then it was going to be a delight to work with!


My design idea transferred from my head to the hook exactly as I hoped it would (hooray!). The stitch definition of the Cascade 220 Heathers is perfect for this stitch pattern and would work equally well in any combination of Solids or Heathers - there is an absolutely stunning range of colours to choose from - have a look here


I have been using a 4.5mm crochet hook for this project, but my tension is extremely relaxed so I have written the pattern suggesting a 6mm hook to give the cowl some drape and flow. The yarn thickness is aran or 10ply which make it work up quickly. The 220 in the name refers to the length of the hank, 220 yards (200m). The Cascade Yarns website has many free, downloadable patterns specifically for this yarn and I am sure it would substitute in most cases where an aran thickness pure wool is required. 


So, I would thoroughly recommend giving this lovely wool a go, whether you knit, crochet, weave or use yarn in other ways. Have you used this yarn before? Or any of the others in the range? If you have, leave me a comment, I would love to read your views too.

Happy hooking,

Marta xx


Thursday 11 May 2017

My current crochet project

Hello! Today I wanted to share my current crochet project with you - it's a really colourful blanket which is sure to brighten up your day!


I began work on this toddler size blanket back in October last year using all the little scraps from my wool stash.


The individual squares are made up of multiple odd ends of wool, needle felted together to form a continuous ball and then crocheted in corner to corner stitch, before adding a neutral border. The needle felted join creates what I call Happy Scrappy Wool and it's very easy to make your own - I  have even created a You Tube video with step-by-step instructions here.


I very quickly became addicted to the process of adding squares and I soon had a 4 x 4 square blanket!


However, like a lot of my projects, the initial euphoria passed and the project was relegated to the WIP (work in progress) pile! It remained there until I dug it out last week and has seen lots of attention since then, in fact, it's almost finished!


The photo above was taken in my back garden at the weekend and the photo below was taken this morning, just 2 more squares to reach my 6 x 6 target! The next step will be to add a couple of rounds of cream before finishing with a colourful border. I keep changing my mind about how I want this to look because I don't want to detract too much from the individual squares. One thing's for sure, it's not going back in the WIP pile so I should be able to post a finished photo soon!


Until then, happy hooking,

Marta xx


Thursday 4 May 2017

In search of perfection ...

I am writing this blog post whilst taking a break from the 6th attempt at a crocheted cardigan pattern! Six times I have followed my own design, tweaking it slightly every time.

Take 1 (front)

Take 1 (back)

Take 1 was made in aran weight merino wool and I was so happy with how it had turned out especially the cable detail down the back ... but it was a little too bulky for a new baby ...

Take 2

This time I used DK thickness yarn and the result was so much better ... but the sleeves were too high up the body ...

Take 3

My next attempt was a teenie tiny version for my Sasha Doll. I had a tiny ball of 2ply alpaca wool and I decided to make a miniature version, just for fun!

Take 4 (photo credit: Niall Mitchell)

Back to King Cole merino blend DK, one of my favourite double knitting yarns, to have another go at sorting the position of the sleeves. In the above photo you can see how the pattern is worked from the neckline down. I conquered the sleeve issue and decided to try making it in the next size up (3 - 6 months) ...

Take 5 (back)

Take 5 (front)

The next size up worked out successfully. It took me a while to get into town and buy buttons for this one and the pink one but when I added the buttons I suddenly became aware that the front neckline was too high ...

Take 6

Take 6

I knew exactly how to sort the neck issue so began work on Take 6, using merino DK and going up a size again (6 - 12 months). My idea worked and I am now at the stage of sending this pattern off to be tested, hooray!! My perseverance with this one has been worthwhile, I have gained crochet knowledge and made a mini wardrobe of cardigans for my little niece, Agnes (she won't mind them being slightly wonky, will she?)


Thursday 27 April 2017

What have I been up to this April?

April has been a busy month for me! I have mostly been crocheting, gardening, school holiday day tripping, pattern writing, enjoying family birthdays, taking photos, celebrating Easter, cooking, baking and a bit of DIYing (if that's a word!). I haven't had time to sit down and blog properly so here is a quick, mostly visual, summary of what I've been up to.

I crocheted 2 baby cardigans!
This is the Callander Cardigan by Joanne Scrace 

The weather has been fab so we have been outdoors most days.
This would be an excellent photo shoot location.

2nd crocheted cardigan, Wolf by Kat Goldin
(only my version is a monkey!)


Easter Sunday was also my birthday!
I made this Easter cake with swiss meringue buttercream icing!

Our homemade Easter tree

... and Easter Monday was my youngest son's birthday!
We planted out this old sink with flower seeds.

I celebrated 1 year with my crochet companion Jazz!

Cake and coffee with my boys at the Two Sister's Cafe, 
Carnoustie

A mystery collaboration I am currently working on.
More details coming very soon!

I have fresh ideas for future blog posts and I will be back soon with more updates, but until then, happy crafting!

Marta xx


Friday 24 March 2017

Crochet Pattern Review - Monkey by Vanessa Mooncie

This week I thought I would review a crochet pattern I recently followed; Monkey by Vanessa Mooncie. This pattern can be found in Vanessa's book Crocheted Wild Animals; A collection of cuddly creatures to make from scratch. It's a book I have had for a few years now and this is the second time I have followed the monkey pattern because the last one was such fun to make and such a hit with friends that I decided to make another one.


I like Vanessa's patterns because they are written out in a clear, logical way and just in case you still don't understand, there are diagrams for each individual piece required for the finished piece. The monkey pattern, like the others in the book, is accompanied by lots of photos of the finished monkey in a variety of different poses. I find this is handy when it comes to sewing the completed sections together because you can clearly see what goes where.


The picture above shows the first monkey I made, back in 2015, patiently waiting for me to make him a new friend! The photo below gives an idea of the layout of the pattern within the book. I like the little facts about each of the animals added in some of the free spaces!


I worked on the monkey with very little distraction from other projects and I enjoyed watching the colours form stripes in the variegated merino from Marley Yarns (https://www.etsy.com/uk/shop/MarleyYarns), so I finished off within a few days. I only made four small deviations from the original pattern. Firstly I always use buttons instead of safety eyes; there's no particular reason for this other than because I love buttons! Secondly I altered the ears going through the front loop only of the inner ear; I thought the ridge created was similar to the way the top of the face was attached. Thirdly I omitted the tummy section; I wanted to show off the variegated yarn. Fourthly I didn't edge the top of the face; because I was using variegated yarn it looked clumsy - a clear line of yellow worked best. I want to be clear that all these reasons are purely personal and in no way a reaction to poor pattern writing. 


I would definitely recommend Vanessa Mooncie's Monkey pattern, and indeed any of her other patterns. Vanessa has a delightful way of designing cuddly creatures and giving them real anthropomorphic character which will instantly charm anyone who sees them. 


Have you followed this pattern? Or any of Vanessa's other patterns? Let me know what you think in the comments. xx


Crochet and Sustainability: Your Guide to Being More Eco-Friendly

Hello! Are you l ooking for ways to reduce the environmental impact of your crochet? There are so many opportunities to create what we do in...