Showing posts with label merino. Show all posts

Wednesday, 11 March 2020

Workshop Review - needlefelting for beginners at Dalmore Croft

the stove is lit and I am all set up and ready to go!

Hello! Last Saturday I held my first ever craft workshop at Dalmore Croft, Barry and I wanted to share my experience here in this blog post because the morning went very well, the ladies all enjoyed themselves and they learnt a new skill. I should add at this point that all recommendations are my own, this post has not been sponsored.

materials and tools

I have been needlefelting for many years now and I almost exclusively use gilliangladrag.co.uk for my felting supplies. It's a bricks and mortar shop in Dorking, England which also has an amazing online shop - go check it out! I am a huge lover of colour so for me this online shop is a delight and I would love to go to the shop itself one day, it's on my list!

craft and tea!

When I arrived at the studio on Saturday the stove had been lit and it was wonderful and cosy with the fairy lights twinkling too; the scene was set for a creative morning. It didn't take me long to unpack the wool tops, needles etc and shortly after that my students started to arrive. There was tea, coffee, freshly made scones and homemade blueberry muffins for everyone to enjoy.

so much concentration

The first project was a simple pincushion with a vintage cotton reel for the base. This taught the basics of how to handle and manipulate the fibre into the shape they wanted. Smooth Merino wool tops was on offer for this project in a large variety of colours - something to suit all tastes. The next project was a bunny brooch which was slightly more challenging but everyone approached it with the confidence of their new found skills. To mix things up I offered various British, undyed wool tops for this stage, to allow the students to work with something a bit different and experiment with texture.

nearly finished

By the end of the morning my students had a finished pincushion and a finished (or very nearly finished) bunny brooch. If anyone wasn't quite finished they had the skills and materials to take it away and finish it off at home. I handed out feedback forms at the end are here are a few of the comments I received in the "what did you like about the course?" section; "Everything! Marta was a very good teacher and I loved doing a new craft." and "I liked learning the basics of a new craft and having a finished product."

So, I am definitely going to be running future workshops - more needlefelting ones, including advanced needlefelting - but also other handcrafts. I feel that people enjoy taking time out of their busy lives to stop, take a break and try something new. If you would like to keep up to date with news of all my future workshops please sign up to receive my newsletter.

Until next time,

Marta xx


Wednesday, 24 January 2018

Yarn Review: Koigu Mori

Hello! Today I am going to review a recent addition to my yarn stash - Koigu Mori. I bought 3 skeins of this amazingly soft yarn from loveknitting.com in their January sale and when I opened my parcel I did a little dance because it was stunningly beautiful!

skeins of Koigu Mori with some sunny daffodils

The colours in the yarn instantly made me think of daffodils - of both their flowers and their folliage - the perfect colours as we look forward to Spring in the northern hemisphere. I chose colourway 533 (they are all numbered rather than named) for its fresh look but there is a massive range of colours to choose from, both variegated like this one and solid colours. You can view the entire collection on the Koigu website here.

The composition of the yarn is 50% merino wool and 50% mulberry silk giving it excellent stitch definition and a luxurious sheen. The silk content makes it wonderfully lightweight and drapy so an idea began to form in my head for a scarf design. Inspired by a swatch in a 70s crochet book I began to play with a filet pattern which incorporated a daffodil like motif. 

early stages of the design process

The yarn worked up beautifully without snagging or splitting and the stitches stand out really prettily. The colour changes in the variegated yarn are very short producing a mottled rather than a stripy effect which I like. 

fast progress on this shawl

Based a few hours outside Toronto, Canada, Koigu Wool Designs is a small family run business. It started up specialising in 4ply 100% merino and the demand for this yarn became so great that the business expanded and introduced other bases, still focusing on 4ply something which makes the brand stand out. Today the yarn is a vailable worldwide.

wonderful stitch definition

So, my plans are to continue with this scarf design, write it up, send it to testers, do the final edit and then share it with you in time for Spring!

Happy hooking,

Marta xx

NB. This blog post has not been sponsored by Love Knitting or Koigu, the viewpoints are entirely my own.


Thursday, 16 November 2017

Pattern Release; Fields of Lavender Cardigan

Hello! I am super excited to be ready to release my Fields of Lavender Cardigan crochet pattern today!! This pattern is possibly my favourite of all the patterns I have designed so far and I am really pleased to be able to share it with you at last!

cover photo for my Fields of Lavender Cardigan

The pattern includes two sizes; 3-6 months and 6-12 months, it is suitable for intermediate crocheters and it's written in UK terms throughout. The intricate lavender stalks may look like a complex design but I can assure you, they are not as tricky as they look to create!

I chose King Cole merino blend DK for this design for two reasons, firstly it's a superwash wool (a must for baby garments) and secondly because the finished cardigan will be really warm and snuggly for the little one. You will need 3x 50g balls for the smaller size and 4x 50g balls for the larger size.


cuff and waistband detail

The garment is constructed from the waist up, splitting into 3 sections at the armpit and then the sleeves are crocheted seperately before being sewn up and sewn into position.


the lavender stalks

The pattern is currently available as a pdf download from my Ravelry store and for the first week it will be on special offer for only £1.80. If you would like to purchase and download a copy you can find it here.

back of the cardigan

Look out for more pattern releases coming very soon - I have another winter project for you in the next week or so ...

Until then,

happy hooking,

Marta xx

Thursday, 4 May 2017

In search of perfection ...

I am writing this blog post whilst taking a break from the 6th attempt at a crocheted cardigan pattern! Six times I have followed my own design, tweaking it slightly every time.

Take 1 (front)

Take 1 (back)

Take 1 was made in aran weight merino wool and I was so happy with how it had turned out especially the cable detail down the back ... but it was a little too bulky for a new baby ...

Take 2

This time I used DK thickness yarn and the result was so much better ... but the sleeves were too high up the body ...

Take 3

My next attempt was a teenie tiny version for my Sasha Doll. I had a tiny ball of 2ply alpaca wool and I decided to make a miniature version, just for fun!

Take 4 (photo credit: Niall Mitchell)

Back to King Cole merino blend DK, one of my favourite double knitting yarns, to have another go at sorting the position of the sleeves. In the above photo you can see how the pattern is worked from the neckline down. I conquered the sleeve issue and decided to try making it in the next size up (3 - 6 months) ...

Take 5 (back)

Take 5 (front)

The next size up worked out successfully. It took me a while to get into town and buy buttons for this one and the pink one but when I added the buttons I suddenly became aware that the front neckline was too high ...

Take 6

Take 6

I knew exactly how to sort the neck issue so began work on Take 6, using merino DK and going up a size again (6 - 12 months). My idea worked and I am now at the stage of sending this pattern off to be tested, hooray!! My perseverance with this one has been worthwhile, I have gained crochet knowledge and made a mini wardrobe of cardigans for my little niece, Agnes (she won't mind them being slightly wonky, will she?)


Friday, 24 March 2017

Crochet Pattern Review - Monkey by Vanessa Mooncie

This week I thought I would review a crochet pattern I recently followed; Monkey by Vanessa Mooncie. This pattern can be found in Vanessa's book Crocheted Wild Animals; A collection of cuddly creatures to make from scratch. It's a book I have had for a few years now and this is the second time I have followed the monkey pattern because the last one was such fun to make and such a hit with friends that I decided to make another one.


I like Vanessa's patterns because they are written out in a clear, logical way and just in case you still don't understand, there are diagrams for each individual piece required for the finished piece. The monkey pattern, like the others in the book, is accompanied by lots of photos of the finished monkey in a variety of different poses. I find this is handy when it comes to sewing the completed sections together because you can clearly see what goes where.


The picture above shows the first monkey I made, back in 2015, patiently waiting for me to make him a new friend! The photo below gives an idea of the layout of the pattern within the book. I like the little facts about each of the animals added in some of the free spaces!


I worked on the monkey with very little distraction from other projects and I enjoyed watching the colours form stripes in the variegated merino from Marley Yarns (https://www.etsy.com/uk/shop/MarleyYarns), so I finished off within a few days. I only made four small deviations from the original pattern. Firstly I always use buttons instead of safety eyes; there's no particular reason for this other than because I love buttons! Secondly I altered the ears going through the front loop only of the inner ear; I thought the ridge created was similar to the way the top of the face was attached. Thirdly I omitted the tummy section; I wanted to show off the variegated yarn. Fourthly I didn't edge the top of the face; because I was using variegated yarn it looked clumsy - a clear line of yellow worked best. I want to be clear that all these reasons are purely personal and in no way a reaction to poor pattern writing. 


I would definitely recommend Vanessa Mooncie's Monkey pattern, and indeed any of her other patterns. Vanessa has a delightful way of designing cuddly creatures and giving them real anthropomorphic character which will instantly charm anyone who sees them. 


Have you followed this pattern? Or any of Vanessa's other patterns? Let me know what you think in the comments. xx


Friday, 3 March 2017

Yarn Review - King Cole merino blend DK

Today I thought I would continue with another yarn review - this time King Cole merino blend DK. These review posts are not sponsored by the wool companies, it's simply me, adding my thoughts and opinions on the yarns I like to use.

I have used King Cole merino blend DK for a wide variety of projects, from large blankets to teenie amigurumi to baby cardigans - it's a fantastic all purpose wool! Not all the yarn, but a significant amount of it, was King Cole merino blend DK in my Sophie's Universe Blanket (pictured below).


One of the reasons I love this wool is the amazing range of colours it is available in - there are 45 different colours ensuring there is a colour for everything and a colour for everyone! I enjoy making and designing amigurumi in bright colour combinations and I like choosing just one colour to make hats and baby cardigans. My most recent crochet project (and the prompt for this blog post) uses the gorgeous mustard colour!


King Cole merino blend DK is a superwash wool making it ideal for baby and toddler garments. It's nice and soft too which is lovely to work with and lovely to wear because it is not itchy. There are 104 metres in a 50g ball which works really well when pulled from the centre and worked from the inside out. King Cole merino blend DK is widely available online and in many local yarn shops. 


The friendly amigurumi monster called Malunna (pictured above) was designed and crocheted in King Cole merino blend DK. I love this colour combination - blues and oranges have always been a favourite of mine. If you are interested, the free pattern for this monster is available in my Ravelry store here

Have you used this wool before? What do you think of it? I am interested to know your opinions - please pop a comment below xx


Sunday, 18 September 2016

Yarn Review: Ginger's Hand Dyed Bleating Velvet 4ply

I have only been crocheting with Ginger's Hand Dyed Bleating Velvet 4ply for a week and it has shot into 1st place in my top yarn list! Dyed on a base of 80% superwash merino/ 10% cashmere/ 10% nylon it has a soft texture that feels wonderful to work with. But the main appeal for me is the stunning colourways available!


Last Saturday my husband and I had a child free day in Edinburgh. We took an early train through and spent the day exploring the city of my birth with no real fixed plan or agenda ... except a visit to Ginger Twist Studio! I had visited Ginger Twist Studio's stall at the Edinburgh Yarn Festival in March and although I didn't buy anything, knew I had to go and visit the shop and see all the gorgeous yarn together.


So, after leaving Waverley train station we wandered down to Edinburgh's east side and found the pretty shop with a little help from Google maps (how did we cope before all this technology?). The shop really is like it says on its website description - "a sweetie shop for knitters, crocheters, spinners and weavers"! There were so many colours to take in, I had a hard job choosing just one or two colour palettes for future projects!

There is an extensive choice of the shop's own hand dyed range called Ginger's Hand Dyed. The above photo shows the 2 skeins of Bleating Velvet 4ply I chose. They were hanging side by side from the shelf and I thought the vibrant orangey red was perfect beside the cooler blue grey. I had a shawl in mind from The Shawl Project: Book Two by Joanne Scrace and Kat Goldin which required 2 different coloured skeins of 4ply and thought these two would do very nicely.


The colours I chose have descriptive names - they are "Grey Gardens" and "Girl on Fire" and the pattern, by Joanne Scrace, is called "Missed Kingfisher". The subtle shifts and changes in the colour of the wool make each row unique and compelling to crochet. 


I'm using a 5mm crochet hook, slightly narrower than the recommended 6mm but I'm particularly loose with my tension. The large hook helps the shawl flow and takes away any rigidity a finer hook would produce. Ginger's Hand Dyed Bleating Velvet 4ply drapes beautifully and feels so soft against my skin, I can't wait to wear it around my shoulders (oh yes! This one is for me!!).


My new-to-me vintage basket holds this project perfectly, I just had to take a photo or two for my Instagram gallery ...


If you are in or around Edinburgh I would highly recommend a visit to Ginger Twist Studio, if you're further afield you can buy online at www.gingertwiststudios.com

At the moment I am only a few rows away from finishing this shawl, then I will give it a light blocking before I can wear it. I can't wait!


Thursday, 14 January 2016

Inspiring start to the year

I have had a lot of inspiration for new work so far this year which is not the way I expected January to turn out! I decided to challenge myself to write (and type up!) one new crochet pattern each month of 2016 because last year my pattern writing was somewhat unfocused and sporadic. I thought if I stuck to a seasonal item each time it would give me the focus I needed to create. Today is the 14th of January and so far I have a boot cuff pattern written (typed up and at the testing stage) and a hat pattern on the go!

boot cuff design

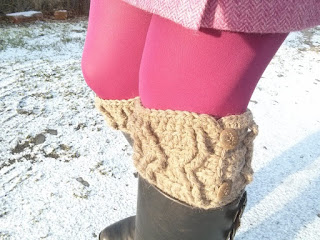
The boot cuffs use the crocheted cable method to produced a raised, textural effect. I began with pen and paper, sketching out the cable pattern then transferred it to crochet. I chose Artesano aran alpaca wool blend for the project because I am slightly addicted to alpaca yarn at the moment and I knew this particular wool would be soft and cosy. The small and medium size boot cuffs use one skein, larger sizes use two skeins; you can buy Artesano aran here. Once I am happy that the pattern is fully tested I will publish it, keep your eyes peeled!

fresh off the hook


last night's dusting of snow provided the 
perfect back drop for my photo shoot 

My second crochet design is a beanie hat, made in two colours using spike stitches. Up until now I have tended to focus on single colour patterns when I am designing because they are so much easier to write up. Now that I have more experience I am going to bring my love of colour into my work. This is something I am really excited about for this year and I hope it will bring a pop of colour into the world!

design in progress

This time I am using MillaMia naturally soft merino aran, which you can buy here. I love these two intense colours together, they will make a super bright hat! There may even be enough yarn left over from two balls to make a pompom, I'm not sure at this stage. I will finish this design in the next few days and type it up promptly (not leave illegible scribbles in my notebook to be forgotten!). Again, once it is tested I will share it with you.

My third creative burst this year is a new sewing design which I hope to sell in my online Folksy shop later this month. I started with a simple idea of using a covered button and played around with various fabrics and textures to go with it to create a brooch. I had soon come up with something I liked and I hope others will too!

new brooch design

So, I seem to be off to a good start this year and I hope it continues to be a year full of inspiration and creativity! What about you? Have you any creative plans for the year? Have you made something exciting? Please share below, I'd love to see!

Marta xx

Wednesday, 23 September 2015

Free Crochet Pattern: Ear Warmers with optional bow

I designed this pattern about 18 months ago but for some reason am only just publishing the pattern now!


The ear warmers were designed using Jenny Watson pure merino DK wool. This wool felt lovely and soft, perfect for being next to the skin! The pattern is worked up using front post and back post trebles; easy enough for a beginner to do.


The large bow is an optional extra and there are clear instructions for making the ear warmers larger and smaller.

I would like to thank my pattern testers from the Instagram community; Karen (@jumpingthroughloops) and Claire (@flowerhead2). Neither of my testers encountered any problems so I am happy to go ahead and publish. 

The pattern is available below or if you would like a pdf copy head over to my Ravelry page: http://www.ravelry.com/patterns/search#sort=best&craft=crochet&query=mrsdaftspaniel. Please do not copy this pattern in any form. Also please do not sell items made following this pattern, it is for personal use only. 


Stretchy ear warmers created using the cable rib technique. A larger or smaller headband could easily be created by adding multiples of 4 chains or decreasing by multiples of 4 chains. The ear warmers could also be made without the large bow.

Materials

2 x 50g balls of Jenny Watson pure merino DK (approx 124m per 50g ball), I used “heather”
4.5 mm crochet hook
stitch marker / contrasting piece of yarn
tapestry needle for sewing in ends

Tension

16 stitches and 14 rows per 10cm²

Abbreviations (UK terms)

ch chain
ss slip stitch
tr treble
fptr front post treble (see advice)
bptr back post treble (see advice)
yrh yarn round hook
beg beginning
prev previous

Advice

The ribbed pattern is created by crocheting into the front and back posts of treble stitches instead of into the top of the stitch. Detailed descriptions of these 2 stitches are given below.

fptr yrh, insert hook from front to back of work around back of indicated stitch and back through to the front, yrh, draw round back of post indicated, (yrh draw through 2 loops) twice

bptr yrh, insert hook from back to front of work around front of indicated stitch and back through to the back, yrh, draw round front of post indicated, (yrh draw through 2 loops) twice

It may help to have a stitch marker or contrasting length of wool to mark the beginning of each round.

Pattern

Main band

Ch 76, ss into first ch to form large ring (making sure it isn’t twisted)

Round 1  ch3 (counts as 1tr), tr into each ch, ss into 3rd ch at beg. of round 1 (76 stitches)

Round 2  ch2 (counts as 1bptr), *fptr into next tr (3 times), bptr into next tr* repeat to end of round, ending with ss into 2nd ch at beg. of round 1 (76 stitches)

Rounds 3 - 10  ch2 (counts as 1bptr), *fptr into next fptr (3 times), bptr into next bptr* repeat to end of round, ending with ss into 2nd ch at beg. of prev. round (76 stitches).

Finish off, sewing in ends on reverse.

Bow

Ch 44, ss into first ch to form ring (making sure it isn’t twisted)

Round 1  ch3 (counts as 1tr), *tr into each ch* repeat to end of round, ending with ss into 3rd ch at beg. of round 1 (44 stitches)

Round 2  ch2 (counts as 1bptr), *fptr into next tr (3 times), bptr into next tr* repeat to end of round, ending with ss into 2nd ch at beg. of round 2(44 stitches)

Rounds 3 - 10  ch2 (counts as 1bptr), *fptr into next fptr (3 times), bptr into next bptr* repeat to end of round, ending with ss into 2nd ch at beg. of prev. round (44 stitches).

Finish off, leaving 20 cm to secure to main band.

Knot

Ch 22, place chain through main band, ss into first ch to form large ring circling main band (making sure it isn’t twisted)

Round 1  ch3 (counts as 1tr), tr into each ch, ss into 3rd ch at beg. of round 1 (22 stitches)

Round 2  ch2 (counts as 1fptr), *fptr into next tr* repeat to end of round, ending with ss into 2nd ch at beg. of round 1  (22 stitches)

Rounds 3 - 10  ch2 (counts as 1fptr), *fptr into next fptr* repeat to end of round, ending with ss into 2nd ch at beg. of prev. round (22 stitches).

Finish off, leaving 20 cm to secure to main band and bow.

Finishing off

Line up the beginning rounds of both main band and bow. Sew bow securely onto main band in the centre, making sure the stitches will be concealed by the knot later. Cover all ends and joins with the knot. Sew securely to the bow and the main band with 6 strong stitches on reverse only. Sew in ends on reverse.

If you do make the ear warmers, please share a photo with me, I would love to see them!

Happy hooking!

Marta xx
Friday, 11 April 2014

Dundee Yarn Crawl

A few weeks ago my friend Jo posted a link on my Facebook page asking if I had been to 'Fluph', a yarn shop in Dundee. A week or so later I posted a link on her page, asking if she had been to 'The Knitting Pin', another Dundee wool shop. Several comments later we agreed we would do a yarn crawl of the 4 main Dundee wool shops!

After a little more organising, I caught the no. 73 bus into Dundee with Jo and her daughter, who loves to knit. I had my youngest and eldest sons with me too because they are just getting into knitting and crocheting. Our first stop was 'The Knitting Pin' up Albert Street (here is a link to their facebook page https://www.facebook.com/pages/The-Knitting-Pin/249792755194830?rf=263565830472270  ). We timed it well because my friend Liz, who had a greed to meet us there, had arrived moments before us. We spent a happy 20 minutes looking high and low at all the different wools. This shop is jam packed, bursting at the seams with hundreds of different types of yarn! There is something for everyone, and if you can't find what you are looking for the super friendly staff will help you. It was the owner's husband who was in charge today and he kindly gave the children lollipops too! I bought a ball of Sirdar Eco wool, DK which I have been using lately to dye with natural dyes.


inside The Knitting Pin

Next we strolled down the hill to the town centre (about a 15 minute walk). It was a sunny day and we all chatted away as we walked. We soon reached 'Wool Craft' which is a hidden gem in The Keilor Shopping Centre. The shop was very busy as usual, both with customers and stocks of wool everywhere! A large and unusual variety of knitting and crochet books were displayed for sale. There were special offers and bargain buckets too. I bought 4 little Anchor tapestry wools in different colours to fit into my latest granny square project. I can't find a website for the shop, but here is a link with a little more info and a map  https://plus.google.com/111923526296304615649/about?gl=uk&hl=en .

Wool shop no. 3 was only a 5 minute walk and we headed straight through the city centre towards it. Wool&co. is the newest of the Dundee wool shops and immediately we noticed how different it was to the others! The shop had a simple, uncluttered layout set against clear white walls. All the wool was set out beautifully on the shelves. There were some gorgeous knitting books and patterns on display too. We noticed that this shop also caters for machine knitters with lots of cones of wool. The yarn was high quality luxury brands, such as a large selection of Erika Knight wool (one of my favourite brands!), Blue Sky Alpaca and several types of Rowan wool, including their popular Big Wool. My youngest son spent his pocket money on a ball of Erika Knight's british blue wool and some bamboo needles to knit it with. This is a link to the shop's website  http://www.woolandco.co.uk/index.php .


me and my eldest, outside Wool&co.

From here we had another 15 minute walk (up hill this time) to 'Fluph' (here's a link to shop's Facebook page  https://www.facebook.com/fluphshop ). I think our tiredness left us immediately as we entered the beautiful shop. We were full of wonder as we looked around at the beautiful wool and quirky handmade decorations. The wool was a mix of skeins and balls of pure wool, alpaca and silk. The owner Leona and her super cute cocker spaniel made us feel very welcome, inviting us to rest our weary legs on the comfy sofas and work on our current projects too.


concentrating in Fluph

While the others caught their breath I nipped across the road and attached a yarnbomb to the lampost. It was my first yarnbomb of the year and it felt good to put it up as everyone walked past or sped past on bikes and in cars. When I went back to the shop I bought 3 balls of Drops alpaca, 1 ball of Drops karisma and my sons bought a ball of Drops eskimo each.


yarnbomb on Blackness Rd, opposite Fluph

We left Fluph with our purses lighter and our bags bulging with wool agreeing it had been a fantastic morning, full of discovery!

Elevate Your Crochet Photoshoots with the Effective Use of Props

Hello! This week I've been taking photos of my crochet and i n this blog post I’m going to pass on my tips on how to make the best use o...