Monday 29 December 2014

Free Crochet Pattern - Alpaca Wrap - a Christmas gift to all my readers!


Merry Christmas everyone! I am sharing this alpaca wrap pattern as a Christmas gift to all my lovely readers! This pattern has been thoroughly tested and I am happy to share it with you for your personal use. Please respect my original design and do not reproduce this pattern or the wrap made from it for your own financial gain. Happy hooking!

 main photo

Alpaca Wrap Pattern by Marta Mitchell


A warm wrap which drapes beautifully over the shoulders. Worked in one of the neutral King Cole Baby Alpaca shades, this wrap will look pretty worn over blouses and dresses.


Materials


8 x 50g balls King Cole Baby Alpaca, DK (110yds/100m per ball) I used shade 500, “Camel”
4.5 mm crochet hook
tapestry needle for sewing in ends


Tension


20 stitches, 8 rows in 10 cm². The tension should be fairly loose, move up a hook size if you crochet tightly.


Abbreviations (UK terms)


ch chain
ch-sp chain space
dc double crochet
tr treble
shell shell motif (see notes)
fdc foundation double crochet
sl st slip stitch
WS wrong side of work


Notes


This wrap is made of two symmetrical sections which branch out from the centre. It begins with a row of foundation double crochet stitches. I chose this method because it produces a stretchy piece of crochet without any gathering or tightness. If you are unfamiliar with this technique it is worth looking up or you could create a similar effect by chaining 67 stitches and working a dc into the 2nd chain from the hook, and carrying on with 1dc into each ch (65dc across).
The shell motif is produced by working 2tr, ch1, 2tr into the dc stitch indicated.

detail of wrap
Pattern

Edit: This pattern was only free for a short time. It is now available to buy for only £3.60 in my Ravelry Store (http://www.ravelry.com/patterns/library/crocheted-alpaca-wrap) and in my Etsy shop (https://www.etsy.com/uk/listing/462745672/alpaca-wrap-a-crochet-pattern-for-a-cosy?ref=shop_home_active_3)


I am extremely grateful to my online friend Anthea for testing this pattern for me. Anthea's blog is well worth a look - it's full of creative ideas!  http://www.talesfrommountpleasant.com/

If you have a go at making this wrap please send me photos, I would love to see how you get on!

Marta xx

Monday 8 December 2014

5 Top Tips for Selling at Craft Fairs

Two days ago I had a stall at the Windmill Christian Centre in Arbroath, Scotland. It was the first craft fair I had done since turning my craft from a hobby into a business. I want to share a few top tips of how to make the most of selling to the public at craft fairs and markets.

1. Pack a small bag with items which might just save your day - eg blu tac, scissors, drawing pins, a pen, pencil, rubber - you never know exactly what your space will be like and these small items have always come in useful to me in the past.


2. Make friends with stall holders round about you. They can be a great help watching your stall while you nip to the toilet or grab a bite to eat. Fellow stall holders often offer each other discounts or freebies which is a great way to network too!


3. Have everything clearly priced. Customers often believe that if they have to ask the price it must be expensive.


4. Make sure the event has been well publicised. Ask the people running the event if they have created a Facebook event and invite your friends, offer to put up posters or hand out flyers.


5. Take a cloth to cover your table and use boxes or crates to create different heights to your display. This will add interest and make your stall more interesting. If it's Christmas time perhaps add fairy lights or battery operated tea lights to give it a festive look.


I hope these small tips help you if you are setting up a craft stall, please let me know if they do!

Monday 1 December 2014

Happy Scrappy Yarn

A few years ago I began to join all my odd ends of wool together to make a ball of stripy yarn. I then used this wool to make crocheted toys which my family loved! I have continued to collect the wool and join it together ever since, making bunnies and monkeys as soon as I have enough to do so. 

crocheted monkey, hanging from a tree!

Recently I decided to see if this stripy wool would work well  if it was crocheted into fingerless mitts or wrist warmers The result was just as I imagined and my "happy Scrappy" collection began!

1st pair of wrist warmers

Above: happy scrappy wool, ready to use 
Below: odd ends of wool, waiting to be joined

I use a needle felting tool to join and blend the two ends of wool together. This creates a strong join and a lovely blend between the two colours. The first pair a happy scrappy wrist warmers sold very quickly and before long I had enough to make a second pair. I make a lot of granny square blankets and any wool which is too short to make the centre of a new square is placed to one side.

2nd pair of wrist warmers

The yarn is all 100% pure wool and a mix of all sorts of different brands including Rowan, Debbie Bliss, King Cole and Drops. As long as it is around double knitting (DK) thickness and any kind of pure wool it is added in!

2nd pair of wrist warmers, modelled

I listed the second pair of wrist warmers today in my Folksy Shop today  www.folksy.com/shops/martasecocrafts This week I am offering a special 15% discount on all shop items! Simply add the code "CHRISTMAS" at the checkout. Offer ends Friday 5th December 2014.

Wednesday 22 October 2014

An owl and a monkey

I have had a lot of fun recently following Vanessa Mooncie's patterns and making crocheted animals! I bought Vanessa's book 'Crocheted Wild Animals' about 6 months ago and so far I have made the elephant, the giraffe, the owl and the monkey. I find the patterns very easy to follow because they are in both written and diagram form.

finished owl

The owl was particularly fun to make because it involved various different stitches. I loved making the shell pattern body!

I decided to make the monkey as a surprise birthday present for my husband this week. His birthday was yesterday and despite him catching me working on it a few times he did not suspect it was something for him. I chose darker wool than the pattern suggested, mainly because that is what I had in my stash. For both patterns I used King Cole baby alpaca DK and the finished animal is so soft and squishy!

finished monkey

If you would like to see more of Vanessa Mooncie's crocheted and knitted animal patterns take a look at her Ravelry page http://www.ravelry.com/designers/vanessa-mooncie


Friday 17 October 2014

My latest pattern - at the testing stage!

The alpaca wrap crochet pattern that I had been working on is finished and it has been typed up. One of my followers on Instagram kindly volunteered to test it out for me and I sent the pdf off to her a few minutes ago - phew! It is such a good feeling to be at this stage. This pattern has 4 repeating rows which look very similar in written form and they had me going cross eyed trying to focus, making sure I was typing in the correct abbreviations!


finished alpaca wrap

So, all I have to do now is wait patiently while this pattern is tested and distract myself with thinking up new possibilities! I also began work on a pretty pink baby cardigan yesterday and found it to be the perfect little distraction. I know of several babies due in the next six months - one of them is sure to be a girl! The pattern is another Kat Goldin one, from her book 'Crochet at Play'.


my current work in progress

There will be details soon of where to find my latest patterns, stay tuned and happy hooking!

Friday 3 October 2014

New pattern ideas


The school holidays start today so I thought I had better fit in a quick blog post because I know I am not too good at blogging in the holidays! I have been busy crochet pattern writing this week and wanted to share my progress with you. Earlier in the week I looked back over my ribbed ear warmer pattern and made a few changes before sending it out to a couple of testers. I know that one of them has begun work straight away and it's always exciting to find out from testers how it's going so I can not wait! This pattern will be published here once the testing stage is complete.


ribbed ear warmers (crochet)

Tightening up my ear warmer pattern gave me the urge to create another crochet pattern and I had 10 balls of King Cole baby alpaca sitting in my stash waiting to be put to use. I have worked in this yarn before, creating a shell pattern cowl (the pattern is free on my blog, look under April 2014). I love how soft this wool is and also how well it drapes so I decided to make a larger piece in it.


the beginnings of a new pattern


After a short time playing around with a few ideas I settled on a pattern I liked and quickly worked out the dimension details before beginning for real.


pattern progress

Today it's raining so it's the perfect day to curl up in my cosy corner and crack on with this! I shared a picture of where I sit and do most of my crafting on Instagram earlier this week so I will post it here too.


my crafty corner

I will endeavour to blog at least once in the holidays, until then happy crafting!

Tuesday 30 September 2014

Hats, hats and more hats!

I have been making hats lately ... lots of hats! It started with the bags of lovely wool that my friend Carole very kindly passed on to me, she was having a major destash! As I was sorting through it my mind was racing with the possibilities of what I could make with it all! I had bought Kat Goldin's new book 'Hook, Stitch and Give' that weekend so my new yarn stash could not have arrived at a better time! Kat has a quirky blog with lots of information and free crochet patterns which is worth looking at if you like crochet  http://www.slugsontherefrigerator.com/ . I loved the slouch and bobble hat on the front cover of her book and decided to give it a go.            


my first Kat Goldin slouch and bobble hat

The first thing I had to learn was how to do foundation treble stitches. Up until then I had only used the traditional foundation chain to begin crocheting and I struggled a little with this new technique at first. The trebles are worked into the chain stitch of the previous treble, combining the foundation chain and the first row in one step. The book explained it clearly with diagrams in the opening chapter which was good. Once the foundation trebles were done I quickly progressed through the rounds and the hat was finished within a couple of hours! I immediately began the second hat ...


2nd hat, green with 2 different blues

This time I decided to add a third colour to the alternate rows giving it a slightly different look. The effect makes me think of tartan, which I love!


back of 2nd hat

After the green hat I had enough wool of the same type to make one more hat. This one was another three colour hat, with an edgy contrast in the colours which reminded me of sunny autumn days.


3rd hat, dark red with ochre and bright blue


From here I moved on to much chunkier wool! Rowan Big wool - perfect for making a hat in just over half an hour! I decided to take the foundation treble stitch I had learnt form Kat Goldin and apply it a hat design of my own. The advantage of the foundation treble is that the finished item has much more stretch than a foundation chain beginning, which can sometimes be tight and restrictive, This makes it perfect for hats, gloves, socks etc. 


my wave pattern beanie hat 

I was happy with the result because it made my hat more stretchy and gave the edge a wavy border. I also added a pompom which is not in the original design. Whilst I was busy making all these hats my husband was busy making me a hat! He is a loom knitterand has recently started his own blog http://loomknitterdude.blogspot.co.uk/ . During the summer I had chosen some pink Drops Andes for him to knit me a hat and I was excited that he was making something especially for me.


the hat my husband made me

Once he had finished I decided to add a pompom because all the hats I had made had pompoms and I was adding pompoms to everything! I made this one extra large and I am really happy with the overall look and can not wait for cooler days so that I can wear it. 

Tuesday 9 September 2014

African Flowers Blanket

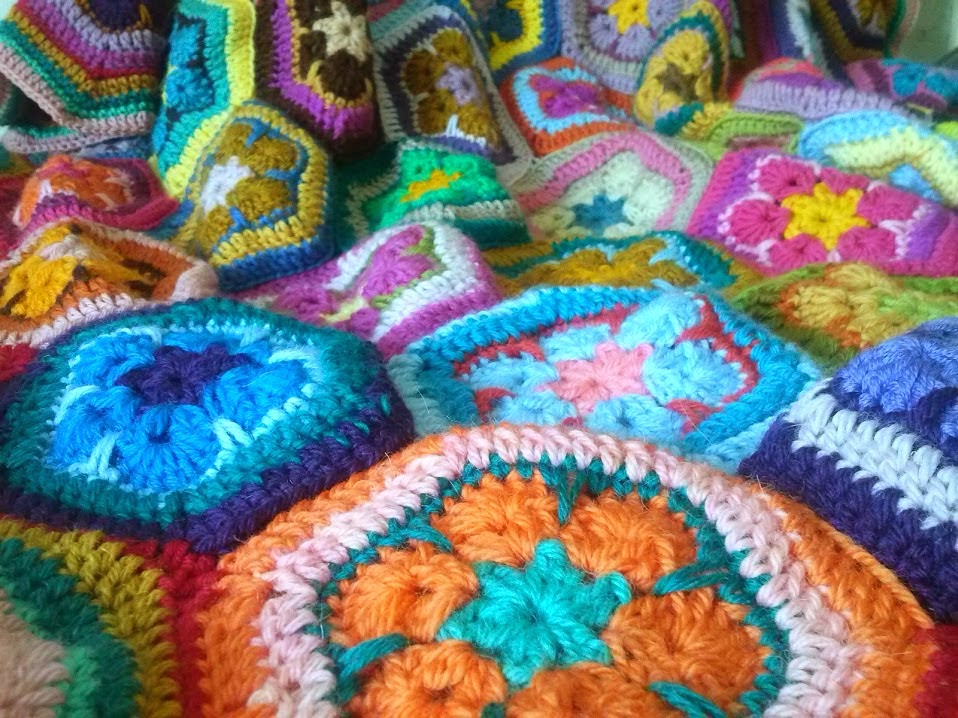
In my last blog post I shared a couple of photos of my finished african flowers blanket and I thought that this special blanket deserved a blog post of its own. 

 close up of finished blanket, showing the border

I had always been captivated by crocheted african flower motifs I had seen on Instagram and decided to look up the pattern and give it a go. Many instagrammers were following Heidi Bears pattern, so this seemed like a good place to start! The following link takes you to Heidi's tutorial (please note it uses US crochet terms)  http://heidibearscreative.blogspot.co.uk/2010/05/african-flower-hexagon-crochet-tutorial.html


 making a start

I joined the hexagons together with slip stitch on the reverse (placing right sides together). This is the first blanket I have made using the join as you go method. Usually I make all the necessary squares and then lay them out the way I want them before labelling and joining together. This new method gave instant satisfaction because I could see the blanket grow!


I was instantly addicted to making these hexagons!

I loved looking into my stash of odds and ends and choosing colours for these hexagons.  As long as the 4 colours in each hexagon went together I was happy. When choosing where to place each hexagon I sometimes put complimentary colours together, sometimes clashing colours to give it a random look.

 my blanket grew very quickly!


 summery colours


Most of the wool came from charity shops or kind donations from friends. I also loved picking up a ball of wool or two if I was passing by a wool shop! 

 there was only just enough of this colour to go around


 another close up


the finished blanket

I am really happy with the finished blanket and it is definitely one that is staying in our house! I hope you have enjoyed reading more about my blanket's progress and looking at my photos. Have you made an african flowers blanket? Please share if you have!

Thursday 4 September 2014

I'm back! (and sorry I've been away so long)

I seem to have taken a rather a long break over the summer - ooops! The school holidays were full of long sunny days, trips to the beach, picnics and of course lots of crafty days with the boys!

Rather than typing thousands of words about what I have been up to over the last few months I will use photographs to tell my story. If you would like to know more about anything you see please leave a comment and I will get back to you.


 the youngest and I learning how to use double pointed needles


 a giraffe I crocheted for the middle boy and an elephant for a friend's baby


 a new style of brooch which I have designed and started selling in my folksy shop


 the youngest drew this monster and I recreated it in crochet!


 middle boy wanted the same, of course!


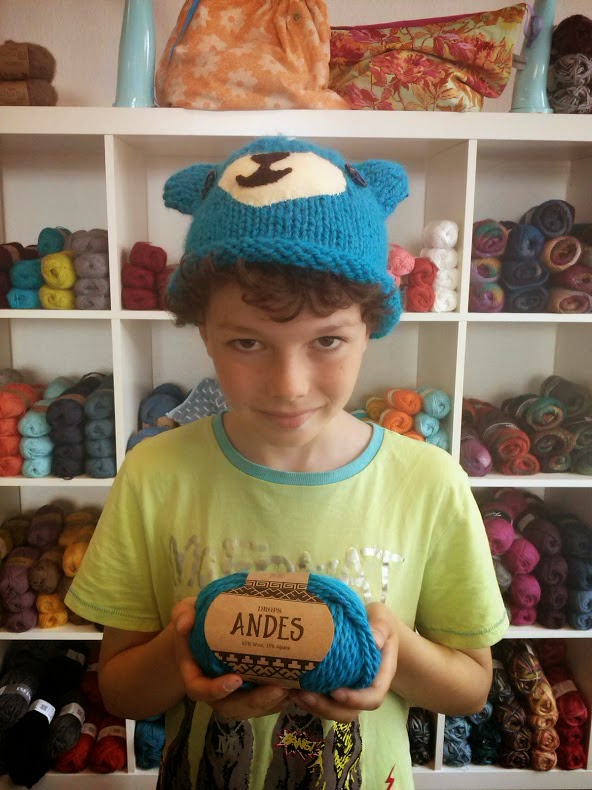
 youngest showing off his finished hat in Fluph wool shop, Dundee


 anniversary day out with the hubby! He takes his loom knitting everywhere!!


 a friend commissioned me to make this sweet little mouse


middle boy designed and made a den for his crocodile and a water bowl


 eldest sprayed and painted his Nerf gun


 my latest yarn bomb in Dundee, Blackness Road area


 I finished the african flowers blanket which I had been working on for a long time


 detail of finished blanket


I have taken up quilting using the english paper piecing technique

Well, that's a snapshot of my summer! School has been back for a month now and I will get back into blogging and restocking my folksy shop https://folksy.com/shops/martasecocrafts


Friday 23 May 2014

Duncan of Jordanstone College of Art and Design Degree Show 2014

I had an hour in Dundee this morning to take a speedy look around the Degree Show at Duncan of Jordanstone College of Art and Design. I graduated from this art college in 2000 after studying Fine Art, specialising in sculpture. As soon as I entered the building the distinctive art college smell of oil paint and turps took me right back to to my student days. I enjoyed walking the familiar corridors which have changed very little since then.

I decided to concentrate on Fine Art and Textile departments because I was so pushed for time. In the Fine Art department I was struck by the variety of techniques and media that the students had used. My visit began at 10am and there were no artists there to talk to and ask permission to take photos so I am unable to share any images with you on here. I settled for taking a photo from the 6th floor corridor, from the window my middle sister, Aimee Henderson (BA(Hons), 2011), looked out of when it was her studio!

The view from the 6th floor, looking across the River Tay

By the time I reached the Textiles department the students had woken up and I was pleased to chat to a few of them. I enjoyed the work of Jennifer Heilbronn because of her eye catching use of mega chunky yarn!

Jennifer's tunisian crochet

I liked Jennifer's use of colour, mainly blues and oranges, invoking images of the sea, sand and maritime life. Take a look at her website, the photography is stunning!  http://jenniferheilbronn.wix.com/knit

I am looking forward to next year's show, when I will definitely make sure there is time to see more work!


How To Make Do And Mend With Crochet

  Make Do And Mend With Crochet Hello! This week I'd like to focus on one of my core values when it comes to crafting: How To "Mak...