Thursday 14 April 2016

Why This Shawl is on the Naughty Step!!


I have been crocheting this shawl, designing the pattern as I go, since the 2nd of March this year. It's been one of those projects I've picked up and put down, working on other things as the mood takes me. It's also been the work-in-progress (WIP) that I've taken with me to appointments, on train journeys, to cafes and most recently on our short break to North Berwick.

the shawl, with my notebook

So, why is it on the naughty step? Well, because it has been picked up and put down so often and not looked at too closely or stretched out for photographs I hadn't noticed the shape had all gone wonky! If you look at the photo below you can see it tapers from left to right - this should be the straight stretch - Noooooooo! When I noticed I threw it in the corner in disgust and it's only now, 4 days later, that I can look at it and figure out where to go from here!

tapering when it should be straight!

beginning the shawl

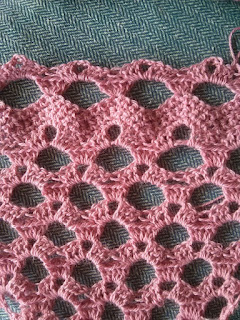
The shawl started out well with a simple 2 row repeat, worked back and forth, creating an ever increasing triangle. I was happy with how it was progressing.

progress

Then I decided to mix things up a little and add a section of plain double crochet stitches. This would help to break the shawl up - both for the crocheter and for the look of the finished item. Again, I was happy.


getting bigger!

At this point I had created a large triangle and I knew the shawl could go in two directions; keep increasing the triangle until it reached the right size or stop the increases, work a straight section and then decrease to a point again. I thought option 2 would suit me and my crochet style best and went for that, first working out (or so I thought, ha!) how to stop increasing and crochet in a rectangular fashion. 

So, what now? Well, me and the wool (which is gorgeous Artesano alpaca silk 4ply by the way, should have mentioned that!) have become friends again. I think I will rattle back to the start and see where it takes me. I like the pattern repeat and it is perfect as a project for on the go, I just need to pay more attention when I'm designing!

Marta xx


Friday 1 April 2016

Easy Crochet Flower Photo Tutorial

Hello! Last night I was playing about with some cotton yarn, trying to make a very small flower and getting frustrated because the centre was so big and taking up a lot of unnecessary space! I was using the magic loop method, ch 1, 12dc (UK terms) into the loop and then on to round 2 for the petals, when I suddenly thought "can I skip round 1?" ... And yes, I can!!

finished flowers

I am going to give you a step-by-step photo tutorial for the flower below, but firstly I'll give all the instructions in the usual compact format. 

NB. You will need to know how to make a magic loop

Materials - small amount of yarn and appropriate size of crochet hook (I used Erika Knight vintage wool and a 5mm crochet hook), needle for sewing in ends

UK instructions

ch - chain
dtr - double treble
ss - slip stitch

Begin with a magic loop, [ch3, 2dtr into loop, ch3, ss into loop] 5 times. Pull starting tail to tighten magic loop. Finish off.

US instructions

ch - chain
trc - triple crochet
ss - slip stitch

Begin with a magic loop, [ch3, 2trc into loop, ch3, ss into loop] 5 times. Pull starting tail to tighten magic loop. Finish off.

That's it, a very small flower which can be used for all sorts of decorative purposes! Top tip - if you leave your tails nice and long these can be used to secure your finished flower to your project.

Here's the step-by-step photo tutorial ...


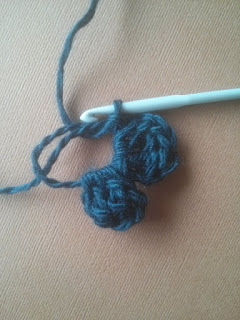
begin by wrapping the yarn around
your fingers to make a magic loop


insert yarn from front to back, pull 
a loop through


extra photo to show the start of the magic loop


chain 3 (to begin petal)


first dtr (UK) / trc (US) into the loop

second dtr (UK) / trc (US) into the loop

chain 3 (to finish petal)

slip stitch into loop

Continue around the loop, working the above pattern 5 times in total

Here's the start of petal no. 2 

2 completed petals

5 completed petals

pull the starting tail 
to tighten the loop

you can leave the centre open or
pull it completely closed.

Weave in your ends and you are finished!

a pile of finished flowers in various 
different yarn weights and textures

I would love for you to get in touch and show me your flowers or let me know how you have found this pattern! You could comment below or tag me on Instagram with the tag #mrsdaftspaniel. This pattern is now available as a free pdf download from Ravelry.com!

Happy hooking!

Marta xx


How To Make Do And Mend With Crochet

  Make Do And Mend With Crochet Hello! This week I'd like to focus on one of my core values when it comes to crafting: How To "Mak...