Wednesday 26 February 2020

Drawing out crochet charts

if at first you don't succeed ...

Hello! A short blog post because there are not so many colourful crochet photos to share this week, it's been all about drawing out crochet charts instead!

my set up

The above photo is from my Instagram stories, it shows my usual drawing set up: sketch pad, pencil, laptop and a mug of rooibos tea (with soya milk). I have just finished drawing out the chart for my Fields of Wheat beanie, and it's been one of the trickiest charts I have ever drawn! I had to think long and hard about exactly how to depict the intricate 3D form of the beanie as a 2D chart. However, it was well worth persevering with and I am pleased with the finished result. The photo at the top of this post shows the finished chart in the top left corner and I love how pretty it turned out, it's like a big flower!


example of a finished chart

This chart, for a yet-to-be-named project has a fascinating geometric pattern going on too! It's only now that I am into crochet pattern writing that I wished I was better at Maths - it's all so mathematical - it must be good exercise for my brain, so that's a bonus I suppose!

Daffodil Shawl chart in progress

I like to daw the charts out in pencil and then carefully go over them in fine coloured pen, usually 2 colours to clearly define the different rows or rounds. I then either scan them or take a high resolution photo before adding them to the pattern pdf. Most of my recent patterns have charts and I am going back and adding them to earlier patterns because I know they can be a real help to people. Personally I prefer following a written pattern but if a chart is included too I will refer to it, especially in the early stages, it helps to visualise what the pattern writer expects. What about you, do you like to follow charts? What do you like about crochet charts? Let me know in the comments.

Until next time,

Marta xx

Thursday 20 February 2020

my Fun a Day Dundee project


my finished Fun a Day project

Hello! Today's blog post is all about a project I was involved with in January. For the second year in a row I took part in Fun a Day Dundee, a project which has been running in the city since 2011. "The premise is simple: pick a project (take a photograph, make the bed, draw a picture, bake a cake, etc) and do it every day in January, then show your work the following month in a big group exhibition." (quote taken from the Fun a Day Dundee website).

initial sketchbook ideas

Last year I drew a flower every day for the month using various methods and a wide array of materials. Whilst I thoroughly enjoyed making 1 finished piece every day it did feel quite pressured and there were days when I was pushed for time or simply didn't feel very creative. This year I decided to crochet a doll over the course of the month, working on it a little every day - more time or less time depending on what else I had on and my creative energy.

beginning to have character

I have made quite a few crocheted dolls over the years because I love the satisfaction of making something tangible, full of character and personality in a fairly short space of time. For this project I chose to design the doll myself writing the pattern for it as I went along.

Hello!

I crocheted the body using Rico Creative Cotton in the colourway Powder because I really liked the pale skin colour of this yarn. The huge mop of curly hair is created by needlefelting Debbie Bliss Lara (in the colourway Anna) in place - I love the bouncy curl it has. After crocheting the doll I began working on a little outfit for the chilly wee boy - it was January! I knew that I wanted to add lots of little optional details to my pattern and I had great fun designing pockets and even adding orange thread top stitching.


tiny details

shoes with laces

The shoes were possibly the most tricky design element because the feet are essentially quite shapeless and the shoes have to be able to be pulled on without stretching them or the doll out of shape. I added little contrast soles and gave them laces too, giving them more destinguishing features.

making him a friend!

By the 25th of January I was finished the doll and the clothes and had to make a decision: make more clothes and accessories or make another doll? As you can see from my first photo, make another doll won! I knew the process would be much faster this time because I had my pattern written up, ready to follow.

needlefelting the hair

Sure enough, I had a second doll in next to no time (not an awful lot else got done in these few days mind!). I decided to give the girl doll bright orange, Japanese manga style hair so I ordered Cascade Magnum in the colourway Living Coral and when it arrived it was perfect! I needlefelted the hair in place again, a technique which I had followed in the past and really wanted to use in my pattern too.

January 31st
So, by 31st of January I had 1 completely finished doll and 1 almost finished doll - she just needed her hair sorting and some more clothes. I was chuffed with how productive I had been! It was lovely to have feedback and encouragment from fellow participants on Instagram and in turn to follow their creative journeys - I loved this aspect of the project!


more details

Last week I added the final touches to the girl doll's outfit - a green cardigan and a pair of sandals. for both dolls I used DMC Narura cotton yarn partly because I like to have a different texture for clothing when I make a doll and partly because the colour range in this cotton is fantastic - so many to choose from! All I need to do now is add the final touches to my pattern and do an outdoor photo shoot of both the dolls. The weather here hasn't been in my favour and I think I will leave it another few weeks for some spring flowers too. Also, both dolls need names! If you have any suggestions, please leave them in the comments.


finished doll

The group exhibition for Fun a Day Dundee takes place over the Easter weekend, 10th - 12th April at Generator Projects in Dundee - my dolls will be there alongside so many other different projects, I can't wait!

Until next time,

Marta xx


Thursday 13 February 2020

"Are your crochet patterns suitable for beginners?"


YES! Many of my crochet patterns are suitable for beginners! It's a question which people frequently ask me, so in this blog post I'm going to share with you which of my crochet patterns are suitable for beginners.

how best  to wear your This Way,
That Way scarf 

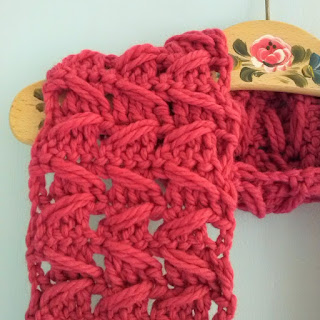
I designed my This Way, That Way scarft with the beginner in mind - it only requires double crochet (UK terms). There are ridges running along the length of this reversible scarf, created by changing between working into the front loop and back loop of the stitches, but don't worry - the pattern includes a step-by-step tutorial to keep you right! It's a unisex design which can be made in your own combination of colours in chunky yarn. The pattern is available in UK and US terms.

Calunna Hills cowl

Slightly more challenging, but still with a beginner rating, is my Calunna Hills cowl. It requires just a few simple stitches to create this stunning wave effect. Once you have crocheted a few rows the pattern is repeated and it's easy to remember and get into a routine with. It's available in both UK and US terms.

Jute Plant Pot Cosy

My Jute Plant Pot Cosy pattern is super simple and works up fast in Hoooked 100% natural jute. The finished cosy has a raw, chunky quality which heightens the lush greenery of any plant placed in it. This free pattern can easily be adapted to suit whatever size of plant pot you have.

Small Flower

My Small Flower pattern includes a step-by-step photo tutorial and a chart alongside the full written instructions. You will need to know how to make a magic loop but there are plenty of YouTube videos to keep you right on that! This project is perfect for using up small amounts of left over yarn in any thickness and the flowers can be used to decorate all kinds of things! It's also another of my free patterns! 

Easy Wrist Warmers

Another simple beginners project is my Easy Wrist Warmers pattern - a free Ravelry downoad. There are only a few basic stitches required and the pattern works up quickly giving you an achievable finished item that you can show off to friends and family!


The final pattern I would like to share with you is Zig Zag scarf pattern. It is a super simple stitch repeat which works up really fast! there is an easy to follow chart included with the pattern and it's available in both UK and US terms.

Wow! Six beginner level patterns to choose from! And, once you've mastered a few basic crochet stitches, become more confident with your hook & yarn and learnt to follow a pattern you will be ready to move on to intermediate level patterns. I'm now including charts or video tutorials (or both!) with all my crochet patterns (and going back and adding them to older patterns) because I know they can really help people visualise how the pattern works. If you have any questions relating to my patterns please leave a comment below or send me a message on Instagram (@marta.mitchell.designs)

Until next time,

Marta xx

Wednesday 5 February 2020

Introduction to Needlefelting

bunny brooches - perfect for Spring time!

Hello! I have some very exciting news to share today - I am going to be teaching my first workshop! This is something that I have wanted to do for a long, long time but have never actually taken the time out to fully visualise, plan and organise ... until now!! 

pincushion in progress
So, what is needlefelting? Put simply, needlefelting is the transformation of wool into 3D objects using a very sharp, barbed needle. The wool fibres become tangled and then tighten causing them bond together into a solid shape. You can manipulate the wool in many different ways creating a huge variety of effects. It's a craft that I really enjoy because it very quickly develops from a smooshy handful of wool into a finished piece - it's very satisfying and addictive!

needlefelting in action!
My first workshop will be held on the morning of Saturday 7th March at Dalmore Croft, Barry near Carnoustie. Dalmore Croft is a 12 acre small holding owned and run as a small mixed farm by Rosemary and Dan Champion, and the workshop will take place in their wonderfully cosy, converted outhouse - complete with wood burning stove and comfy chairs.

the studio at Dalmoe Croft

bunny brooches with the cosy
wood burner in the background
Over the course of the morning I am going to teach my students to make a small pincushion with a vintage cotton reel base and a bunny brooch. There will be lots of colour options available in the Merino wool for the pincushion, playing with colour combinations will be fun! The brooch can be tailored to suit lots of different styles and made in natural Blue Faced Leicester wool or in the bolder colours of the dyed Merino fibre. By the end of the morning my students will have the skills and confidence to carry on with the craft at home - the possibilities are endless!

... and me!
 All photos taken by Niall Mitchell
As you can tell, I am really excited about the opportunity to start teaching - I hope this is the first of many! If you would like to join me on this course you can book here. If you have any questions, please get in touch via the comments below or directly with Dalmore Croft.

Until next time,

Marta xx

The Art of Yarn Substitution: Four tips to find your perfect yarn match!

  Hello! Have you ever fallen in love with a crochet or knitting pattern, only to discover the specified yarn is unavailable, discontinued, ...