Friday 28 October 2022

Your Guide To Choosing The Right Crochet Hook

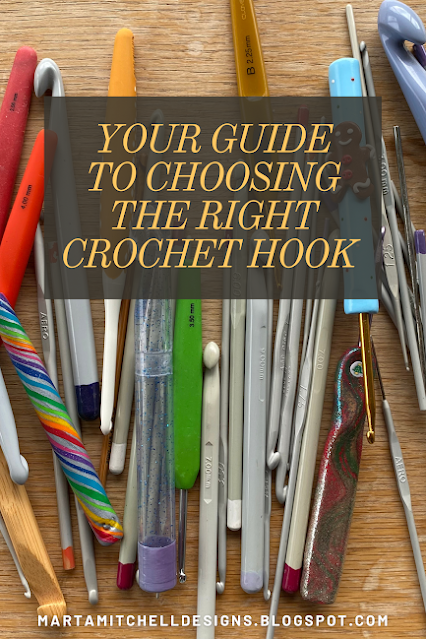
Text - Your Guide To Choosing The Right Crochet Hook appears over a background of crochet hooks of various shapes and sizes


Hello! With so many crochet hooks out there to choose from, maybe you're confused on which type to go for? Maybe you've tried a few different types and would like to explore further options? Here's my guide to choosing the right crochet hook ...

In this blog post, I'm listing the variety of materials that hooks can be made from and giving you a little info on each one. I also turned this post into a YouTube video if you're more of a visual learner you might want to check that out here.

1) Steel: these are generally super fine hooks (0.5mm - 2mm) which are ideal for working with thread and very thin yarn

2) Aluminium: are a good all rounder! They are cheap to buy and smooth to use. They come in a large range of sizes and are easy to find in charity shops.

3) Bamboo: an excellent choice if you prefer natural materials. Bamboo hooks come in a wide range of sizes, all except the really fine and the super chunky. Personally I have found that these hooks can catch on yarn, especially the finer ones (up to 4mm), but I do enjoy the feel of working with them.

4) Plastic: nice and light to work with. The smaller hooks are solid plastic, larger sizes are hollow plastic. Like aluminium hooks they are cheap to buy. You may want to avoid these if you're considering the environmental impact (unless second hand of course!).

5) Ergonomic: this is where your options explode open! There's a huge range of ergonomic hooks on the market, starting from very cheaply produced ones to luxury ones which feel so good to hold. The handles are formed of soft pastic moulded around an aluminium hook.

6) Hand crafted: these hooks are lovely if you're looking for something a little bit different. A polymer clay is added around an aluminium hook to create a chunkier handle. These hooks range from plain colours to quirky & fun!

7) Hand carved: if you're looking for something special, this is your option! These hooks are lovingly and expertly hand carved from wood. They usually have a bees wax finish to keep them supple and smooth.

8) Resin: Another luxury hook! A quick scroll through Etsy brought up so many pretty options, many of which are combined with wood. These tend to have a chunky ergonomic handle.

9) Interchangeable: A slightly different option; these hooks come with one ergonomic handle and a range of hook sizes to click or screw in place. I haven't tried them, but they are popular.

10) Light up: Similar to interchangeable hooks but with a light up tip. The hook itself is made of clear plastic with a light in the end, these click or screw onto a USB rechargeable handle.

Phew! Did you realise there were this many options?

Which type do I prefer?

Do you know, I tend to default to my trusty aluminium hook for most projects; it's probably because they're what I started crocheting with and they feel familiar to me.

I do also use a range of ergonomic hooks, particularly if I'm doing finer work. For super chunky and T-shirt yarn I like to use a hollow plastic hook because it's lighter. Basically, I mix things up!

A beautiful handcarved or resin hook is definitely on my WISH LIST! (I wonder if the hubby will read this?)

I've deliberately not linked to any hooks here. If there are any types you'd like to look up they're only a quick search away.

As well as different materials for hooks, there's also a difference in the design of the hook head and neck. However, I feel this needs a diagram to explain the technicalities and is probably a whole other blogpost for another day!

Until next time, happy crocheting,

Marta xx

PS. If you'd like to receive practical crochet info like this straight to your inbox, sign up to my mailing list here. There's a free pdf for you when you do - 25 Top Tips Every Crocheter Needs To Know!


Thursday 27 October 2022

Everything you need to know about dye lots


MY 200th BLOG POST!

Hello! Following on from the top tip I shared about yarn bands last week, I feel there is a lot more to say about dye lots! If you missed that email, you can find the info in this blog post. Can you believe I've now written 200 blog posts? Crazy!

So, what are dye lots? A dye lot is the batch number that a yarn dyer or manufacturer puts on the yarn band or label. See the photo above for an example, it's usually located beside the colour name or number.

Due to the nature of the dying process, each batch is going to differ slightly from the others. Now, this is only a problem if you're creating something with multiple balls or skeins of yarn - then you want to make sure they all come from the same batch or dye lot.

Has the following ever happened to you? You've crocheted a jumper or a blanket and noticed that there's a stripe going across your work that's a slightly different, but ever so noticeable, shade?

So, now you know, always check the label or band!

I have a few pro tips for you here:

1) If you're working with hand dyed yarn there isn't always a batch number and even if there is there can be variations between the skeins! 

In this case the best thing to do is alternate between the skeins, round by round or every 2 rounds (depending on the scale of your project). This will give you an even looking finish.

2) Some yarn shops will keep yarn back for you if you let the owner know you're working on a large scale project and may need to buy more. 

If you find a local shop that offers this AMAZING service, please support them as much as you can! Also, don't forget to let them know when you've finished your project so they can put their stock back on the shelves.

3) If you ordered your yarn online and find you need more you can email or phone them with your dye lot number and they may be able to supply you with the correct batch. 

Oh, one final thing - hang on to those ball bands!

Until next time, happy crocheting,

Marta xx

PS. Top tips like these can be delivered straight to your inbox so you never miss them! Sign up here. 

Friday 14 October 2022

Storing Ball Bands

various payer ball bands with little pieces of yarn attached to them


Hello! I'd like to share a neat trick I've come up with for looking after my yarn bands. It's simple: when I start a ball or skein I snip off a 10-15cm strand and either sticky tape or staple it to the ball band. That's it!

I then store them together in a tin so if I need to order more of any of the colours I have all the info I need, including the dye lot numbers, which is very useful! (Edit: I've written a blog post all about dye lots, if you'd like to know more about them you can read it here.)

It's also an easy way to begin building up a bank of colour samples for when you need some inspiration for a project. 

What do you think? Is this something you do already? Have you got a different way of doing things?

Leave me a comment, I'd love to know your thoughts on this.

Until next time, happy crocheting,

Marta xx

PS. If you'd like to receive tips like this straight to your inbox, sign up to my mailing list here.

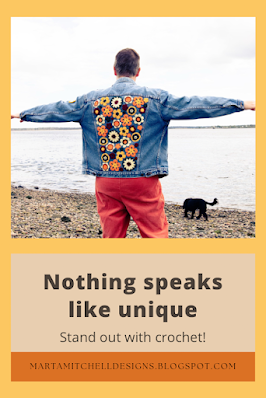
Nothing speaks like unique


Hello! One thing I love about crocheting from a pattern, particularly if it's a wearable item, is that I know my finished piece is going to be unique.

Even if I've followed along using the suggested yarn there will be differences between mine and everyone elses out there! There is NO WAY I'll walk into a room and have that awkwardnesss of realising that someone is wearing the same thing as me.

I find this very satisfying. Especially when you consider all the variations within a pattern; sizing, sleeve options, colours (obviously!), little tweaks here and there.

We're all different and so is our way of interpreting a pattern and one thing that I never tire of as a designer is seeing your versions of my designs. I LOVE it!

A feature which I now include with my patterns is a 'Take it Further' section. It's where I encourage you to take my design as a starting point and truly make it your own. I include 3 or 4 ideas to get you thinking, but there are countless ways you can do this!

This week, over on Instagram, lots of you have been tagging me with your makes (it was actually quite hard to choose one for my Gallery section below!).

So, I'd like to encourage you to choose handmade! Whether it's a crocheted hat, a knitted shawl, a home sewn dress. BE BOLD! Make it your own and no one else will be looking the same as you!

If you're looking for inspiration for your winter layers, check out the patterns on my website. I've created a Winter Collection featuring all my hats, mitts and scarves - check it out!

That's all for this week, have a yarn filled weekend,

Marta xx

Monday 10 October 2022

Ready to learn a new crochet skill?


This blog post contains affiliate links. I receive a percentage of the sales, at no extra cost to you.

Hello! How was your weekend? I had a fantastic catch up with both my sisters - the first time we've been out together in a long time! We went to a local indian restaurant with the yummiest of curries (Chillie's in Carnoustie if you're a local!) and chatted away all evening, setting the world to rights.

I found time for lots of crochet and knitting over the weekend too, YAY! I'm rotating between 3 favourite WiPs at the moment; my Tunisian Sampler Cowl, my knitted Sea Glass Sweater and my latest crochet pattern which I need to keep under wraps for now but I'll be able to spill the beans soon!


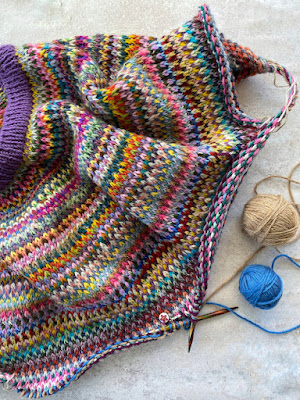
The top photo is a close up of the Tunisian Sampler Cowl, the one above is the Sea Glass Sweater (you can see it now has arm holes, lots of progress on this one!)

Before I began the 'Tunisian Crochet - Basics & Beyond' course, I had convinced myself that I couldn't do Tunisian Crochet (crazy, huh?). 

I had tried a few times over the years but it had never quite come out right. Attending an in-person workshop at some point was a goal of mine, so when this online course by The Crochet Project popped up it was the next best thing!

Joanne's video are perfectly paced for an absolute beginner (even for someone who can't crochet). The course is broken into 8 weekly sections, with just the right amount of crocheting to delve into each time.

You can see the different bands in my cowl - each one a different section of the course. At the end of the course the two short ends of the rectangle will be joined to make a cowl.

I'm enjoying this new technique so much and can't wait for the new content each Friday morning. I've also dug out some Tunisian crochet books I had gathering dust which has inspired me to have a go at writing my first Tunisian crochet pattern!

So, if you'd like to try out this new skill, I urge you to check out this course! www.thecrochetproject.com/courses/tunisian

Until next Friday (9am, BST) when my new look newsletter drops, happy crocheting,

Marta xx


Friday 7 October 2022

My story: How I became a crochet designer


I don't think I've shared the story of how I became a crochet designer with you before, have I? It all started back in 2014 when a small online yarn shop called Lemonade Yarns ran a crochet design competition. I saw the call for submissions and, even though I'd never written a single pattern in my life, thought "I could enter that!"

I only went on to WIN the competition! I was over the moon! Partly because I was super surprised at winning, partly because one of the prizes was a signed copy of Erika Knight's new book 'Crochet Workshop' which came with a personal message from Erika herself! SQUEAL!

This was the kickstarter to my crochet design journey! From then on I slowly gained confidence - initially adding free patterns to Ravelry then paid for ones as I saw that people were enjoying them. Later I started selling on LoveCrafts to increase my visibilty in the online space. With each pattern I wrote I listened to feedback and improved. Today all my patterns come with at least one video, many have around 30 minutes of video tutorial included!

Earlier this year I created my own website which was a HUGE step forward for me! It means I've been able to branch out from selling crochet patterns to selling crochet kits and crochet courses - something you just can't do on Ravelry or LoveCrafts. 

I love being a crochet designer because crocheting a sequence of stitches and making yarn come alive in the way I imagined brings me so much JOY! Then later, once the pattern is released into the world, I get to see how others recreate my design and that gives me such a buzz too - particularly when the crocheter surprises themselves by creating something that was a challenge for them.

I also really enjoy the variety of my business day. As well as being my own boss, I'm also the secretary, photographer, accountant, supply manager, social media person, graphic designer, PR assistant, SEO specialist, coffee maker and biscuit supplier, so my work is very varied! Each day is different from the next!

Have you ever dreamt of becoming a crochet designer? Do you have a pattern scribbled down that's bursting to come to life and be shared with the world? If so, check out my How To Write Up a Crochet Pattern Course. It has all the info you need (in the form of video and written tutorials) to get your first pattern written up. 

Throughout October I'm offering you 15% off this course with the code DESIGN

That's all for this post, I hope you enjoyed my story! If you'd like more of the same, plus crochet tips & advice, my latest releases, BIGGER discount codes, sign up to my newsletter here.

Until next time, happy crocheting,

Marta xx

Monday 3 October 2022

Crochet pattern of the month for October


Hello! It's the start of a new month and the start of a new offer for you! I've chosen Banjo Socks to be my crochet pattern of the month this time because they're so good for keeping your toes warm around the house.

These socks are intended to be worn as slippers with a fold down cuff which helps give shape and keeps your ankles warm. They could just be that extra layer that keeps you cosy without having to turn the heating on!


Here's the nitty gritty on the pattern details ...
  • It's available in UK and US terms. 
  • Instructions for 4 sizes, ranging from UK size 2 to 12 with plenty of scope for adjustments.
  • It's a toe-up pattern, crocheted in the round.
  • You can find the pattern on my website, Ravelry and LoveCrafts.
  • Intermediate skill level required.
  • It's been tested and tech edited, giving you peace of mind and an easy to follow pattern.
  • Half hour YouTube tutorial to accomapany the pattern.
  • Designed in Fiddlesticks Grange Ten - aran weight yarn/ 10ply (40% wool/ 40% acrylic/ 20% alpaca)
  • 2x 100g balls is sufficient for the smallest size, 3x 100g balls needed for the larger sizes.
  • 5.5mm crochet hook required

If there's anything I haven't covered here please reply to this email, I'm happy to answer your questions.

Throughout the month, you can use the code OCT22 for 10% off this crochet sock pattern on my website. Remember, you now have the option to add all patterns from my website to your Ravelry library.

Until next time, happy crocheting,

Marta xx


Working with Dark Yarn: 6 Tips to Avoid Mistakes

Hello! As the daylight hours shorten here in the northern hemisphere, many of us find that dark yarn can be a challenge to work with! The st...