Monday 30 October 2023

Wise Words From My Nana


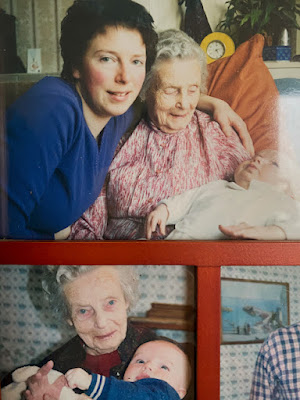
Hello! When I was a girl I would spend a week every summer holidays staying with my Nana who lived 2 and a bit hours away by car, down in in the Scottish Borders. For me this was a magical time because it was just the two of us and my Nana really encouraged me to be creative.

One of my favourite things to do was to spend the whole week making teenie tiny things for my dolls and doll houses. Everything was thrifted! I reused the tiny Kellog's cereal boxes to make wardrobes. I glued together bits of tinfoil from sweetie wrappers to make ornaments. I used scraps of material from my Nana's stash to sew clothing and bedding - sewing on her vintage, hand-turned Singer sewing machine of course!

These were such happy days. My Nana was always so full of encouragement and kept coming up with creative ways to reuse things which would otherwise be thrown away. She had a cupboard called her Glory Hole which she used to store all these treasures, because she said "you never knew when this might come in useful".

Today, I definitely have my Nana's wise words in my head when I snip off ends of yarn and store them up for stuffing or when I stash away little oddments of wool for making a scrappy blanket. It's all just too good to throw away!

Crocheting and knitting scrappy blankets has become something I LOVE to do and I'm sure my Nana had a big influence on this way of working. I've even written 3 patterns for crocheted scrappy blankets and all 3 are available on this blog, for FREE!


In this blog post I'm going to highlight my Scrappy Blanket II, but if you pop "scrappy blanket" into the search bar above you'll find all 3 free patterns.

I crocheted my sample in 4ply/ sock weight yarn but if 4ply yarn isn't your thing, fear not! I've done the maths to enable you to create this blanket in 4ply, DK, aran and chunky! Not only that, I also took the time to calculate the number of stitches & rows for 5 different sizes of blanket, from pram to single bed size!
 
Take a look at this stunning blanket via the link below, start saving up your scraps if you haven't already, and get crocheting!

Until next time, happy crocheting,
Marta xx
 

Friday 20 October 2023

Help Me Choose My Next Design!


Hello! That's right, I need your help to decide which way forward I should go with this design! On day one I started crocheting and it was going to be a new sock design - I was super pleased with the way the stitches looked in this yarn. All was well and going to plan!

Then on day 2, I was on a live Instagram chat with Claudia (@sunbirdcrochet across social media) and when I went to share my progress with Claudia I popped the sock on my hand to show it off better. Suddenly I thought "oh, this could be a mitt design!"

So, you see my dilema? I'm not going to produce both designs, for me it's a one or the other situation - but which one? I put a poll on my Instagram stories asking my followers there to decide and the result was a 50/50 split, aaarrgghhhh! I'm hoping you can give me a clearer answer because right now my head is a muddle and I can't choose!

If you're wondering, I'm using one of Zauberball Crazy colourways from Schoppel (no. 1153 to be specific!). It's 75% virgin wool, 25% nylon 420m/ 100g ball.

Click this link to my super quick Google form and cast YOUR vote. Thank you in advance for your help!


Marta xx

Monday 16 October 2023

6 Tips For Better Crochet Photography

Image in the centre shows a piece of crocheted fabric down the right with a sunflower on the left.


Hello! I'm here today to share my 6 top tips for better crochet photography because in the last week or so I've put in more of an effort to take better photos and it's paid off because I've seen an increase in reach and engagement on social media, yay!

As you know, crochet is such a beautiful craft, and it's only natural that we should want to share our finished projects with the world! But taking good crochet photos can be troublesome, especially if you're new to it.

Here are my 6 tips to help you take better crochet photos:

1.  Use natural light. Natural light is ALWAYS the best light for photography, so try to take your photos outdoors or as near as you can to a window (if that means rearranging the furniture, do it!). However, avoid using direct sunlight, as this can create harsh shadows. Instead, opt for soft, indirect light. I have thin blinds in my photo spot which I can pull down to diffuse the light. A piece of muslin taped to the window would work well!

2.  Choose your background wisely. The background of your photo is just as important as the crochet project itself. Choose a background that is neutral and uncluttered, so that your crochet project stands out. Try using a plain white or light-coloured wall, or a piece of fabric. If you're outside, brickwork, folliage, on the beach, large doorways are all good options.

3.  Stage your photo carefully. Once you have chosen your background, take some time to stage your photo,  arranging your crochet project in a way that is visually appealing. You may want to use props to help showcase your project, such as a basket of yarn, crochet hook, cup of coffee, seasonal objects that resonate with your viewers.

4.  Use the right camera settings.  If you're using an up-to-date smartphone camera, you can adjust the exposure and brightness settings (Google or YouTube are your your friends here if you need to learn). If you're using a DSLR camera, take some time to learn about the different manual settings. You'll need to adjust the aperture, shutter speed, and ISO in order to get the best possible photo (again, you know where to go for help!)

5.  Take multiple photos. Don't be afraid to take multiple photos - this will give you more to choose from when you're editing your photos. Try different angles - you may be surprised at how different angles can change the look of your photo.

6.  Edit your photos. Once you've taken your photos, it's always worth editing them to make them look their absolute best. There are many different photo editing programs available, both free and paid. You can use these programs to adjust the brightness, contrast, and colours of your photos. You can also use them to crop and straighten your photos, and to remove any unwanted objects. My favourite editing app is called Snapseed - it's FREE!

Here are a few bonus tips to keep in mind:

  • Use a tripod to keep your camera steady. This is especially important if you're using a DSLR camera or if you're shooting in low light.
  • Be sure to focus on your crochet project, not your props. Make sure that your project is in sharp focus, the star of the show, and that the background is slightly blurred.
  • Have fun! Taking crochet photos should be enjoyable. And never be afraid to experiment and try new things.

With a little patience & practice, you'll be taking beautiful crochet photos in no time! Of course, if you're taking a photo of a crochet project made following one of my patterns, don't forget to tag me when you share it so I can see! 


Until next time, happy crocheting and happy snapping!

Marta xx

PS. Are you subscribed to my mailing list? My emails are packed with info and a few free patterns too! You can sign up here.

PPS. I have another blog post all about flatlay photography - if you'd like to dive deeper into that, click here.

 

Thursday 12 October 2023

Cosy Socktober: Super Snug Crochet Socks!


Hello! We're well into October and for many crocheters and knitters this means SOCKTOBER - the month we get creative making super snug socks and sharing pretty photos of our socks on social media! Apologies, I thought I had published this post, turns out it was sitting in drafts! Doh!

To celebrate this special month I'm offering you 10% off my Fiddle Socks crochet pattern (pictured above). If you've been put off the idea of crocheting socks because most patterns use 4ply/ fingering weight yarn, this is the pattern for you because it calls for 8ply/ DK weight yarn! It also means they work up QUICKLY so you're more likely to get them finished in a month!

This design packs a traditionally shaped heel with a flap, turn & gusset to make sure they FIT and STRETCH perfectly over your instep. The half treble V-stitch (UK terms) gives a super snug and comfy texture on the leg and upper foot.

Not crocheted socks before? No problem, this pattern comes with SEVEN (yes, seven!) video tutorials to guide you through the process. So, if you're looking for a crochet sock pattern to take part in Socktober, this is the one for you!

Use the code SOCKS at the checkout on my website or on Ravelry to claim your 10% discount!

Happy crocheting,

Marta xx


Wednesday 11 October 2023

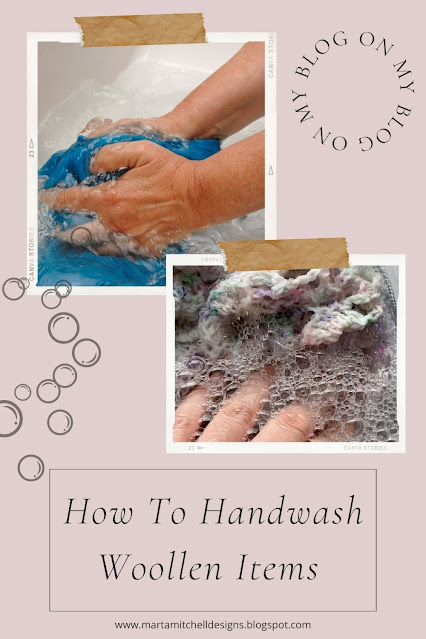
How To Handwash Woollen Items

Text 1:How To Handwash Woollen Items, text 2: on the blog. Images show woollen items in the soaking process of washing. There are bubble grapics around the edge.

How To Handwash Woollen Items

Hello! Last Friday I shared a tip with my newsletter subsribers about how to handwash woollen items to ensure they last for many, many years to come. I had a few replies to my email asking for more info about exactly how I wash mine, so I thought I would expand on my quick tip further and write it up as a blog post.

Wool is a natural fibre which can react badly when handled wrongly, and we want to avoid using harsh detergents or high heat when washing it. Here are more thorough instructions on hand washing because it's the gentlest way to wash handmade woollen clothing.

To hand wash your woollen items, follow these steps:

  1. Fill a basin with lukewarm water (approximately 30°C, not much hotter!)
  2. Add a small amount of no-rinse wool detergent.
  3. Stir the water to mix the detergent through. 
  4. Turn your woollen items inside out if you can.
  5. Place your items in the basin.
  6. Soak them for 10-15 minutes.
  7. Gently squeeze the items to remove excess water. Do not wring!
  8. Use a large towel and wrap your items in it, squeezing out even more liquid.
If you're wondering which no-rinse wool detergent I use, it's Soak and my favourite scent is Celebration.

Drying your woollen items

It's best not to machine dry woollen clothing. To dry your woollen items, lay them flat on a dry towel or drying rack in a warm (but not hot!), well-ventilated area. If you have blockers, go ahead and use them. You can dry outside but avoid placing your items in direct sunlight because this can cause unexpected colour changes.

By following my tips, you can help to keep your handmade woollen clothing looking and feeling its best for many years to come.

I hope this post was useful for you. If you liked it, please subscribe to my mailing list to receive posts like these straight to your inbox.

Until next time, happy crocheting,

Marta xx

Thursday 5 October 2023

Free Crochet Beanie Pattern!

Image shows a young woman adjusting a crocheted beanie hat

Free Crochet Beanie Pattern!

Hello! I'm super excited to announce the release of my new free crochet beanie pattern, the Perth Beanie! I designed this crocheted beanie with a few things in mind: Firstly, I wanted to create a hat which was both stylish and functional - I love the way it fits snugly around the head and ears, keeping you cosy on even the coldest days. Secondly, I wanted to create a beanie which showed off the gorgeous Scottish provenance wool from The Scottish Yarn Festival at its best - I think I pulled this one off, I'm so happy with the texture I created!

You'll find the the medium size FREE crochet beanie pattern below, or you can upgrade via my website or Ravelry to all 4 sizes PLUS a 10 minute bonus video guiding you through the textured section. 

The four sizes available with the full pattern are Child, Teen, Medium (adult) and Large (adult), with plenty of scope within the ranges to get the fit you really want. As with all my more recent patterns there's a section at the end with suggestions for how you can take my design and add your own twist to really personalise it and create something special (paid-for version only). Check out this blog post of mine for loads more inspiration on personalisation.

Whether you're a seasoned crocheter or you're much newer to the craft, I'm confident that you'll love crocheting the Perth Beanie. It's a fun and rewarding project which will produce a stylish, practical beanie that you'll cherish for years to come.

Monday 2 October 2023

How To Cheat At Swatching!

Text reads How To Cheat At Swatching, image is of an L shaped piece of crochet in mint coloured yarn with a crochet hook and ball of yarn to the right of it.


Hello! This is one of the best crochet hacks I've ever shared on Instagram, it received a tonne of engagement - How To Cheat At Swatching - and I thought I'd share it with you here in case you missed it (you know how fickle the algorithm can be!).

The hack is simply to crochet an L shape instead of a square, which cuts down on about 30% of the crochet time!

To do this; start as usual & crochet 3 to 5 rows, then start the next row but turn after about 5 stitches, leaving the remaining stitches unworked, crochet into these 5 stitches only until your height is about the same as your width.

A few things to note! 

  • You will need to work less rows for thicker yarn/ more for thinner yarn before beginning the leg of the L.
  • Again, thicker yarn may only need 4 stitches and thinner yarn more like 7 - use your judgment here.
  • This hack is not suitable if you need to get a good idea of drape, simply because there's less fabric to play with.

To watch my reel on Instagram, click here.

If you'd like to dive deeper into the topic of gauge swatches you can read my popular post; 6 Top tips For Better Swatches here.

Learn the rules then break them like a pro! 

Until next time, happy crocheting,

Marta xx

PS. If you'd like even more crochet hacks from me, sign up to my mailing list and I'll send you a pdf with 25 Top Tips Every Crocheter Needs To Know

Your Guide to Joining Crochet Like a Pro

  Seamingly Seamless: Mastering the Art of Joining Hello! If you've been crocheting for a while, you'll probably have come across a...