Friday, 14 February 2025

Discover Your Inner Designer: How to Crochet the Perfect Cowl, Part 2

Image shows close up of a crocheted cowl with a mobius twist.

Hello, I'm returning, as promised,  with the second installment of my two part series on designing your own crocheted cowl. I hope you found the first part useful and have perhaps even begun to think about your first möbius cowl crochet design. However, if you missed that blog post, not to worry, you can find it here.

Crocheting Your Own Möbius Cowl Design: Step-by-Step Guide

Once you're happy with your cowl design idea, gather your materials and follow these steps:

  1. Work out how many pattern repeats, if any, you're going to need (for a super simple one stitch cowl, there won’t be a pattern repeat): I suggest the circumference of your möbius tube should be around 40cm, but this will depend on the length of your pattern repeats, it may be a little less or  a little more. So, for a 5cm pattern repeat you will need 8 repeats to achieve a round of 40cm (thus creating a tube which is 20cm across).

  2. Create a Foundation Chain: Begin with the appropriate number of chains based on your calculations in step 1. Join to work in the round, making sure your chain isn’t twisted.

  3. Work Your Stitch Pattern: Follow your chosen stitch pattern to create the desired length of your cowl (I suggest around 80cm).

  4. Colour changes: If you’re using more than one colour, yarn can be carried up the inside of your cowl. If it’s a longer jump, cut the yarn and knot the two ends together after joining - with this design method all ends will be hidden inside the tube.

  5. Join the Ends: To achieve the möbius twist, with RS turned out, line up both ends of the tube & add a half twist to one end to offset the line up, pin in place. Thread the long tail on a needle & sew the ends together with mattress stitch. Sew in these 2 final ends.


Tips for Success: 

  • Write notes as you go: Keep a notepad or use your phone to keep track of everything you do. It will make it so much easier to come back to, especially if you decide to make a second one or write up the pattern!

  • Practice Makes Perfect: I know it's a cliché, but practice really does make perfect, so don't be discouraged if your first attempt isn't quite how you imagined it would be. Simply enjoy the learning process and go along with your own journey of creating. As with all things. It does get easier (promise!).

  • Ignore Imposter Syndrome: This kind of follows on from my tip above; try not to compare yourself too much with established crochet designers. They will have been doing this for much longer than you, they'll have more experience and will have made all sorts of mistakes along the way.

  • Show Off Your Creation: Share your masterpiece with the world! Post photos on social media of your process and your finished cowl to inspire others.


Close up of a crocheted Mobius cowl, before sewing up commences.

Next steps:

Did you know I’ve written a course to help you write up your first crochet pattern? If you’re ready to take your scribbled notes to the next level and publish your crochet pattern, check out my How To Write Up A Crochet Pattern Course which will guide you through all the steps in the writing up process. I really encourage you to give this a go and, as always, I'm on hand to answer any questions you have.

Final Words of Encouragement from Me:

Designing and crocheting your own cowl is a very fulfilling experience that allows you to express your creativity at the same time as crocheting a functional accessory you'll cherish for years to come. So, why not discover your inner designer (I bet you’ll surprise yourself!), go gather what you need and embark on this exciting crafting adventure!

Until next time, happy crocheting,

Marta xx


Friday, 7 February 2025

Discover Your Inner Designer: How to Crochet the Perfect Cowl, Part 1

Image shows a blue and green crocheted cowl against a grey background

Hello! As you probably know, crocheted cowls are a much loved accessory, offering the perfect blend of warmth and style. However, if you’ve been crocheting for a while now, have you thought about designing your own cowl? This can be an immensely rewarding experience because your cowl will be unique. No one else will have one quite like it!. I’ve just finished designing and crocheting my River Never Sleeps Cowl (pictured above), so in this 2 part blog post series, I'm going to guide you through the essential steps of designing a crocheted cowl which perfectly reflects your personal taste and style.

I’m going to lay out the steps for designing a möbius cowl which is a cowl that’s worked in the round as a long tube and sewn together upon completion. The twist in a möbius cowl creates a continuous loop with a subtle but nonetheless intriguing visual effect. The way the fabric drapes and moves is different from a standard circular cowl (worked up and down the way), adding a touch of unique style with the twist highlighting stitch patterns in interesting ways. One huge advantage of the möbius cowl is that all the ends are hidden in the inside, which is especially good news if you choose to work with multiple colour changes!

First Up, Inspiration: 

Before jumping into the technical side of things, take a moment to gather your inspiration: browse through crochet pattern books, magazines and online platforms like Pinterest and Ravelry to explore different cowl styles, stitch patterns, and yarn choices. You may wish to sketch out some ideas, but this is not essential - it depends on your way of working.

Stitch Patterns:

Next I want you to choose the stitch pattern for your cowl. For this construction method, you’ll be working in the round, so choose a stitch pattern which works well in the round - the right side will be showing all the time. Most stitch patterns can be adapted to work in the round, but there are some exceptions. Perhaps you crocheted a hat or a sweater recently and you liked the stitch pattern you used? Well, if it was crocheted straight (without any increases) this will work well for a cowl. You are looking for anything from a 1 round repeat to a four round repeat (let’s keep it simple for your first one, ok). Another place to find stitch inspiration is in a stitch dictionary, although these are usually written for rows of stitches so you’ll have to do a bit of figuring out to switch to rounds, but it’s certainly doable. Searches on Pinterest, Google etc will also bring up stitch patterns and combinations.

  • Simple Stitches: Explore basic stitches like double crochet, half trebles or trebles for a clean and classic look.

  • Textured Stitches: Stitches such as bobble stitches, popcorns, or shell stitches will all add depth and visual interest.

An outstretched hand holds a crocheted cowl on red, yellow and green against a background of gorse bushes
Gorse Cowl - another of my möbius cowl designs

Yarn Choice:

The yarn you use will have a huge impact on the look of your finished cowl. At this stage you may wish to crochet up a practice version in stash yarn, in which case as long as it’s roughly similar to your final vision, yarn choice isn’t so important. However, if you’re going for it with this version, then here are a few things to consider.

  • Fibre Content: Consider the warmth, drape and texture you want to create. There are lots of different wools to choose from as well as cotton, linen, acrylic and blends.

  • Weight: Choose a yarn weight that complements your chosen stitch pattern and desired drape. As a general rule of thumb, the finer the yarn the softer the drape and the warmer the finished cowl (because more body heat is trapped in the fibres). However, I have crocheted up a few cowls in chunky yarn and they look fab!

  • Colour: Select a colour or colours which resonate with you and complement your wardrobe. This is a chance to show the world your personality!

Size:

For this exercise, the finished depth of your cowl will be around 20cm and the finished width of your cowl (after joining with a twist) will be around 36cm. The 20cm measurement will be worked in the round as a tube, so it will actually be a round of 40cm. The 36cm width before sewing up will be a long tube of around 80cm in length.


Swatching:

Create a swatch, in the round, to ensure your stitches match the vision you have in your head. It doesn’t need to be as wide as your intended cowl width, just enough to try out the pattern and check how it looks and drapes. You may need to play around with stitches or hook sizes to achieve the look you have in mind. 

Note down the following details for later:

  • The length of your pattern repeat in centimetres.

  • The height of your pattern repeat in centimetres (although you can simply crochet until you reach the desired length, this measurement is less important)

  • How often you envision any colour changes.

This is the end of Part 1 of this two part series on designing your own cowl. I'll publish Part 2 next Friday here on the blog or you could sign up to my mailing list to have it delivered straight to your inbox.

If you decide to have a go at this project, be sure to tag me in your photos on social media, I'd love to see! Any questions? Leave me a comment and I'll get back to you.

Until next time, happy crocheting,

Marta xx

Wednesday, 5 February 2025

Show Notes for Crochet Podcast Episode 61


Hello! Marta here! I know, I know it’s been AGES, but I’m back podcasting with a bumper bundle of crochet and knitting projects to share with you. You can find the episode on YouTube here: https://youtu.be/7hHOxEj099w


The knitted jumper I’m wearing is my recently finished Little Bousta Yoke by Gudrun Johnston. I knitted it in Shetland jumper weight wool from various sources, some from old cones, some Jamieson's which I purchased in The Woolly Brew, Pittenweem. Find the pattern on Ravelry here:  https://www.ravelry.com/patterns/library/little-bousta-yoke


The teether thingy which is fresh off the hook will become my next pattern release. It was crocheted in Stylecraft Cotton + Bamboo (I knew I’d find the name once I started searching!). I thoroughly recommend this yarn for baby items and amigurumi projects, it feels beautiful.


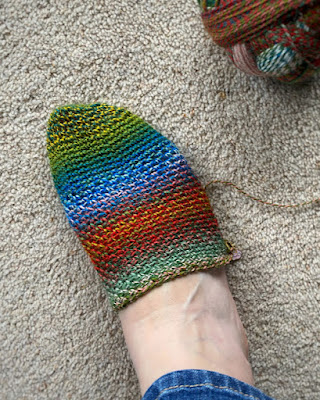
The crocheted socks I’ve (almost) finished were made following my own pattern, Lazy Days Socks. I used a subtly variegated yarn from West Green Loft Yarns. You can find my sock pattern here:  https://martamitchelldesigns.com/products/lazy-days-socks


And the knitted socks I’ve just finished were made following Stephen West’s Pierre Socks pattern, which I’d thoroughly recommend! The yarn for these was Lang Yarns SOXX which I know my sister purchased at The Woolly Brew, Pittenweem. Ravelry link for the Pierre Sock pattern:  https://www.ravelry.com/patterns/library/pierre-socks


The cowl which I forgot to show off properly will be my March pattern launch, coinciding with The Scottish Wool Producers Showcase on the 22nd March. Find out more about the yarn and this fabulous event on the website:  https://thescottishyarnfestival.com/


The Christmas Eve Box was from Rachael at Sew Ray Me: https://www.etsy.com/uk/shop/SewRayMeUK


Future plans! Next up I plan to cast on the Tresoro sweater by Isabell Kraemer and I have gorgeous non-superwash merino from Crafternoon Treats set aside for this project. I hope to return to more regular podcasting too - I’ll aim for once a month initially, see how I get on from there.


If I've missed anything or you'd like more info, please do give me a shout! 


Until the next time, happy crocheting,


Marta xx


PS. If you’d like to be kept up to date with the release of my next video, sign up to my newsletter to stay in the loop! There’s so much crochet goodness coming your way when you do!  https://martamitchelldesigns.com/pages/about-me


Friday, 31 January 2025

Crochet Terminology Cheat Sheet

Cheat sheet with the differences between UK terms and US terms laid out.

Hello! I've created another super useful printable for you; a UK/ US terminology cheat sheet. If you've been crocheting for a while, you'll be very used to the concept of UK vs US terms and the pitfalls to avoid when following a crochet pattern! However, if you're newer to crochet this might take a little bit of explaining!

You'd think, with something as universal as yarn and a hook, we'd all be speaking the same language? But oh no! Enter: the glorious and utterly baffling differences between UK and US crochet terminology. Personally, I suspect this was a deliberate ploy by some mischievous imp, designed specifically to drive crocheters the world over to the brink of sanity.

In UK terminology the number of loops on your hook gives the stitch its name, and in US terminology it's the number of yarn overs when pulling up your first loop.

Good crochet patterns should state clearly at the top which terminogy they use, but sadly there are many badly written patterns out there which have not been tech edited. 

Always check which set of terms your pattern is written in before starting. Some may be written in both (most of mine are), some may be written in UK terms with an abbreviations table for US terms (or vice versa). 

Pro tip: If you're unsure which set of terms you're dealing with, look for a htr (UK) or a hdc (US); these two are unique to each system. Finding one of these abbreviations will quickly tell you which set of terms your pattern is written in.

The cheat sheet above has been added to my website for just 99p where you can download it to keep on your phone or print it out for your project bag - whichever is best for you! 

Until next time, happy crocheting,

Marta xx

Friday, 24 January 2025

Inspiration in Unexpected Places: Tractor Tracks & Crochet

Hello! I wanted to share a little bit with you today about where I find inspiration for my crochet designs. You see, sometimes it's in the most unexpected places!


The other day, I was walking the dogs along the golf links and I noticed these incredible tractor tracks and green keepers' buggy marks in the sand. It was a super frosty morning and the tracks were dusted with ice crystals, highlighting their geometric formations. The way in which they intersected and overlapped was mesmerising and I started to see stitch patterns emerging, shapes taking form.
 
And that's how it often begins for me. A fleeting image, a texture, a colour combination – it all sparks the creative fire! I start to imagine how I can translate that feeling, that visual, into a piece of crochet. In this case there's a filet crochet project coming to mind from the photo above and perhaps something in colour work from the photo below.


I'm always curious to know if you find things like this inspiring too? Do you take photos or maybe even keep a sketchbook? Do you collect interesting, tactile objects? 
 
I'd love to hear your thoughts and also share more about my creative process in the future. Stay tuned to see if these tyre tracks do make it into a future project (hint: the best way to do that is to subscribe to my mailing list).

Until next time, happy crocheting,

Marta xx
 

Friday, 17 January 2025

Choosing Yarn For Crocheting Socks


Image shows a close up of someone wearing chunky crocheted socks

Hello! As you know, this week I released a new crochet sock pattern, Dunkeld Slipper Socks and I received a sweet review from Rosemary, who bought my pattern. She said
 
"Thanks for the lovely pattern. I will do a search here for similar yarn. They look so nice for the winter."
 
Now, Rosemary lives in South Africa and for her winter will be on it's way in a few months, so this got me thinking about the advice I would give anyone who was choosing yarn for crocheting (or knitting!) socks.
 
Crocheting socks requires yarn that can withstand the rigours of daily wear while providing exceptional warmth and comfort. The key to sock yarn durability, regardless of the fibre content, lies in the twist; a high twist creates a tightly wound yarn that resists stretching and pilling. This is crucial for socks because they endure constant friction and wear. In appearance, high-twist yarns tend to be smoother, less fuzzy, and have a more compact appearance because the tightly twisted strands lie closer together. I'm going to delve into the characteristics of various yarn types, including pure wools, blends and vegan fibres.


Close up of crocheted socks in orange and yellow wool

 
Merino
Merino wool is a popular choice for sock yarn, but it typically requires the addition of nylon to increase its durability. This is why you'll typically find sock yarns with a 75/25 Merino/ nylon blend. Merino wool by itself is quite strong, but the addition of the nylon significantly increases its durability, with the nylon providing extra strength and elasticity, helping the yarn resist stretching and pilling. Merino wool often undergoes a superwash treatment to make the yarn machine washable too. 


Blue Faced Leicester 
Blue Faced Leicester (BFL) is renowned for its exceptional warmth. This wool creates such a cosy, insulating layer around your feet and it’s also beautifully soft. While it might not have the legendary strength of Merino, BFL is still a strong fibre, especially when spun with a high twist.


Alpaca 
Alpaca is an excellent choice for those with wool allergies. Coming from alapacas rather than sheep, its structure lacks the lanolin that can cause allergic reactions in some people. Alpaca yarn is also incredibly strong and resilient, making it highly durable for everyday wear and it’s obviously luxurious and soft to wear on your feet. The current pair of socks on my knitting needles are Pierre Socks by Stephen West and I'm using Alpaca SOXX from Lang, it's gorgeous!


Shetland Wool 
Shetland wool is a more unusual choice for crocheting socks, yet its unique properties make it ideal for cold weather wear. The wool is sourced from the Shetland sheep breed, known for its dense, soft, and incredibly warm fleece. Its fine texture creates a beautifully dense and super warm fabric that provides possibly the best insulation of all the wool types. Over the cold spell we had a start of the year, I wore Shetland wool socks and my feet were super toasty! 


Vegan fibres
If you’re looking for something vegan friendly, in line with your own values or the recipient of your socks, there are vegan fibres out there which offer a cruelty-free alternative to wool. Your 3 main choices are cotton, bamboo, and acrylic. Cotton is naturally breathable and soft, but is certainly not as warm as wool. The stitches created in crochet (this doesn’t apply so much to knitting) on the sole of the foot can bunch up with wear and washing, creating a more pronounced, bumpy fabric which may become uncomfortable. Bamboo is known for its softness and moisture-wicking properties, making it a good choice for summer socks especially. Acrylic is a synthetic fibre that is affordable and comes in a wide variety of colours, but it can feel less soft and doesn’t have the breathability of cotton or bamboo. In my opinion, acrylic is best avoided for socks.


Blended fibres 
Sock wool is usually a blend of some of the fibres mentioned above, rather than one single fibre type. This enables a yarn to be created with the best possible properties for wear. Here are some of the many firbres introduced to sock yarn:

  • Nylon provides incredible durability and helps the socks retain their shape. 
  • Cashmere offers luxurious indulgence and warmth. Blends with cashmere feel beautiful to work with and to wear.
  • Alpaca(mentioned above in more detail) is often blended with other wool because it adds a unique softness and warmth. 
  • Bamboo provides moisture-wicking properties, keeping feet dry and comfortable. 
  • Corriedale brings a soft, springy quality and at the same time enhances the durability of the finished socks.
  • Linen is an ideal blend for summer socks because this fibre provides much needed coolness and breathability. Linen enhances air circulation within the fabric, helping to keep feet cool and dry
  • Yak adds incredible warmth and a unique, slightly hairy texture, creating luxurious and exceptionally cosy socks. It’s also really lovely to work with!
  • Zwartblesintroduces a toothy look, a bit of bounce and a touch of rustic charm to the finished socks. 

Conclusion
Sock yarn can be a blend of one or more of these options with fibres chosen for their specific properties, such as warmth, durability, softness, stitch definition and moisture-wicking, to create the perfect yarn for comfortable and long-lasting socks. My advice to you is to experiment, try different blends and find out which ones you like to work with and which ones produce the best socks. 
 
I'm in the process of curating all my crochet sock advice together into a pdf guide for you - this information on choosing yarn will be one of the many sections in the pdf. Sign up to my mailing list for more info from me on this new pdf guide in the next few weeks! 


Close up of stitch detail on crocheted socks


So, what type of yarn would I recommend for my Dunkeld Slipper Socks? Firstly, if you have some in stash or can get hold of some, I would advise that you choose the same yarn yarn which I designed the socks in - New Lanark Spinning Co, Aran weight (10ply), 100% pure new wool.

 
However, there are all sorts of reasons for not using this yarn (location, price, wanting a vegan fibre, allergies), therfore I have a few options for you here.
 
Yarnsub.com is an amazing website where you can search for any yarn and it will come up with the closest matches for you. I'd thorouhly recommend starting there and seeing what pops up.

I designed the socks in pure wool, choosing a pure wool of similar meterage would be another safe choice. Wool blended with Corriedale, Zwartbles or alpaca would all work very well too because they would enhance the texture of the socks and add to the warmth.

If you're looking for a vegan option, cotton or bamboo would both be good choices. Acrylic would also be suitable because this is a house sock rather than a sock to be worn inside shoes, therefore breathability isn't such a big issue.
 
I hope all this yarn info has been helpful for you - if you have any questions, leave me a comment or email me - martamitchelldesigns@gmail.com - and I'll do my very best to help. 

There's still time to take advantage of my early bird disount - DUNKELD10 - gives you 10% off until 23:59 on Sunday 19th January 2025.

Until next time, happy crocheting,

Marta xx


Tuesday, 14 January 2025

Crochet Pattern Release with Early Bird Offer!

Are you ready for a new crochet pattern release from me? I hope so, it's been a while!


Close up of someone wearing a thick pair of crocheted socks in orange and yellow yarn.


Inspired by the beauty of nature, my Dunkeld Slipper sock pattern is designed to be crocheted in pure wool for a truly luxurious and tactile experience. Read on for your early bird discount code!

Never crocheted socks before? Don't worry! I've included 6 easy-to-follow video tutorials to guide you every step of the way even if you're a complete beginner at socks.
 
Fun fact: this pattern was first published in The Journal of Scottish Yarns, issue 2 - Autumn/ Winter 2022. 


Crocheted sock on a wooden blocker on an off white, plain background. The socks have a bumpy texture and a folded down cuff.

Here's what you can expect from this crochet pattern:
 

  • 4 Sizes: Available in a range of sizes to fit most feet, with easy customization options for the perfect fit.
  • Yarn: 10ply/Aran weight, Pure New Wool (approx 160m/100g). I used New Lanark Spinning Co. for my samples.
  • Hook: 6mm crochet hook, or required hook to achieve tension.
  • Traditional Techniques: A classic heel turn and a folded-down cuff for a snug & comfortable fit.
  • Perfect for Cosy Days: These socks are ideal for relaxing after a crisp winter walk or simply enjoying a cosy evening at home.
  • Intermediate Level: Suitable for crocheters with some experience.
  • Ravelry Support: After purchase, you'll receive a link to easily add the pattern to your Ravelry library.
 
Special Launch Offer:
Enjoy 10% off the pattern price until 23:59 Sunday, January 18th with the code DUNKELD10


You can purchase your copy of my Dunkeld Slipper Socks pattern on my website or via my Ravelry store.

Until next time, I hope you enjoy crocheting these,

Marta xx

Discover Your Inner Designer: How to Crochet the Perfect Cowl, Part 2

Hello, I'm returning, as promised,  with the second installment of my two part series on designing your own crocheted cowl. I hope you f...