Tuesday, 30 September 2014

Hats, hats and more hats!

I have been making hats lately ... lots of hats! It started with the bags of lovely wool that my friend Carole very kindly passed on to me, she was having a major destash! As I was sorting through it my mind was racing with the possibilities of what I could make with it all! I had bought Kat Goldin's new book 'Hook, Stitch and Give' that weekend so my new yarn stash could not have arrived at a better time! Kat has a quirky blog with lots of information and free crochet patterns which is worth looking at if you like crochet  http://www.slugsontherefrigerator.com/ . I loved the slouch and bobble hat on the front cover of her book and decided to give it a go.            


my first Kat Goldin slouch and bobble hat

The first thing I had to learn was how to do foundation treble stitches. Up until then I had only used the traditional foundation chain to begin crocheting and I struggled a little with this new technique at first. The trebles are worked into the chain stitch of the previous treble, combining the foundation chain and the first row in one step. The book explained it clearly with diagrams in the opening chapter which was good. Once the foundation trebles were done I quickly progressed through the rounds and the hat was finished within a couple of hours! I immediately began the second hat ...


2nd hat, green with 2 different blues

This time I decided to add a third colour to the alternate rows giving it a slightly different look. The effect makes me think of tartan, which I love!


back of 2nd hat

After the green hat I had enough wool of the same type to make one more hat. This one was another three colour hat, with an edgy contrast in the colours which reminded me of sunny autumn days.


3rd hat, dark red with ochre and bright blue


From here I moved on to much chunkier wool! Rowan Big wool - perfect for making a hat in just over half an hour! I decided to take the foundation treble stitch I had learnt form Kat Goldin and apply it a hat design of my own. The advantage of the foundation treble is that the finished item has much more stretch than a foundation chain beginning, which can sometimes be tight and restrictive, This makes it perfect for hats, gloves, socks etc. 


my wave pattern beanie hat 

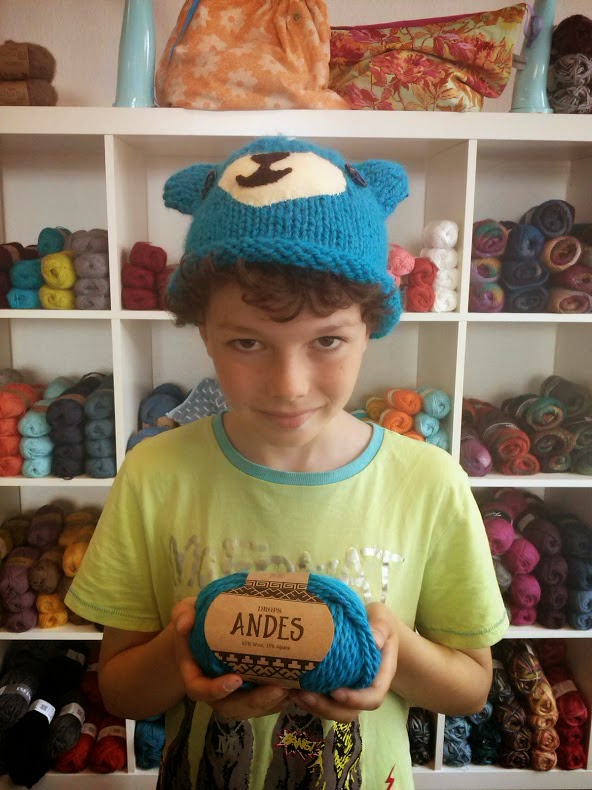
I was happy with the result because it made my hat more stretchy and gave the edge a wavy border. I also added a pompom which is not in the original design. Whilst I was busy making all these hats my husband was busy making me a hat! He is a loom knitterand has recently started his own blog http://loomknitterdude.blogspot.co.uk/ . During the summer I had chosen some pink Drops Andes for him to knit me a hat and I was excited that he was making something especially for me.


the hat my husband made me

Once he had finished I decided to add a pompom because all the hats I had made had pompoms and I was adding pompoms to everything! I made this one extra large and I am really happy with the overall look and can not wait for cooler days so that I can wear it. 

Tuesday, 9 September 2014

African Flowers Blanket

In my last blog post I shared a couple of photos of my finished african flowers blanket and I thought that this special blanket deserved a blog post of its own. 

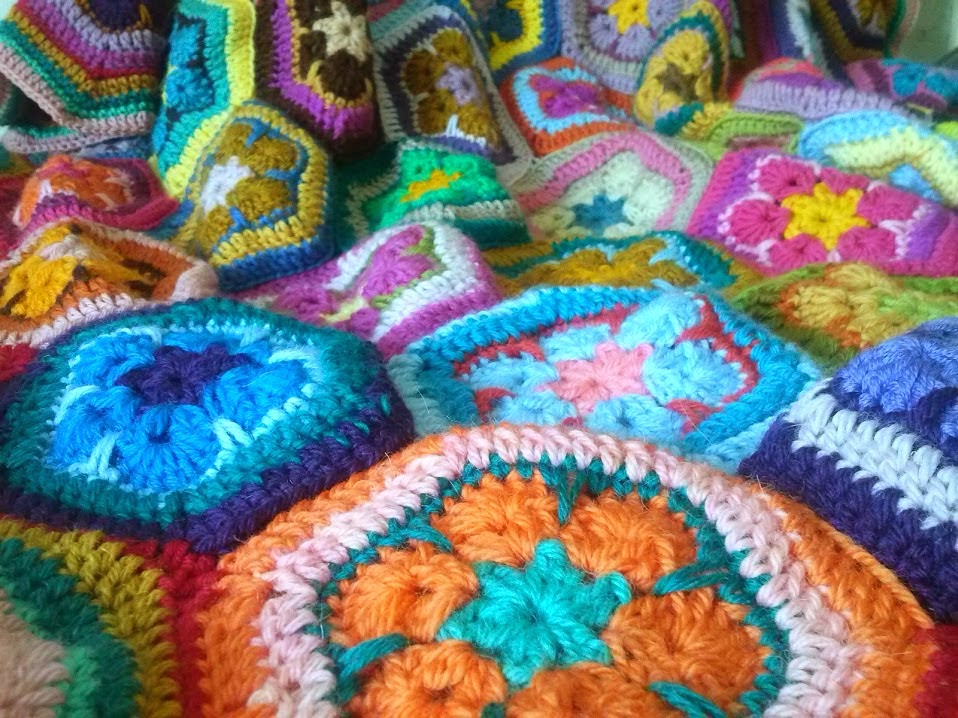
 close up of finished blanket, showing the border

I had always been captivated by crocheted african flower motifs I had seen on Instagram and decided to look up the pattern and give it a go. Many instagrammers were following Heidi Bears pattern, so this seemed like a good place to start! The following link takes you to Heidi's tutorial (please note it uses US crochet terms)  http://heidibearscreative.blogspot.co.uk/2010/05/african-flower-hexagon-crochet-tutorial.html


 making a start

I joined the hexagons together with slip stitch on the reverse (placing right sides together). This is the first blanket I have made using the join as you go method. Usually I make all the necessary squares and then lay them out the way I want them before labelling and joining together. This new method gave instant satisfaction because I could see the blanket grow!


I was instantly addicted to making these hexagons!

I loved looking into my stash of odds and ends and choosing colours for these hexagons.  As long as the 4 colours in each hexagon went together I was happy. When choosing where to place each hexagon I sometimes put complimentary colours together, sometimes clashing colours to give it a random look.

 my blanket grew very quickly!


 summery colours


Most of the wool came from charity shops or kind donations from friends. I also loved picking up a ball of wool or two if I was passing by a wool shop! 

 there was only just enough of this colour to go around


 another close up


the finished blanket

I am really happy with the finished blanket and it is definitely one that is staying in our house! I hope you have enjoyed reading more about my blanket's progress and looking at my photos. Have you made an african flowers blanket? Please share if you have!

Thursday, 4 September 2014

I'm back! (and sorry I've been away so long)

I seem to have taken a rather a long break over the summer - ooops! The school holidays were full of long sunny days, trips to the beach, picnics and of course lots of crafty days with the boys!

Rather than typing thousands of words about what I have been up to over the last few months I will use photographs to tell my story. If you would like to know more about anything you see please leave a comment and I will get back to you.


 the youngest and I learning how to use double pointed needles


 a giraffe I crocheted for the middle boy and an elephant for a friend's baby


 a new style of brooch which I have designed and started selling in my folksy shop


 the youngest drew this monster and I recreated it in crochet!


 middle boy wanted the same, of course!


 youngest showing off his finished hat in Fluph wool shop, Dundee


 anniversary day out with the hubby! He takes his loom knitting everywhere!!


 a friend commissioned me to make this sweet little mouse


middle boy designed and made a den for his crocodile and a water bowl


 eldest sprayed and painted his Nerf gun


 my latest yarn bomb in Dundee, Blackness Road area


 I finished the african flowers blanket which I had been working on for a long time


 detail of finished blanket


I have taken up quilting using the english paper piecing technique

Well, that's a snapshot of my summer! School has been back for a month now and I will get back into blogging and restocking my folksy shop https://folksy.com/shops/martasecocrafts


Friday, 23 May 2014

Duncan of Jordanstone College of Art and Design Degree Show 2014

I had an hour in Dundee this morning to take a speedy look around the Degree Show at Duncan of Jordanstone College of Art and Design. I graduated from this art college in 2000 after studying Fine Art, specialising in sculpture. As soon as I entered the building the distinctive art college smell of oil paint and turps took me right back to to my student days. I enjoyed walking the familiar corridors which have changed very little since then.

I decided to concentrate on Fine Art and Textile departments because I was so pushed for time. In the Fine Art department I was struck by the variety of techniques and media that the students had used. My visit began at 10am and there were no artists there to talk to and ask permission to take photos so I am unable to share any images with you on here. I settled for taking a photo from the 6th floor corridor, from the window my middle sister, Aimee Henderson (BA(Hons), 2011), looked out of when it was her studio!

The view from the 6th floor, looking across the River Tay

By the time I reached the Textiles department the students had woken up and I was pleased to chat to a few of them. I enjoyed the work of Jennifer Heilbronn because of her eye catching use of mega chunky yarn!

Jennifer's tunisian crochet

I liked Jennifer's use of colour, mainly blues and oranges, invoking images of the sea, sand and maritime life. Take a look at her website, the photography is stunning!  http://jenniferheilbronn.wix.com/knit

I am looking forward to next year's show, when I will definitely make sure there is time to see more work!


Thursday, 22 May 2014

Free Crochet Pattern - Zig Zag Scarf

I have designed this easy crochet project which works up really fast! It is a versatile pattern, the finished scarf is suitable for both men and women to wear and it can be made in any colour you choose! This pattern has been thoroughly tested and I am happy to share it with you for your personal use. Please respect my original design and do not reproduce this pattern or the scarf made from it for your own financial gain. Happy hooking!

finished scarf


Materials


2 x 100g balls Rowan big wool (approx 80m / 87 yds per 100g), in any colour
10 mm crochet hook
tapestry needle (to sew in the ends)


Tension


Because it is a scarf the tension is not too important, just keep your stitches loose. Approx 9 stitches and 3 rows per 10cm²
Finished size approx 140cm x 15cm


Abbreviations (UK terms)


ch chain
ch sp chain space
tr treble
cab st cable stitch (see notes)


Notes

The zig zags are created by working 1 cable stitch in the missed treble space; work 3 trebles, then yarn round hook, insert hook in the skipped treble space, pull through, yarn round hook, pull through first 2 loops, yarn round hook, pull through last 2 loops.


detail of scarf

Pattern

Edit: This pattern was only free for a short time. It is now available to buy for only £3.60 from my Ravelry store (http://www.ravelry.com/patterns/library/zig-zag-crocheted-scarf-pattern) or my Etsy shop (https://www.etsy.com/uk/listing/476227831/zig-zag-scarf-a-crochet-pattern-for?ref=shop_home_active_2)

Thursday, 8 May 2014

Adding little details

I have not done as much crocheting as usual this past week or so because I have become obsessed with adding embroidery detail to my clothing! It began with an ankle length denim skirt. This skirt has always been one of my favourites but every time I wore it I imagined stitching extra detail around the hem. I looked out my embroidery threads and chose a slightly muted palette to go with the denim and began embroidering. Once I started I realised just how much fabric was in the skirt around the hem and that I had a lot of stitching to do!

detail on my ankle length denim skirt

As soon as this skirt was finished I attacked another denim skirt! This one was knee length and I decided to keep it simple, I free hand embroidered some flowers to one panel. I stuck to a blue fairly close to the colour of the denim in the skirt because I liked the fact that this skirt went with almost any colour of top, making it very versatile, and I wanted to keep it that way.

knee length denim skirt with flowers


detail of skirt

Altering my clothes and adding details like this is something I have done since my late teens. There have been a few disasters along the way, for example the time I decided to embroider massive flowers on a pair of bright blue cords - I used satin stitch but the stitch length was about 5cm, leaving big gaping holes that never really filled and the trousers ended up in the bin (clothes recycling wasn't available then). A few weeks ago, inspired by The Great British Sewing Bee, I bought a lovely yellow three quarter sleeve top in a charity shop. The sleeves were elasticated and actually finished around the elbow which wasn't the most flattering of looks on me. I chopped them off higher up and attached some home made bias binding which I was much happier with. The original buttons were poorly sewn on so I took them off, made co-ordinating covered buttons to match the bias binding which finishes the T-shirt off.

my altered T-shirt

The garment which receives most comments from people is my lambswool sleeveless wrap top. I picked this up for a few pounds in a charity shop, initially to turn into felt because it was so plain and not really "me".However, I decided to add needle felted swirls all down the opening and around the hem. These added spirals of colour have changed the top completely and made it one of my favourites!

my favourite top

As you know I am a big fan of Instagram and I love to see other people's twists on similar projects. Someone I have recently started following is Sue (@sewist53) and I loved a photo she had posted of a denim jacket of hers which she had added bias binding and bright applique patches to. I asked Sue why she enjoyed altering her clothes and she replied:

"I do it because I love to give favourite clothes a new lease of life and also I love the fact that it becomes unique to the wearer - you put some of your personality into it!! And it's fun, of course!!!" 

Another person who inspires me on Instagram is Polly (@jakandgeegee). I love a blog post of hers about how she had changed a pair of jeans into a skirt ( http://www.jakandgeegee.co.uk/?m=201402 ). I asked Polly why she enjoys this kind of thing, here's what her thoughts were;

"I love to upcycle my old clothes as I hate to see things go to waste, plus it's fun to make something really show off your personality. It's good to be different and personalising your clothes is an easy way to do it!"

I agree with them both; it's fun, it adds personality and it makes your clothes unique. Have you added detail or altered your clothing? I would love it if you could share your experiences, send me a comment or tag me (@mrsdaftspaniel) on Instagram.


Wednesday, 23 April 2014

My latest project

I have been very busy over the last few days because I have started a new project. It's another big one which will keep me busy over the next few months. I have always admired the crocheted african flower motif  with it's striking flower centre, surrounded by rounds of trebles finishing in a pentagonal or hexagonal shape. A few months ago I made a one off coaster in the design and knew that it was a motif I would want to go back to.

On Saturday morning I made my first hexagonal african flower motif and so began the start of my latest project! By the end of the weekend I had crocheted 7 motifs and using the join-as-you-go method joined them together to form a larger hexagon.


the first 7 motifs

I have continued making more motifs over the last few days and I am pleased with how it is coming together. Because each hexagon is joined onto the rest immediately after completion and the ends are being woven in at the time I have begun to use the blanket over my knees already. This way I can look at the colours and make decisions about which colours to use next as I am going along.

the first 13 motifs

I am not buying any new yarn for this project, instead I am using up my stash of pure wool. I keep it in a roomy canvas bag so I can see them tumble together, forming exciting new colour possibilities.

the first 17 motifs

I will write another blog post on this before the project is completed and in the meantime I will continue to post photos on my Instagram page - come and find me @mrsdaftspaniel 

Need a quick last minute crochet gift idea?

Hello!  Are you in need of a quick, last minute crochet gift idea?  Don't stress, I have you covered! Here are 3 of my favourite quick m...