Friday 19 May 2017

Yarn Review: Cascade 220 Solids and Heathers

It's been a while since I dedicated a whole blog post to a yarn review so today thought I would share my thoughts on Cascade 220 Solids and Heathers. I have been crocheting a cowl this week using Cascade 220 Heathers and I am loving the feel of this wool!


Cascade Yarns is a family run business based in Seattle, Canada. Established in the 1980s, the company is passionate about producing high quality yarn at affordable prices. I received 2 hanks of Cascade 220 Heathers as part of an Instagram swap package with the theme of #imnotgoingtoeyfswap - for all those who felt they were missing out on the Edinburgh Yarn Festival (EYF) this year. I was partnered with Emma -  @eldenwood_craft - and was delighted to unwrap a completely new yarn that I hadn't come across before! At the time I had way too many WIPs on the go, so I popped the hanks on my wool shelf where I could clearly see them and have a think about what to make. 


Earlier this week I began crocheting a new cowl, following my own design idea, that required two colours and since Emma had sent me Fog Hatt and Mystic Purple I decided to go with these colours. My first task was to wind the hanks into balls and since I don't own a wool winder I set to it using the backs of two chairs. The 100% Peruvian wool felt lovely as it passed through my fingers and wound really easily without any knots or tangles and I knew then it was going to be a delight to work with!


My design idea transferred from my head to the hook exactly as I hoped it would (hooray!). The stitch definition of the Cascade 220 Heathers is perfect for this stitch pattern and would work equally well in any combination of Solids or Heathers - there is an absolutely stunning range of colours to choose from - have a look here


I have been using a 4.5mm crochet hook for this project, but my tension is extremely relaxed so I have written the pattern suggesting a 6mm hook to give the cowl some drape and flow. The yarn thickness is aran or 10ply which make it work up quickly. The 220 in the name refers to the length of the hank, 220 yards (200m). The Cascade Yarns website has many free, downloadable patterns specifically for this yarn and I am sure it would substitute in most cases where an aran thickness pure wool is required. 


So, I would thoroughly recommend giving this lovely wool a go, whether you knit, crochet, weave or use yarn in other ways. Have you used this yarn before? Or any of the others in the range? If you have, leave me a comment, I would love to read your views too.

Happy hooking,

Marta xx


Thursday 11 May 2017

My current crochet project

Hello! Today I wanted to share my current crochet project with you - it's a really colourful blanket which is sure to brighten up your day!


I began work on this toddler size blanket back in October last year using all the little scraps from my wool stash.


The individual squares are made up of multiple odd ends of wool, needle felted together to form a continuous ball and then crocheted in corner to corner stitch, before adding a neutral border. The needle felted join creates what I call Happy Scrappy Wool and it's very easy to make your own - I  have even created a You Tube video with step-by-step instructions here.


I very quickly became addicted to the process of adding squares and I soon had a 4 x 4 square blanket!


However, like a lot of my projects, the initial euphoria passed and the project was relegated to the WIP (work in progress) pile! It remained there until I dug it out last week and has seen lots of attention since then, in fact, it's almost finished!


The photo above was taken in my back garden at the weekend and the photo below was taken this morning, just 2 more squares to reach my 6 x 6 target! The next step will be to add a couple of rounds of cream before finishing with a colourful border. I keep changing my mind about how I want this to look because I don't want to detract too much from the individual squares. One thing's for sure, it's not going back in the WIP pile so I should be able to post a finished photo soon!


Until then, happy hooking,

Marta xx


Thursday 4 May 2017

In search of perfection ...

I am writing this blog post whilst taking a break from the 6th attempt at a crocheted cardigan pattern! Six times I have followed my own design, tweaking it slightly every time.

Take 1 (front)

Take 1 (back)

Take 1 was made in aran weight merino wool and I was so happy with how it had turned out especially the cable detail down the back ... but it was a little too bulky for a new baby ...

Take 2

This time I used DK thickness yarn and the result was so much better ... but the sleeves were too high up the body ...

Take 3

My next attempt was a teenie tiny version for my Sasha Doll. I had a tiny ball of 2ply alpaca wool and I decided to make a miniature version, just for fun!

Take 4 (photo credit: Niall Mitchell)

Back to King Cole merino blend DK, one of my favourite double knitting yarns, to have another go at sorting the position of the sleeves. In the above photo you can see how the pattern is worked from the neckline down. I conquered the sleeve issue and decided to try making it in the next size up (3 - 6 months) ...

Take 5 (back)

Take 5 (front)

The next size up worked out successfully. It took me a while to get into town and buy buttons for this one and the pink one but when I added the buttons I suddenly became aware that the front neckline was too high ...

Take 6

Take 6

I knew exactly how to sort the neck issue so began work on Take 6, using merino DK and going up a size again (6 - 12 months). My idea worked and I am now at the stage of sending this pattern off to be tested, hooray!! My perseverance with this one has been worthwhile, I have gained crochet knowledge and made a mini wardrobe of cardigans for my little niece, Agnes (she won't mind them being slightly wonky, will she?)


Thursday 27 April 2017

What have I been up to this April?

April has been a busy month for me! I have mostly been crocheting, gardening, school holiday day tripping, pattern writing, enjoying family birthdays, taking photos, celebrating Easter, cooking, baking and a bit of DIYing (if that's a word!). I haven't had time to sit down and blog properly so here is a quick, mostly visual, summary of what I've been up to.

I crocheted 2 baby cardigans!
This is the Callander Cardigan by Joanne Scrace 

The weather has been fab so we have been outdoors most days.
This would be an excellent photo shoot location.

2nd crocheted cardigan, Wolf by Kat Goldin
(only my version is a monkey!)


Easter Sunday was also my birthday!
I made this Easter cake with swiss meringue buttercream icing!

Our homemade Easter tree

... and Easter Monday was my youngest son's birthday!
We planted out this old sink with flower seeds.

I celebrated 1 year with my crochet companion Jazz!

Cake and coffee with my boys at the Two Sister's Cafe, 
Carnoustie

A mystery collaboration I am currently working on.
More details coming very soon!

I have fresh ideas for future blog posts and I will be back soon with more updates, but until then, happy crafting!

Marta xx


Friday 24 March 2017

Crochet Pattern Review - Monkey by Vanessa Mooncie

This week I thought I would review a crochet pattern I recently followed; Monkey by Vanessa Mooncie. This pattern can be found in Vanessa's book Crocheted Wild Animals; A collection of cuddly creatures to make from scratch. It's a book I have had for a few years now and this is the second time I have followed the monkey pattern because the last one was such fun to make and such a hit with friends that I decided to make another one.


I like Vanessa's patterns because they are written out in a clear, logical way and just in case you still don't understand, there are diagrams for each individual piece required for the finished piece. The monkey pattern, like the others in the book, is accompanied by lots of photos of the finished monkey in a variety of different poses. I find this is handy when it comes to sewing the completed sections together because you can clearly see what goes where.


The picture above shows the first monkey I made, back in 2015, patiently waiting for me to make him a new friend! The photo below gives an idea of the layout of the pattern within the book. I like the little facts about each of the animals added in some of the free spaces!


I worked on the monkey with very little distraction from other projects and I enjoyed watching the colours form stripes in the variegated merino from Marley Yarns (https://www.etsy.com/uk/shop/MarleyYarns), so I finished off within a few days. I only made four small deviations from the original pattern. Firstly I always use buttons instead of safety eyes; there's no particular reason for this other than because I love buttons! Secondly I altered the ears going through the front loop only of the inner ear; I thought the ridge created was similar to the way the top of the face was attached. Thirdly I omitted the tummy section; I wanted to show off the variegated yarn. Fourthly I didn't edge the top of the face; because I was using variegated yarn it looked clumsy - a clear line of yellow worked best. I want to be clear that all these reasons are purely personal and in no way a reaction to poor pattern writing. 


I would definitely recommend Vanessa Mooncie's Monkey pattern, and indeed any of her other patterns. Vanessa has a delightful way of designing cuddly creatures and giving them real anthropomorphic character which will instantly charm anyone who sees them. 


Have you followed this pattern? Or any of Vanessa's other patterns? Let me know what you think in the comments. xx


Wednesday 15 March 2017

Agnes the Bunny - a free amigurumi crochet pattern

I am really happy to be able to share this amigurumi crochet pattern pattern with you here. I began writing this pattern in February 2016 in the hope of having it finalised in time for Easter that year (you can read my blog post from the time here). However, I got swept up in other projects, Easter and spring came and went and the project was put on hold. Earlier this year I became an auntie for the first time! I now have a little neice called Agnes and inspired by her beautiful name I decided to remake the bunny using alpaca wool, with a view to releasing the pattern in time for Easter, and here it is!


With her baby alpaca fur and her Liberty Tana Lawn cotton ears, Agnes is the softest, most luxurious bunny ever! She is crocheted using amigurumi techniques and all her cute little details are hand stitched after she has been sewn together.
This pattern is rated BEGINNER level.

You will need ...
1x 100g skein of Juniper Moon Farm extrafine baby alpaca in Bullrush (200m per 100g, DK weight)
10x10cm piece of Liberty Tana Lawn cotton in Felicite (for ears)
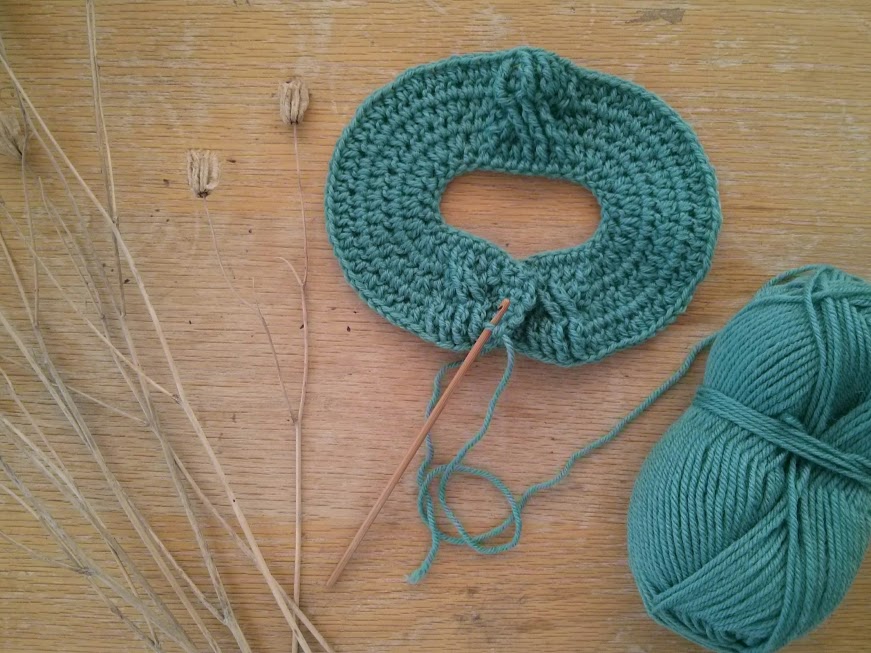
3mm crochet hook
scrap of contrast yarn or stitch marker
2 small, vintage shell buttons (for eyes)
green sewing thread (for eyes)
terracotta coloured embroidery thread (for sewing nose and mouth)
small piece of mint coloured wool felt (for mouth)
needle (for thread)
tapestry needle (for sewing body parts together)
toy stuffing

Finished Size and Tension
The stuffed bunny is 34cm from tip of ears to toes. Tension should be tight for making amigurumi, you may need to switch to a 2.5mm hook. The stuffed head should be about 6.5cm diameter (top tip; you could use the head as a tension guide).

Abbreviations (UK terms)
ch chain
ss slip stitch
dc double crochet
dc2tog double crochet 2 stitches together (see notes)
beg begin
rep repeat
dec decrease
inc increase
htr half treble
Tr treble
trCl treble cluster (see notes)
yo yarn over
RS right side

Notes
I have given instructions for both the magic loop method and the chain 2 method of starting - choose whichever you are most comfortable with. Here is a useful link to the magic loop method http://www.simplycrochetmag.co.uk/2014/10/20/make-magic-loop/

For the head pattern I have staggered the increases to avoid the hexagonal look which standard amigurumi methods create. I have not done so for the body because it is less noticeable.

Invisible decreases are another of the crochet techniques I like to use in my patterns because it creates such a smooth and flawless look. Where I have indicated dc2tog; insert hook through front loop only (flo) of 1st stitch to be decreased (2 loops on hook), do not yarn over, insert hook through flo of 2nd stitch to be decreased (3 loops on hook), yo, pull through 2 loops (2 loops left on hook) yo, pull through both loops. 1 invisible decrease made. If you are new to crochet and want to keep things simple, dc2tog in the standard way. Here’s a link to blog post with photo tutorial - it uses the US term single crochet to describe the UK double crochet stitch but the photos are so clear this shouldn’t matter http://www.allaboutami.com/invisibledecrease/

A treble cluster (trCl) is used to create the thumb; a group of 3 trebles joined closely at the top. To make a trCl work each of the trebles up to the last yo, pull through needed to complete it (4 loops on hook), yo, pull through all loops on hook. 1trCl made.

With the exception of the ears, which are worked in rows, all the other parts are crocheted in the round in the amigurumi style (ie. no ch1/ ss at the beginning of rounds). All the body parts are made separately and sewn together.


I hope you enjoy following this pattern. Look out for more free patterns at mrsdaftspaniel.blogspot.co.uk Follow me on Instagram @mrsdaftspaniel  and tag your work with #mrsdaftspaniel


Pattern


Head worked from nose to back of head
Start with either a magic ring with 6dc worked into it or ch2, 6dc into 2nd chain from hook
Round 1 (inc) 2 dc in each dc. (12dc)
Round 2 (inc) (1dc in next dc, 2dc in next dc) 6 times. (18dc)
Round 3 (inc) 1dc in 1st dc, (2dc in next dc, 1dc in each of next 2dc) 5 times, 2dc in next dc, 1dc in last dc. (24dc)
Round 4 (inc) (1dc in each of next 3dc, 2 dc in next dc) 6 times. (30dc)
Round 5 (inc) 1dc in 1st 2dc, (2dc in next dc, 1dc in each of next 4dc) 5 times, 2dc in next dc, 1dc in each of next 2dc. (36dc)
Round 6 (inc) (1dc in each of next 5dc, 2 dc in next dc) 6  times. (42dc)
Round 7 (inc) 1dc in 1st 3dc, (1dc in next 6dc, 2 dc in next dc) 5 times 2dc in next dc, 1dc in each of next 3dc. (48dc)
Rounds 8 -10 1dc in each dc around.
Round 11 (dec) (1dc in each of next 6dc, dc2tog) 6 times. (42dc)
Round 12 (dec) 1dc in each of next 2dc, dc2tog, (1dc in each of next 5dc, dc2tog) 5 times, 1dc in each of next 3dc. (36dc)
Round 13 (dec) (1dc in each of next 4dc, dc2tog) 6  times (30dc)
Round 14 (dec) 1dc in 1st dc, dc2tog, (1dc in each of next 3dc, dc2tog) 5 times, 1dc in each of next 2dc. (24dc)
Round 15 (dec) 1dc in each of next 2dc, dc2tog) 6 times (18dc)
Stuff head with toy stuffing.
Round 16 (dec) (1dc in next 1dc, dc2tog) 6  times (12dc)
Add a little more toy stuffing if necessary.
Round 17 (dec) dc2tog around (6dc)
Finish off leaving long tail for sewing up. Pull through stitch on hook to finish off. Using tapestry needle, weave in and out of remaining stitches, pull tight to close hole.

Body worked from bottom upwards
Start with either a magic ring with 6dc worked into it or ch2, 6dc into 2nd chain from hook
Round 1 (inc) 2 dc in each dc (12dc)
Round 2 (inc) (1dc in next dc, 2dc in next dc) 6 times (18dc)
Round 3 (inc) (1dc in next 2dc, 2dc in next dc) 6 times (24dc)
Round 4 (inc) (1dc in next 3dc, 2 dc in next dc) 6 times (30dc)
Round 5 (inc) (1dc in next 4dc, 2 dc in next dc) 6 times (36dc)
Rounds 6 - 10 1dc into each dc around
Round 7 (dec) (1dc into each of next 4dc, dc2tog) 3 times, 1dc in each of next 18dc (33dc)
Round 8 1dc into each dc around
Round 9 (dec) (1dc into each of next 3dc, dc2tog) 3 times, 1dc in each of next 18dc (30dc)
Round 10 1dc into each dc around
Round 11 (dec) (1dc into each of next 2dc, dc2tog) 3 times, 1dc in each of next 18dc (27dc)
Round 12 1dc into each dc around
Round 13 (dec) (1dc into 1st dc, dc2tog) 3 times, 1dc in each of next 18dc (24dc)
Rounds 14 - 18 1dc into each dc around
Round 19 (dec) (1dc in each of next 2dc, dc2tog) 6 times (18dc)
Rounds 20 - 23 1dc into each dc around.
Finish off leaving a long length of yarn to attach body onto head. Stuff tightly. Sew securely to head.

Arms (make 2) worked from hands upwards
Start with either a magic ring with 6dc worked into it, or ch2, 6dc into 2nd chain from hook
Round 1 (inc) 2 dc in each dc (12dc)
Round 2 (inc) (1dc into each of next 3dc, 2dc in next dc) 3 times (15dc)
Round 3 1trCl in 1st dc, ch1 (thumb made), 1dc in each of next 14dc.
Round 4 1dc in trCl, miss ch1, 1dc in each of next 14dc.
Round 5 1dc into each dc around
Round 6 (dec) (1dc in each of next 3dc, dc2tog) 3 times (12dc)
Round 7 1dc into each dc around
Round 8 (dec)  (1dc in next dc, dc2tog) 4 times (8dc)
Stuff hand tightly.
Rounds 7 - 11 1dc into each dc around.
Loosely stuff arm, it should be floppy.
Rounds 12 -18 1dc into each dc around.
Do not add more stuffing. Pinch top of arm closed. Work 3dc across top of arm joining both sides together.
Finish off leaving long tail for sewing up. Sew the arms to the body close to the neck.

Legs (make 2) worked from feet upwards
Start with either a magic ring with 6dc worked into it, or ch2, 6dc into 2nd chain from hook
Round 1 (inc) 2 dc in each dc. (12dc)
Round 2 (inc) (1dc in next dc, 2dc in next dc) 6 times. (18dc)
Rounds 3 - 6  1dc into each dc around.
Round 7 (dec)  (1dc in next dc, dc2tog) 3 times, 1dc in each of next 9dc. (15dc)
Round 8 1dc into each dc around.
Round 9 (1dc in next dc, dc2tog) 3 times, 1dc in of next 6dc. (12dc)
Round 10 1dc into each dc around
Round 11 (1dc in next dc, dc2tog) 2 times, 1dc in of next 6dc. (10dc)
Round 12 1dc into each dc around
Round 13 1dc in each of 1st 2dc, dc2tog, 1dc in of next 6dc. (9dc)
Stuff foot tightly.
Rounds 14 - 21 1dc into each dc around
Finish off leaving a long length of yarn to sew leg onto body. Stuff lightly. Sew securely to body.


Tail
Start with either a magic ring with 6dc worked into it or ch2, 6dc into 2nd chain from hook
Round 1 (inc) 2 dc in each dc (12dc)
Round 2 (inc) (1dc in next dc, 2dc in next dc) 6 times (18dc)
Rounds 3 - 4 1dc into each dc around
Round 5 (dec) (1dc in next 1dc, dc2tog) 6  times (12dc)
Finish off leaving a long length of yarn. Stuff tail with toy stuffing. Sew the tail to the body.


Ears (make 4; 2x inner ear, 2x outer ear)
Row 1 (RS) Ch17, 1dc into 2nd ch from hook, 1dc in each of next 10ch, 1htr in each of next 4ch, 3htr in last ch, keeping RS facing turn ear to work into the other side of the chains: 1htr in each of next 4ch, 1dc in each dc to end. Turn. (22dc, 11htr = 33st)
Row 2 Ch1, 1dc in each of next 4dc, 1htr in each of next 7st, 1tr in each of next 3st, 2tr in each of next 5htr, 1tr in each of next 3st, 1htr in each of next 7st, 1dc in each dc to end. Turn.  (8dc, 14htr 16tr = 38st)

After finishing Row 2 on 2nd and 4th ears, do not cut yarn. Place inner ear and outer together with RS facing each other (I personally find the wrong side looks neater, you may wish to experiment for yourself!). Working into both inner and outer ear, dc together (this side is now RS). Finish off leaving a long length of yarn.

With new RS facing down, draw around the ear onto the back of your Liberty Tana Lawn cotton. Cut out, 4mm in from the line. Check it for size, trim some more if necessary. Top tip; draw around and cut each ear separately to avoid symmetry - your finished bunny will look more natural. Sew to new RS of ear using neat, small stitches. Pinch base of ear together and sew together using a few tight stitches. Using the photo as a guide sew the ears to the head.

Finishing Details
Using the photo as a guide, sew 2 buttons on for eyes. Cut the muzzle shape out of felt and sew using embroidery thread onto the head using small stitches. Sew a few satin stitches for the nose. Sew small stitches for the mouth. If you are feeling creative why not make your bunny a cute Liberty dress!


I hope you enjoyed following this pattern.
Look out for more free patterns at mrsdaftspaniel.blogspot.co.uk
Follow me on Instagram @mrsdaftspaniel  and tag your work with #mrsdaftspaniel

Crochet and Sustainability: Your Guide to Being More Eco-Friendly

Hello! Are you l ooking for ways to reduce the environmental impact of your crochet? There are so many opportunities to create what we do in...