Friday, 15 November 2024

Elevate Your Crochet Photoshoots with the Effective Use of Props


Text reads: Elevate your crochet photos, how to make the most effective use of props. Image shows: close up of a pair of crocheted socks on blockers. There's sheet music under the socks and a violin is semi in shot.

Hello! This week I've been taking photos of my crochet and in this blog post I’m going to pass on my tips on how to make the best use of props to create stunning photos you'll be proud of. If you're sharing these images on social media, your followers will love them too! The right props can add depth, story and visual interest to your images; they can help to showcase the scale of your work, add a touch of your personality or simply create a beautiful and inviting scene. Read on to find out how to make your crochet photos as beautiful as your work!

Here are my top tips for using props effectively:

  • Keep it simple: Too many props can actually clutter your image and distract from your crochet. Your image doesn’t need to have bits & pieces crammed in, in fact - some empty space will actually balance out your photo. Often I start with more items than I need and one by one take them out as I simplify the look I’m going for.

  • Choose colours that complement your work: The colours of your props should enhance your crochet, not compete with it.  Choose props that either contrast or complement the colours in your crochet. For example, a vibrant, colourful crochet hat will look stunning against a neutral, textured backdrop. 

  • Textured contrast: The texture of your props will add depth and interest to your photos. For example, a rough, tweedy crochet basket will look even more rustic when photographed against a smooth, silky background. Experiment with different combinations of textures to find what works best for you.

  • Use props to tell a story: Props can be used to create a narrative or evoke a certain feeling. A good example of this is vintage toys, whimsical figurines or fairy lights - all of these add a touch of magic and wonder. The key to effective storytelling is to choose props that authentically represent you and your values plus the mood and message of your crochet piece.

  • Mastering angles: Have a play around until you find a composition that you're happy with. The top-down angle will produce a flatlay photo which is ideal for showcasing the overall shape and texture of your piece. Check out this blog post of mine with 10 top tips for flatlay photos if you want to take better flatlay pictures. Side angles can be used to highlight the more intricate details and patterns of your crochet. Close-ups allow you to really focus in on your stitches or your colours.

  • Lighting Techniques: Natural Light is almost always best; it's soft and adds a warm, inviting feel to your photos. Experiment with different times of day and different locations within your home to find the best lighting conditions. You can also use lamps, boxes, or ring lights to create dramatic effects or to balance out the shadows.


3 crocheted chickens sit nestled amongst spring blossom, vintage books and bottles


Here’s some prop inspiration to get you started:

  • Crochet tools: Your hook, yarn, stitch markers etc are fantastic props for showing your process and the materials you've used. Buttons are a cute little extra!

  • Natural elements: Seasonal flowers, leaves, rocks and shells can add a touch of nature to your photos. Go out for a walk and collect seasonal items to add to your photos.

  • Vintage items: Old books, teacups, glass bottles and maps can add a touch of nostalgia. As you know, I’m a huge fan of charity shops, but car boot sales, antique shops and auctions are also great sources.

  • Fabric and textiles: Scarves, blankets, table cloths and other pieces of fabric can add both texture and colour. Have a look around your house to see what you might already have, you'll be surprised!

  • Handmade items: Pottery, jewelery and other handmade items can add a personal touch. However, avoid adding other crocheted items or knitted items because they’re likely to compete for attention with your main piece of work.


Flat lay image of a crocheted sock in progress. There are brass items surrounding the crochet and the ball of wool is in the top right.


One final pro tip:

  • Create a dedicated container to streamline your crochet photography setup. Gather together all your essential photo props, such as fabric swatches, natural elements and vintage items, and store them neatly in the tub or basket. Then, when it's time for your photoshoot, simply grab your container and you'll have everything you need at your fingertips. This approach will save you time and inspire creativity straight away, ensuring that every photoshoot is a breeze!


Remember, the best way to improve your photography skills is to practice regularly and have fun with the process. Simply start taking photos and the more you do so, the more you will learn about what works and what doesn’t.

Are you ready to elevate your crochet photography with props now? I hope so!

Share your favourite prop ideas and tips in the comments below!

Until next time, happy crocheting,

Marta xx


PS. Do you want even more crochet techniques and tips? Sign up for my free ‘Top Tips Every Crocheter Should Know’ pdf and take your crochet skills to the next level!


Friday, 8 November 2024

Knitting the Landscape

Hello! Kiloran Bay, a cherished childhood location for me, was the inspiration behind my latest knitting cast on. Last Saturday I hopped on the train to Perth to attend a Knitting the Landscape workshop with Karie Westermann! The workshop was planned by Eva from The Scottish Yarn Festival as a very generous way of thanking her volunteers - thank you Eva, I think we all loved it!

The theme of this workshop was to create a knitted piece based on a place or a memory of importance. I immediately thought of Kiloran Bay on the island of Colonsay, somewhere I loved being as a child and somewhere I then took my own children when they were primary school age. 

Karie encouraged us to forget about the constraints of knitting (such as following a pattern and sticking to the "rules") whilst at the same time to cling to the elements that were important to us (such as using the pair of needles which felt just right and working with wool with particular memories attached to it). We all shared our stories and our ideas which gave each of us a rich and inspiring expereience. 


The photo above shows the point all the participants had reached at the end of the workshop, my piece of knitting is on the large, straight needle. I'm knitting and allowing the images in my head and those from the photos I have to influence the lasting impression I have of this magnificent bay. I'm not working with much of a plan (though I did sketch out the beginnings of an idea), I'm simply allowing the yarn and the stitches to guide me. There will be crocheted elements too - I used a crochet cast on to make it even easier to crochet into later. I'll share more of my progress in a future post to let you see how I'm getting on.

Have you ever tried anything like this? Do let me know!

Until next time,

Marta xx

Tuesday, 5 November 2024

Working with Dark Yarn: 6 Tips to Avoid Mistakes

Text reads: Working with Dark Yarn: 6 Tips to Avoid Mistakes, ad-free blog. Image shows 2 balls of yarn with a string of fairy lights between them


Hello! As the daylight hours shorten here in the northern hemisphere, many of us find that dark yarn can be a challenge to work with! The stitches are much harder to see, leading to mistakes and frustration, so here are my 5 top tips to help you work with darker coloured yarn more easily:

1. Light Up Your Workspace

  • Natural Light: Sit by a window whenever possible to take advantage of all the natural light pouring in.
  • Artificial Light: Use bright, daylight bulbs, especially in the evenings.

2. Count Your Stitches

  • Regular Checks: Count your stitches at the end of each row or round. This will help you catch mistakes early on.

3. Take Breaks

  • Protect Your Eyes: If you find you're straining your eyes, take short breaks to rest them.

4. Add a Pop of Color

  • Contrast Yarn: If your pattern allows, incorporate sections of lighter-coloured yarn to make your stitches more visible.

5. Embrace Technology

  • Lighting Tools: Consider using neck lamps or crochet hooks which light up, especially during the darker winter months.

6. A Simple Trick for Better Visibility

  • White Background: Place a white cloth on your lap to help highlight the spaces between stitches.

By following these tips, I hope you can work with dark yarn more confidently and reduce the risk of errors. Do you have any other tips? I'd love to know, leave me a comment.

Until next time, happy crocheting!

Marta xx

PS. Don't miss out on your free Yarn Thickness Guide! Grab your copy today and simplify your yarn selection process. 

Friday, 1 November 2024

Understanding Yarn Weights: A Crocheter's Guide

Text: Understanding Yarn Weights: A Crocheter's Guide. Image: multiple oddballs of yarn in all sorts of colours

Why Yarn Weight Matters

Yarn weight, also known as yarn thickness, is a crucial factor in producing the results of crochet projects. Choosing the right yarn weight will determine the gauge, size, texture, drape and even the warmth of your finished piece. Read on to learn about the various yarn weights and their uses.


Image is filled with balls and skeins of yarn, all in warm colours


A Breakdown of the Different Yarn Weights

Let's first of all explore the common yarn weights from the thinnest through to the thickest:

Lace Weight:

  • Also known as: (0), Extra Fine, 2ply

  • Characteristics: The thinnest yarn, it’s extremely fine and delicate.

  • Common Uses: Shawls, doilies, other intricate work.

  • Hook: 1.5mm-2mm

  • I recommend: Rowan Fine Lace, Zakami Fluffy Lace, Debbie Bliss Rialto Lace

Fingering Weight:

  • Also known as: (1), Super Fine, 4ply, Sock Yarn, Baby Yarn (this is my favourite yarn weight!)

  • Characteristics: Fine, but thicker than lace weight.

  • Common Uses: Socks, hats, baby blankets, lightweight sweaters.

  • Hook: 2.25-3.25mm

  • I recommend: Hedgehog Fibres Sock Yarn, Coop Knits Socks Yeah, West Yorkshire Spinners 4ply Sock Yarn

Sport Weight:

  • Also known as: (2), Fine, 5ply, Heavy Fingering, Light DK

  • Characteristics: Versatile weight, not too heavy, not too light! More common in the USA than in the UK.

  • Common Uses: Sweaters, shawls, afghans.

  • Hook: 3.5-4.5mm

  • I recommend: Mrs Moon Pudding, Drops Alpaca Sport, Manos Serena Sport

Double Knitting:

  • Also known as: (3), DK,  Light Worsted Weight, 8ply

  • Characteristics: The most common yarn weight, easy to work with.

  • Common Uses: Blankets, hats, scarves, toys.

  • Hook: 4.5-5.5mm

  • I recommend: The Scottish Yarn Festival Clan DK, Debbie Bliss Rialto DK, Scottish Balmerino DK

Aran Weight:

  • Also known as: (4), Worsted Weight, 10ply

  • Characteristics: A very popular yarn weight, easy to work with.

  • Common Uses: Blankets, hats, jumpers, scarves.

  • Hook: 5.5-6.5mm

  • I recommend: West Yorkshire Spinners The Croft Shetland Aran, Rowan Felted Tweed Aran, Uist Wool Meireal 

Chunky:

  • Also known as: (5), Bulky Weight, 12-14ply

  • Characteristics: Thicker yarn, perfect for quick projects!

  • Common Uses: Cushions, rugs, oversized scarves.

  • Hook: 6.5-9mm

  • I recommend: Malabrigo Chunky, Drops Andes, Rowan Big Wool

Super Chunky:

  • Also known as: (6), Super Bulky Weight, 16ply

  • Characteristics: Extremely thick yarn, ideal for large, bold projects, works up very quickly.

  • Common Uses: Rugs, household items such as cushions.

  • Hook: 10-15mm

  • I recommend: Manos Franca, Wool And The Gang Crazy Sexy Wool

If you'd like copy of my Yarn Thickness Guide Infographic, sign up to my mailing list and you'll receive an email with the download (plus 20% off your first order on my website and my Crochet Tips pdf!).

Pro tips on Yarn Weight:

  • If the weight is unspecified, use the hook or needle size on the ball band or label as a clue to yarn thickness.

  • The higher the meterage per 100g, the finer the yarn. Conversely, a lower meterage per 100g indicates a thicker yarn.

  • If you’re substituting yarn for a pattern, choose something which is similar thickness for best results. If you’re looking for more information on substituting yarn, take a look at this previous blog post I’ve written on the topic.

  • The size of the crochet hook you use will also affect the finished size and texture of your project. As a rule of thumb, a finer yarn requires a smaller hook, while a thicker yarn requires a larger hook.

How to calculate yarn thickness using a ruler: 

You can determine yarn thickness by wrapping yarn around a ruler, known as the wraps per inch method. Take the ruler and wrap the yarn snuggly around it, then count the number of wraps in a one-inch section. A higher number of wraps indicates a finer yarn, while a lower number signifies a thicker yarn, as follows;

Lace Weight: 14-30 wraps per inch  
Fingering: 12-18 wraps per inch  
Sport Weight: 11-15 wraps per inch  
Double Knitting: 9-12 wraps per inch  
Chunky: 6-9 wraps per inch  
Super Chunky: 5-6 wraps per inch

This wrapping method provides a quick and easy way to estimate yarn thickness for those times when you don’t have the label. However do keep in mind that these are guidelines, some variations may occur.


subscribe to my mailing list

Conclusion

If you’re a crocheter (or a knitter!), gaining a good grasp of yarn weights will unlock the key to your crochet and knitting potential. By selecting the appropriate yarn weight for your project, you will achieve the desired look and feel you envisioned. Once you know what you’re doing, you’ll then have the confidence to experiment with different yarn weights to create unique and stunning crochet projects.

Until next time, happy crocheting,

Marta xx


Friday, 25 October 2024

Are you ready for a fun and cosy crochet challenge?


Are you ready for a fun and cosy crochet challenge?

The big idea:

Share photos of your finished projects suitable for the winter months following one of my crochet patterns on social media. Each project you complete counts as one entry with the more projects you finish, the more chances you have to win! WiPs (Works in Progress) are of course welcome!

How to enter:

  1. Crochet something suitable for the winter following any of my patterns.

  2. Take a photo of your finished project.

  3. Share the photo on Instagram.

  4. Use the hashtag #MMDWinterCrochet and tag me in your post (@marta.mitchell.designs).

Not on Instagram? That’s ok! Email your photos to me: crochet@martamitchelldesigns.com

Prizes: 

The winner will be chosen at random and will receive their choice of either my ‘Crochet & Colour Course’ or my ‘How To Write Up A Crochet Pattern Course’. There will be runner up prizes of individual patterns too!

I've loads of patterns to choose from! Most of my designs are for hats, socks, cowls, shawls etc., I'm sure you'll find something you like! You can find them on my website and on Ravelry.

This challenge ends on Thursday 28th November. Good luck and happy crocheting!

Marta xx


Friday, 18 October 2024

What Is A Dye Lot Number?

Text: Understanding Dye Lots, what they are, why they matter & how to work with them effectively. Image: paper ball bands - some have been circled to show the dye lot information


Hello! This week’s hot topic is dye lot numbers! Understanding dye lots is an essential skill for creating beautiful, consistent projects so I’m going to unpack what dye lots are, why they matter and how to work with them effectively. 

What are dye lots?

A dye lot is the batch number assigned to a specific quantity of yarn, given to it by the manufacturer or dyer. You'll typically find this information on the yarn band or label, usually beside the colour name or colour number. Eg. Col: Scarlet, Dye lot: 571

Have you ever experienced this?

Can you recall an incident when you crocheted a blanket or a sweater and when you looked at it on completion, there was a strange, noticeable stripe that was a slightly different shade? This is because yarn from different dye lots was used - the subtle variation suddenly becomes very obvious! Read on to find out how you can go about counteracting this.


Why are dye lots important?

Due to the nature of the dyeing process, each batch of yarn can have slight variations in colour. This isn't a problem if you're only using one skein or ball, but if you're working on a larger project that requires multiple skeins or balls, it's crucial to ensure they all come from the same dye lot. Otherwise, you might end up with unsightly colour variations in your finished piece. Today’s topic was inspired by the fact that I am about to run out of the main colour for my Battenberg Blanket (eeeek!) and need to make sure that the extra yarn is from the same dye lot.

My pro tips for working with dye lots:

  1. Hand-dyed yarn: If you're working with hand-dyed yarn, there might not always be a batch number, and even if there is, there could still be variations between skeins. To avoid these colour inconsistencies, try alternating between skeins every round or two to blend them together.

  2. Local yarn shops: Many yarn shops offer a great service where they can hold back yarn for you for a large scale project and you may (or may not) need to buy more. This is a FANTASTIC service, so support your local yarn shops whenever possible (and remember to let them know when you've finished your project so they can pop the yarn back on the shelf).

  3. Online yarn shopping: If you order your yarn online and need more, you may be able to contact the company with your dye lot number because you might be able to buy yarn from the same batch. Larger companies are unlikely to help you here, but smaller ones might - it’s worth a try!

  4. Keep Those Yarn Bands!: Don't forget to hang onto your yarn bands! They're the only way you’ll be able to identify dye lots and ensure colour consistency in your projects. If you’d like to see how I look after my ball bands, check out this blog post to find out more.

Until next time, happy crocheting!

Marta xx

PS. Want to learn more crochet tips from me? Sign up for my free ‘25 Crochet Tips’ PDF to improve your crocheting skills even further!


Monday, 14 October 2024

Crochet and Sustainability: Your Guide to Being More Eco-Friendly

Text reads: Crochet and Sustainability: Your Guide to Being More Eco-Friendly, Ad-free blog, martamitchelldesigns.blogspot.com. Image shows natural coloured skeins of yarn.

Hello! Are you looking for ways to reduce the environmental impact of your crochet? There are so many opportunities to create what we do in a more sustainable way. Tiny changes can make a big difference, right? I will say right away that none of us is perfect, and I certainly don't want to be seen as being judgemental here. I know I don’t get it right all the time. However, by incorporating eco-friendly practices into your projects, you can help to minimize your environmental impact and create beautiful, conscious pieces at the same time. With all this in mind, let's explore some of the options to make your crochet endeavors more sustainable.

Choosing Eco-Friendly Yarns

  • Bamboo: This is a rapidly renewable resource that produces soft and durable yarn. The drape of the fabric crocheted in this fibre can be stunning!

  • Local: Support local or national yarn producers to reduce transportation emissions, provide local employment and embrace traditional farming and spinning methods. 

  • Organic Cotton: Choose yarns made from organic cotton, which is grown without harmful pesticides or fertilisers.

  • Merino Wool: Be aware of the practice of mulesing in merino sheep, it’s a painful and unnecessary procedure which is causing many consumers and brands to now advocate for mulesing-free merino wool.

  • Recycled Yarns: Yarn made from materials like plastic bottles or recycled fabrics, are becoming more and more popular. In fact I have some Kremke Reborn Wool in my stash which I’m keen to try soon. It’s formed of 65%-75% wool and the rest is other fibres such as viscose, nylon or acrylic depending on the textiles used in the recycling process. 

  • Fair Trade Yarns: By choosing Fair Trade yarn, you’ll be ensuring ethical working conditions and pay to farmers.

  • Wool: Where possible, choose wool from ethically sourced, cruelty-free farms.


Reducing Waste

  • Leftover Yarn Projects: Create small, functional items like coasters, face scubbies, bookmarks or pot holders from leftover yarn.

  • Stash Busting: Prioritise using yarn from your stash before buying new. It’s amazing what we can find in our cupboards, under the bed etc - you’re likely to find something there you’d forgotten about!

  • Scrappy Projects: If you’ve been around me for any length of time, you’ll know how much I love a scrappy blanket! These are perfect for using up all the left-over bits & piecesyou have from other projects. I have several scrappy projects on my blog for FREE, you can find Scrappy Blanket II here.


Colourful crochet blanket with a wavy design is draped over the arm of a green chair.

Sustainable Project Ideas

  • Reusable Items: Crochet reusable iems such as bags, dishcloths or produce bags to reduce single-use plastic consumption.

  • Upcycled Projects: Create new items from recycled materials, for example from old clothing or fabric scraps. One item I’ve enjoyed making is a bathmat crocheted up in long strips of old T-shirts.

  • Repair and Restore: Give old items a new life by crocheting repairs or additions. I’ve dedicated a whole blog post to this topic, which you can read here.

  • Seasonal Projects: Crochet seasonal items like scarves, hats and mitts instead of opting for fast fashion alternatives.

Spreading Awareness and Inspiring Others 

  • Share Your Journey: Document your sustainable crochet projects on social media to inspire others and raise awareness about eco-friendly crafting. You can gently encourage others to adopt sustainable crafting habits by sharing information and resources you’ve found.

  • Join Sustainable Crafting Communities: Connect with like-minded crocheters and share ideas for sustainable practices. This could be online or in person groups, go find your crowd!

Conclusion

By incorporating even a sprinkling of these sustainable practices into your crochet practice, you’ll be contributing to a healthier planet. Please remember that we're all human and we all make mistakes; it's important to be understanding and supportive of each other to keep the community the friendly place it’s known to be. So, let's try to make more eco-friendly crochet to create a more sustainable future together, one stitch at a time.

Until next time, happy crocheting,

Marta xx


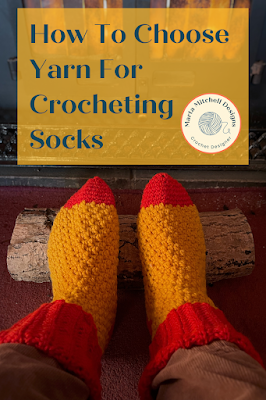
Choosing Yarn For Crocheting Socks

Hello! As you know, this week I released a new crochet sock pattern, Dunkeld Slipper Socks and I received a sweet review from Rosemary, who...