

Hello everyone! I'm starting this year's blogging off with the FREE instructions to crochet your very own happy scrappy blanket! Does that sound good? This is a blanket I began making last summer, working just a few rows at a time as the mood took me and allowing it to gradually grow as scraps of sock yarn became available from knitted or crocheted sock and shawl projects. I'm using the term "instructions" rather than "pattern" because I'm simply going to give basic information for you to use and make this project your own.


So, what do you need? Lots and lots of scraps and odd balls of sock weight yarn. If, like me, you are addicted to knitting or crocheting socks and shawls you will know how quickly these leftovers mount up and it seems a shame to leave them and not turn them into something beautiful. Of course, this blanket would work in thicker or thinner yarn too - simply adjust the number of chains at the start. If you don't have a stash of scrap yarn you could always skip the collecting stage and buy sock minis, many indie yarn dyers sell these (I caved and treated myself to 1 or 2 pretty skeins such as this one below from Lichen and Lace which I bought from Loop London).


Once you have crocheted the blanket to the size you're happy with, it's time to an add the side borders - these edgings really bring the blanket to life!
RS facing, beginning in either top left corner, join yarn into the side of the last tr created (ch1, 2dc) in side of tr, (ch1, 1dc in side of next dc, ch1, 1dc in side of next tr) across to end. Cut yarn.
Row 1, RS facing, join new yarn in 1st dc, (miss 1dc, ch1, 1dc in chsp) across to last dc, 1dc in last dc. Cut yarn.
Row 2. RS facing, join new yarn in 1st dc of Row 1, (1dc in chsp, miss 1dc, ch1) across to lastdc, 1dc in last dc. Cut yarn.
Work Rows 1 and 2 until you are happy with the width (I did 13 rows on each side).
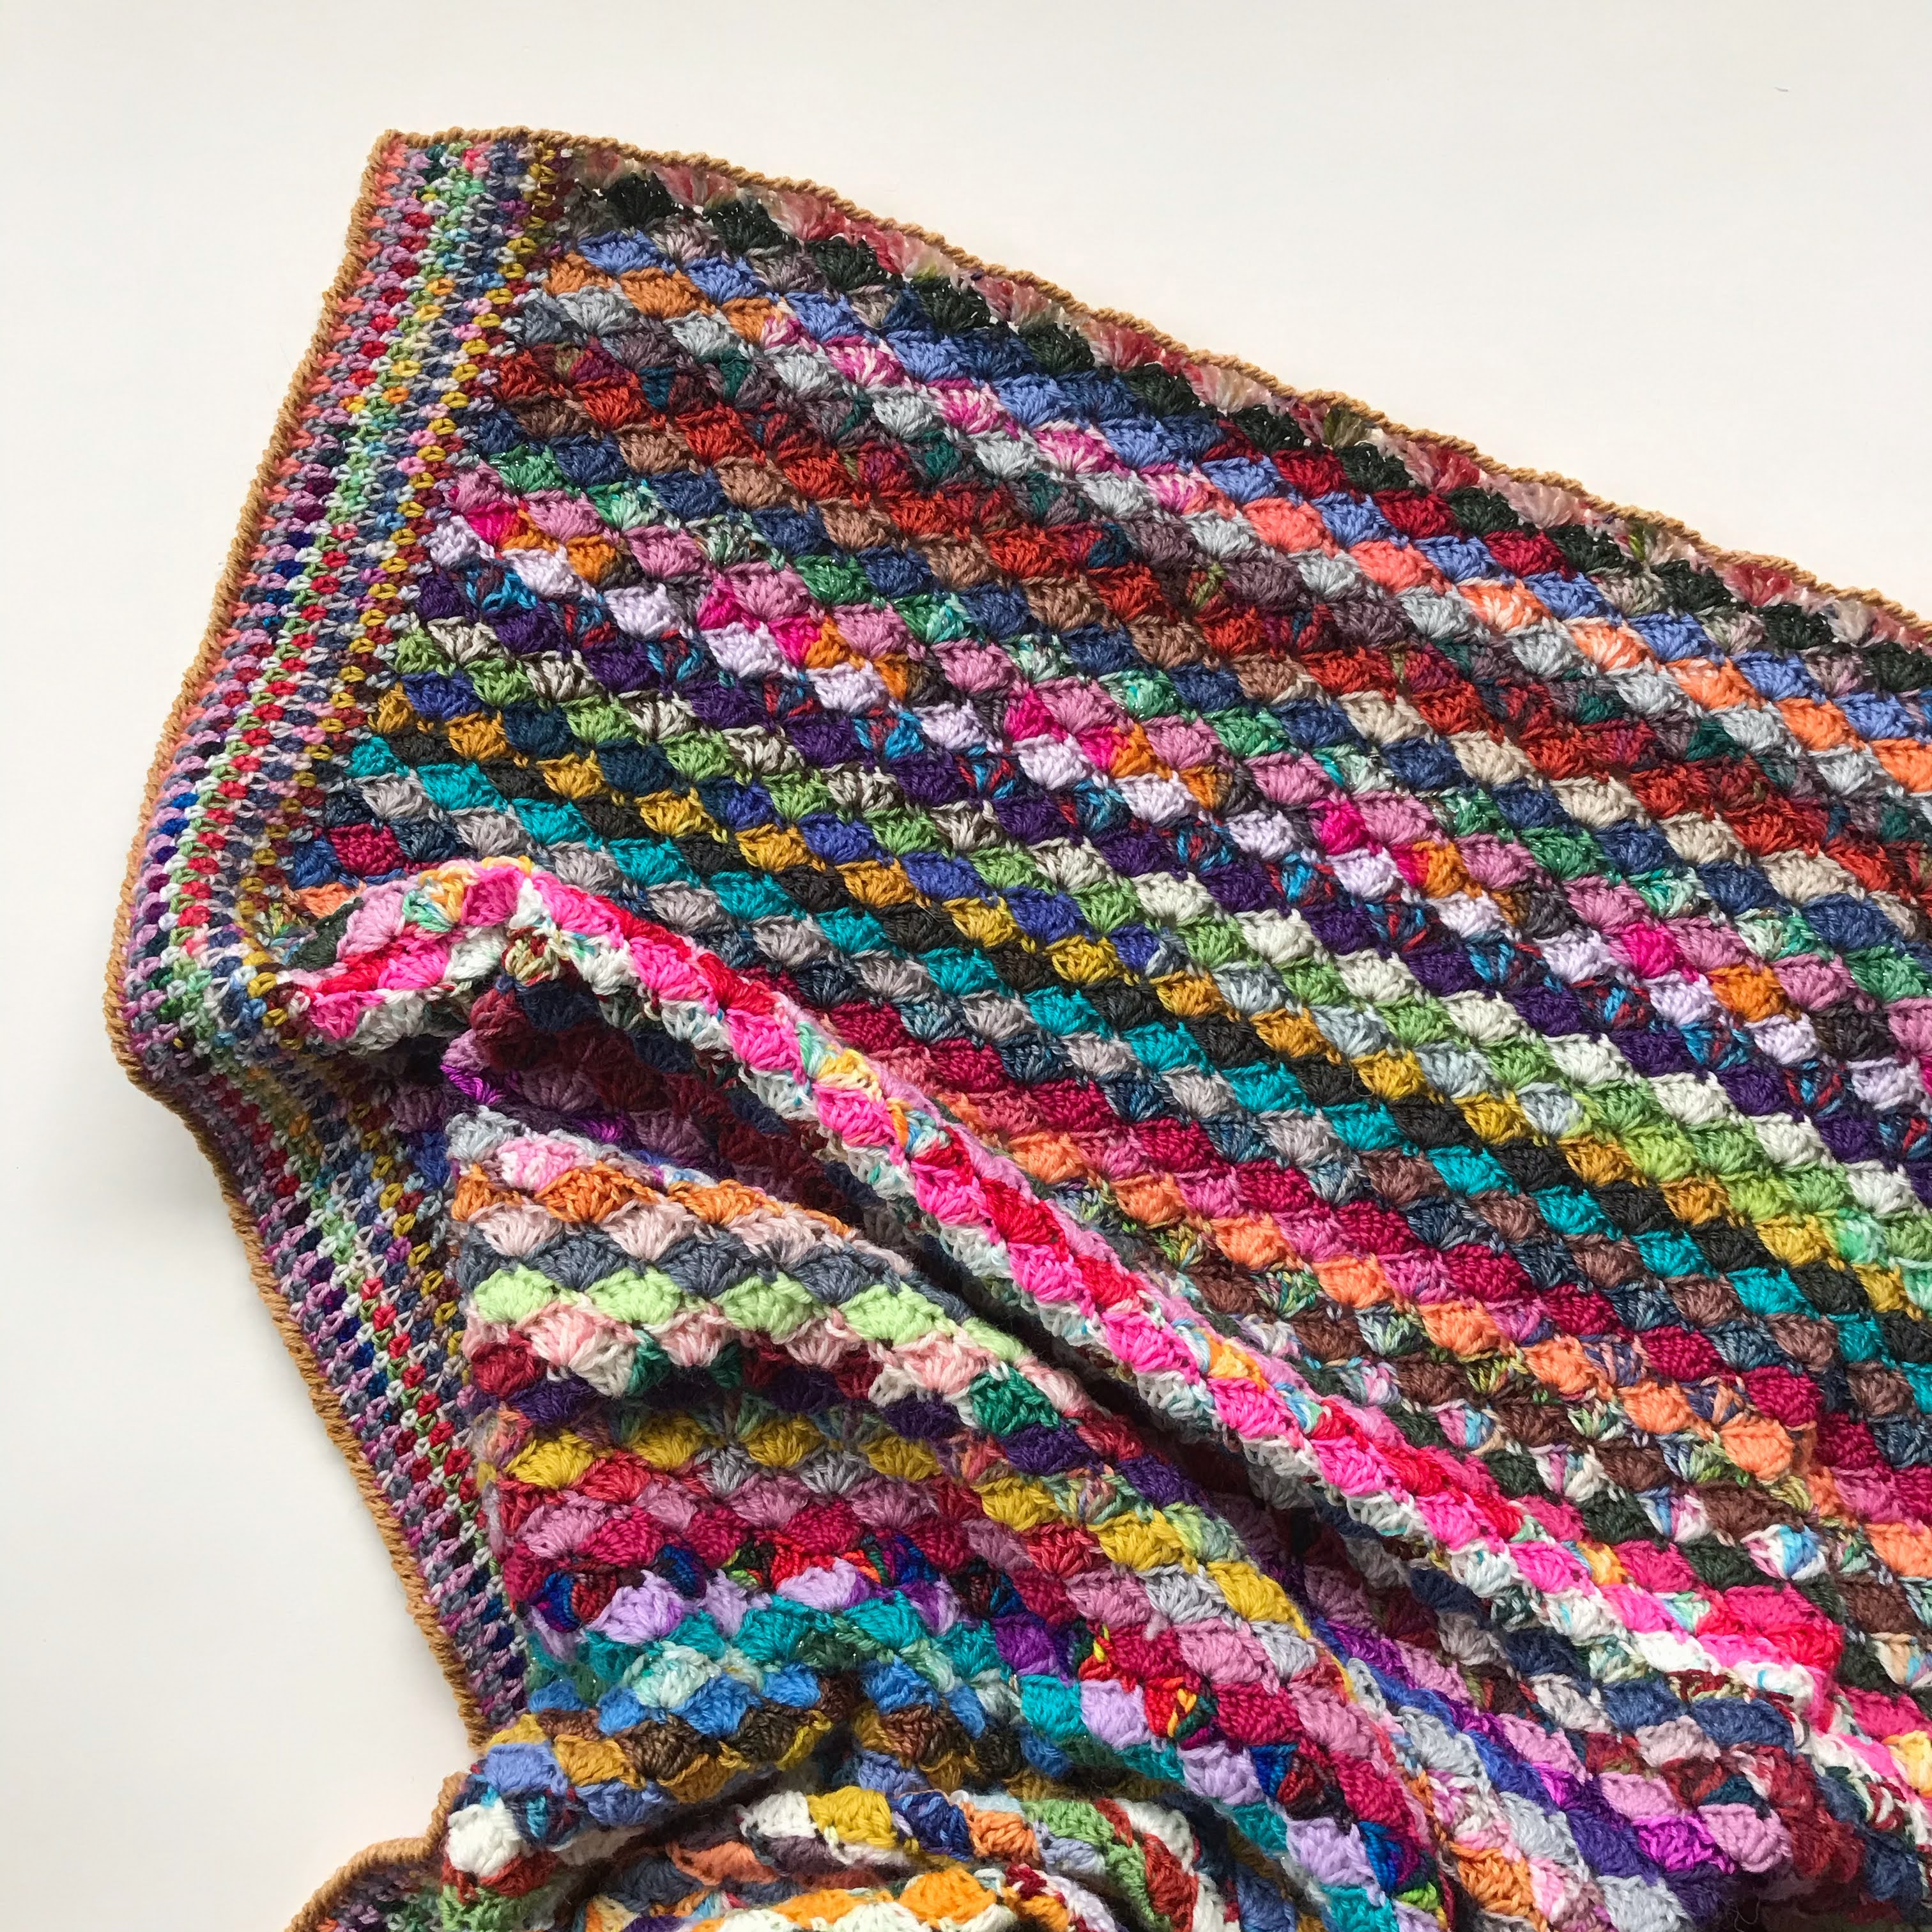
To finish off the blanket I went right around the whole blanket in crab stitch (also known as reverse double crochet) to give a slightly weighted corded edging. You could simply go round with dc stitches if you wanted - or any other variation. I would love to see how you interpret these basic instructions and make them your very own. You can email your photos to martasecocrafts@gmail.com or share them on Instagram, tagging me @marta.mitchell.designs and using the #marta.mitchell.designs hashtag - please help share the love! Also, if you enjoy this pattern you can find lots more of my patterns on Ravelry and Lovecrafts.

Until next time (I'll try not to leave it too long this time!),
Marta xx


No comments:
Post a Comment