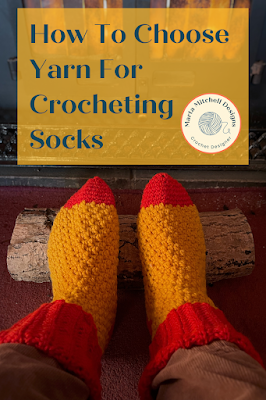
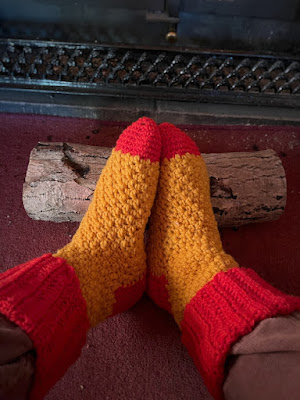
Hello! As you know, this week I released a new crochet sock pattern, Dunkeld Slipper Socks and I received a sweet review from Rosemary, who bought my pattern. She said
"Thanks for the lovely pattern. I will do a search here for similar yarn. They look so nice for the winter."
Now, Rosemary lives in South Africa and for her winter will be on it's way in a few months, so this got me thinking about the advice I would give anyone who was choosing yarn for crocheting (or knitting!) socks.
Crocheting socks requires yarn that can withstand the rigours of daily wear while providing exceptional warmth and comfort. The key to sock yarn durability, regardless of the fibre content, lies in the twist; a high twist creates a tightly wound yarn that resists stretching and pilling. This is crucial for socks because they endure constant friction and wear. In appearance, high-twist yarns tend to be smoother, less fuzzy, and have a more compact appearance because the tightly twisted strands lie closer together. I'm going to delve into the characteristics of various yarn types, including pure wools, blends and vegan fibres.
Merino
Merino wool is a popular choice for sock yarn, but it typically requires the addition of nylon to increase its durability. This is why you'll typically find sock yarns with a 75/25 Merino/ nylon blend. Merino wool by itself is quite strong, but the addition of the nylon significantly increases its durability, with the nylon providing extra strength and elasticity, helping the yarn resist stretching and pilling. Merino wool often undergoes a superwash treatment to make the yarn machine washable too.
Blue Faced Leicester
Blue Faced Leicester (BFL) is renowned for its exceptional warmth. This wool creates such a cosy, insulating layer around your feet and it’s also beautifully soft. While it might not have the legendary strength of Merino, BFL is still a strong fibre, especially when spun with a high twist.
Alpaca
Alpaca is an excellent choice for those with wool allergies. Coming from alapacas rather than sheep, its structure lacks the lanolin that can cause allergic reactions in some people. Alpaca yarn is also incredibly strong and resilient, making it highly durable for everyday wear and it’s obviously luxurious and soft to wear on your feet. The current pair of socks on my knitting needles are Pierre Socks by Stephen West and I'm using Alpaca SOXX from Lang, it's gorgeous!
Shetland Wool
Shetland wool is a more unusual choice for crocheting socks, yet its unique properties make it ideal for cold weather wear. The wool is sourced from the Shetland sheep breed, known for its dense, soft, and incredibly warm fleece. Its fine texture creates a beautifully dense and super warm fabric that provides possibly the best insulation of all the wool types. Over the cold spell we had a start of the year, I wore Shetland wool socks and my feet were super toasty!
Vegan fibres
If you’re looking for something vegan friendly, in line with your own values or the recipient of your socks, there are vegan fibres out there which offer a cruelty-free alternative to wool. Your 3 main choices are cotton, bamboo, and acrylic. Cotton is naturally breathable and soft, but is certainly not as warm as wool. The stitches created in crochet (this doesn’t apply so much to knitting) on the sole of the foot can bunch up with wear and washing, creating a more pronounced, bumpy fabric which may become uncomfortable. Bamboo is known for its softness and moisture-wicking properties, making it a good choice for summer socks especially. Acrylic is a synthetic fibre that is affordable and comes in a wide variety of colours, but it can feel less soft and doesn’t have the breathability of cotton or bamboo. In my opinion, acrylic is best avoided for socks.
Blended fibres
Sock wool is usually a blend of some of the fibres mentioned above, rather than one single fibre type. This enables a yarn to be created with the best possible properties for wear. Here are some of the many firbres introduced to sock yarn:
- Nylon provides incredible durability and helps the socks retain their shape.
- Cashmere offers luxurious indulgence and warmth. Blends with cashmere feel beautiful to work with and to wear.
- Alpaca(mentioned above in more detail) is often blended with other wool because it adds a unique softness and warmth.
- Bamboo provides moisture-wicking properties, keeping feet dry and comfortable.
- Corriedale brings a soft, springy quality and at the same time enhances the durability of the finished socks.
- Linen is an ideal blend for summer socks because this fibre provides much needed coolness and breathability. Linen enhances air circulation within the fabric, helping to keep feet cool and dry
- Yak adds incredible warmth and a unique, slightly hairy texture, creating luxurious and exceptionally cosy socks. It’s also really lovely to work with!
- Zwartbles introduces a toothy look, a bit of bounce and a touch of rustic charm to the finished socks.
Sock yarn can be a blend of one or more of these options with fibres chosen for their specific properties, such as warmth, durability, softness, stitch definition and moisture-wicking, to create the perfect yarn for comfortable and long-lasting socks. My advice to you is to experiment, try different blends and find out which ones you like to work with and which ones produce the best socks.
I'm in the process of curating all my crochet sock advice together into a pdf guide for you - this information on choosing yarn will be one of the many sections in the pdf. Sign up to my mailing list for more info from me on this new pdf guide in the next few weeks!
So, what type of yarn would I recommend for my Dunkeld Slipper Socks? Firstly, if you have some in stash or can get hold of some, I would advise that you choose the same yarn yarn which I designed the socks in - New Lanark Spinning Co, Aran weight (10ply), 100% pure new wool.
However, there are all sorts of reasons for not using this yarn (location, price, wanting a vegan fibre, allergies), therfore I have a few options for you here.
Yarnsub.com is an amazing website where you can search for any yarn and it will come up with the closest matches for you. I'd thorouhly recommend starting there and seeing what pops up.
I designed the socks in pure wool, choosing a pure wool of similar meterage would be another safe choice. Wool blended with Corriedale, Zwartbles or alpaca would all work very well too because they would enhance the texture of the socks and add to the warmth.
If you're looking for a vegan option, cotton or bamboo would both be good choices. Acrylic would also be suitable because this is a house sock rather than a sock to be worn inside shoes, therefore breathability isn't such a big issue.
I hope all this yarn info has been helpful for you - if you have any questions, leave me a comment or email me - martamitchelldesigns@gmail.com - and I'll do my very best to help.
Until next time, happy crocheting,
Marta xx
PS. If you'd like to find out more about choosing coloured yarn for crocheting socks you need to check out this blog post of mine.


