Hello! I've a simple crochet flower pattern to share with you, right here in this blog post! The pattern is also available as a free download on Ravelry. The pattern is suitable for a confident beginner.
This all came about because last night I was playing about with some cotton yarn, trying to make a very small flower and getting frustrated because the centre was so big and taking up a lot of wasted space! I was using the magic loop method, ch 1, 12dc (UK terms) into the loop and then on to round 2 for the petals, when I suddenly thought "can I skip round 1?" ... And yes, I can, so you can too!

finished flowers
I'm going to give you a complete step-by-step photo tutorial for the flower below, but firstly I'll give all the instructions in the written format for both UK and US terms.
NB. You will need to know how to make a magic loop! If this is new to you, my YouTube tutorial below will guide you through the process.
Materials
Small amount of yarn
Appropriate size of crochet hook (I used Erika Knight vintage wool and a 5mm crochet hook for the step by step tutorial)
Needle for sewing in ends

finished flowers turned into a simple greetings card
UK instructions
ch - chain
dtr - double treble
ss - slip stitch
Begin with a magic loop, [ch3, 2dtr into loop, ch3, ss into loop] 5 times. Pull starting tail to tighten magic loop. Finish off.
US instructions
ch - chain
trc - triple crochet
ss - slip stitch
Begin with a magic loop, [ch3, 2trc into loop, ch3, ss into loop] 5 times. Pull starting tail to tighten magic loop. Finish off.
That's it, a very small flower which can be used for all sorts of decorative purposes! Top tip - if you leave your tails nice and long these can be used to secure your finished flower to your project.
Step-by-step photo tutorial
begin by wrapping the yarn around
your fingers to make a magic loop
insert yarn from front to back, pull
a loop through
extra photo to show the start of the magic loop
chain 3 (to begin petal)
first dtr (UK) / trc (US) into the loop
second dtr (UK) / trc (US) into the loop
chain 3 (to finish petal)
slip stitch into loop
Continue around the loop, working the above pattern 5 times in total
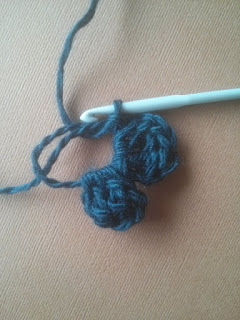
Here's the start of petal no. 2
2 completed petals
5 completed petals
pull the starting tail
to tighten the loop
you can leave the centre open or
pull it completely closed.
Weave in your ends and you are finished!
a pile of finished flowers in various
different yarn weights and textures
Conclusion
I would love for you to get in touch and show me your flowers or let me know how you have found this pattern! You could comment below or tag me on Instagram with the tag #martamitchelldesigns. This pattern is now available as a free pdf download from Ravelry.com!
Happy hooking!
Marta xx


