Monday, 2 April 2018

Updated Pattern: Easy Wrist Warmers

Hello! Today I would like to share an updated version of one of my first free crochet patterns - Easy Wrist Warmers. I wrote this pattern back in 2015 and after pattern testing for a friend of mine last week - also wrist warmers - I went back and had a look at this pattern. I hadn't realised how much my pattern writing stye had matured in such a short time; this pattern was not only clumsily written but had a few small errors in it too! Oooops!

Easy Wrist Warmers, adult small with fluted edge

Over the last couple of days I have tweaked the pattern, worked the first rounds of the original pattern (written only in 1 size), added a small and a large size to the range, included a measurements and yarn quantities table, added a second option for the finish around the knuckles and taken more up to date photos in keeping with my current style.

original wrist warmers in pale lilac with the shell edging

My up to date pattern is still free to download from Ravelry, you can find it together with all my other patterns here. These wrist warmers are the perfect project for a beginner or a speedy make for the more advanced crocheter. The adult small size requires only 1x 50g ball of Debbie Bliss cashmerino DK, the adult medium and adult large sizes will require 2x 50g balls of the same yarn.

detail of the seed stitch pattern

If you follow my pattern please share your progress and finished phtos on social media, I would love to see your makes!

Marta xx


Thursday, 22 February 2018

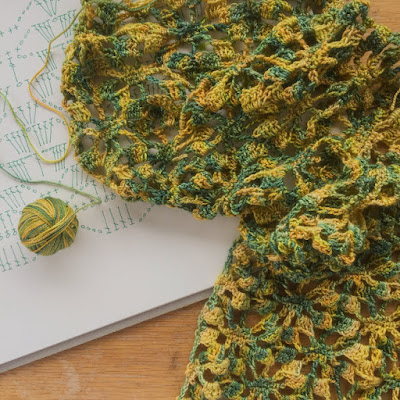
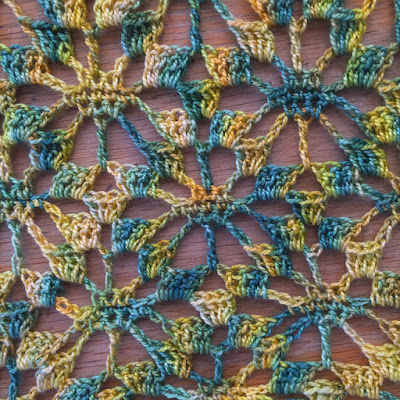
Daffodil Shawl update


Hello! I have been doing a real mix of creative things lately including bullet journalling, drawing, learning to make barista style coffee, chalk board lettering, baking and of course crochet!! Today I wanted to update you on my Daffodil Shawl design progress because I have just finished crocheting the shawl this afternoon!

I started this design in mid January and very quickly worked up 2 of the 3 skeins of Koigu Mori I had set aside for it (see previous blog post with a review of this gorgeous yarn here). For some reason I then became caught up in other projects and this shawl took a bit of a back seat (this often happens with projects - my attention can be quite fleeting!). When I went back to it last week I realised that I wasn't happy with the proportion of the shawl - worked width-wise, it was far too skinny and scarf like! My initial yardage calculations must have been a bit off and it turned out I did have enough yarn to increase the width by 33%, a significant difference, so ... I unravelled the scarf right back to the beginning ...

the moment of realisation, a lot of stitches to unravel ...

I began working up the new dimensions straight away and was very quickly back on track. As you can see in the above photo, I have worked on a chart to accompany the written pattern for this scarf too. In fact, the pattern writing part of the design process is almost complete, I only have a few details to add and then it will be ready for testing.

back on track and first edge complete

next step: blocking!

In other news I found out yesterday that my blog has made it into the Top 50 UK Crochet Blog list! You can see all the blogs listed here and there is so much inspiration, it's well worth a look. This has given me just the encouragement I need to carry on doing what I am doing here, so thank you everyone for stopping by to see what I get up to with my hook and yarn!

Happy hooking,

Marta xx


Thursday, 8 February 2018

Guest Blog Post by Kathryn Vercillo

Hello! Today I am excited to bring you a post by my very first guest blogger, Kathryn Vercillo! If you are a crochet fan and an instagrammer you will probably know Kathryn through the amazing crochet community she has brought together on Instagram via her hashtag #crochetconcupiscence (currently sitting at 55,167 posts!). Kathryn frequently updates her blog too - if you are new to crochet, Kathryn has written an in-depth article covering everything you need to know here.

image @Kathryn Vercillo

I have asked Kathryn to write a post addressing the differences between UK and US crochet terms, something which can often get people in a bit of a muddle. I frequently receive emails from people following one of my patterns stating that they are following the instructions and it looks nothing like my photos. Usually when I ask them to send me a picture of their work I can instantly see that they are using the incorrect crochet terms (even though my patterns clearly state which to use). So, if this sounds familiar to you, read on ...

"One of the first things that you need to look at as you begin a crochet pattern is whether that pattern is written using UK crochet terms or US crochet terms. Although the words are the same, the crochet stitches are different in each of these languages, so if you crochet a project based on a wrong assumption about which terms are being used then chances are your gauge for the project will be way off. Luckily, once you know the differences between UK and US crochet terms, you’ll discover that it’s easy to adapt one pattern to the other if you need to.

Basic Differences Between UK and US Crochet Terms

The basic crochet stitches are named for their height, but those names differ between UK and US patterns. The shortest stitch (other than a chain or slip stitch) is called a “double crochet” in UK language but a “single crochet” in US language. From there, the stitches keep getting taller, so the next one up in the UK is a treble but in the US, it’s a double.

Notice, that means that there is a “double crochet” in both languages. However, the UK “double crochet” is a shorter stitch than the “US” double crochet. Let’s look at how to crochet each of these stitches to gain a better understanding:

UK Double Crochet

  • Yarn over twice
  • Insert hook into stitch
  • Yarn over and pull through
  • Yarn over and pull through two loops
  • Yarn over and pull through two loops
  • Yarn over and pull through two loops

US Double Crochet

  • Yarn over
  • Insert hook into stitch
  • Yarn over and pull through
  • Yarn over and pull through two loops
  • Yarn over and pull through two loops

There is an extra “yarn over and pull through” in the UK version because there is an extra “yarn over” at the beginning. This makes the UK double crochet a taller stitch than the US double crochet (and the same height as a US treble crochet).

This can all seem very confusing at first, but you do get used to it. It really isn’t all that different from traveling between the US and Europe. In Europe, you enter a building on the ground floor and take the elevator one floor up to the “first floor”. In the United States, the floor you enter on is called the first floor and when you take the elevator up one flight you’re on the second floor. In other words, the European first floor is the US second floor. It seems confusing at first but travel enough and it becomes second nature. It’s the same way with crochet.

image @Kathryn Vercillo - UK double crochet/ US single crochet

image @Kathryn Vercillo - UK treble crochet/ US double crochet


Guide to UK vs US Crochet Stitches

Now that you have a basic understanding of the difference between UK and US crochet stitches, here is a helpful guide to the basic stitches in both languages.

UK Term vs US Term

Double crochet vs. single crochet
Half treble crochet vs. half double crochet
Treble crochet vs. double crochet
Double treble crochet vs. treble crochet

So, let’s say that you are reading a UK crochet pattern that calls for a “half treble crochet”. If you are used to working in American terms, you will mentally convert that to a half double crochet stitch and proceed with the pattern accordingly.

A Few Other Things to Know

  • Slip stitch and chains are the same in both UK and US terminology.
  • Techniques are also usually the same across languages; the “magic loop” for example is the same in UK and US patterns.
  • The abbreviations are the same in both languages. Double crochet is always dc, it just refers to a different height of stitch in UK vs US patterns. 
  • In contrast, the symbols used in symbol charts match the height of the stitch, not its name. So, an X on a UK chart means a UK double crochet but the same X means a UK single crochet. The symbol for a US double crochet is a T with a line across the middle.
  • There are a few other words that might be different between UK and US patterns. For example, what is typically called “tension” in UK patterns is called “gauge” in US patterns; what is called “skip” in the US is “miss” in the UK.
  • Australian crochet patterns typically use UK terminology.
  • Many crochet pattern designers offer their patterns in both US and UK language so check to see if your desired pattern is available in the language you prefer.


This is a guest post by Kathryn Vercillo, blogger at Crochet Concupiscence and author of several books including Crochet Saved My Life and Mandalas for Marinke."


image @Kathryn Vercillo 


So, a big thank you to Kathryn for being my first guest being my first guest blogger! I hope this post has been useful for you - if you have any questions about UK vs US terms, please leave them in the comments below. If you are interested in being a future guest blogger, please get in touch!

Happy hooking,

Marta xx


Tuesday, 30 January 2018

Pattern Release: Saturday Beanie

Hello! At the start of the year I challenged myself to release 1 crochet pattern per month and with just a day and a half until the end of January I have left it pretty close this month but I have made it, yay! My first pattern is a super-quick-to-crochet beanie style hat worked in extended double crochet stitches (UK terms). If you haven't tried this stitch before you are in for a treat - it's a gorgeous variation on the traditional double crochet stitch.

Saturday Beanie cover photo

I have designed this hat using Cascade Yarns Boliviana an aran weight merino yarn (175m/100g) which I have just discovered has been discontinued! However, as my testers have found the hat will work up all sorts of different aran weight yarns including Rico Essentials Soft Merino and James C. Brett Aztec. Have a look at yarnsub.com for inspiration or have a look online for websites selling discontinued stock at reduced prices!

close up of ribbing

The ribbing is worked in rows of back loop only (BLO) stitches to add stretch and texture. The pattern is available in 4 sizes; toddler, child, woman and man. With an intermediate knowledge of crochet it is very simple to customise the pattern to get the perfect fit. Worked in 1 solid colour, requiring only 1 ball of yarn for toddler to woman's size, the single colour really helps to show off the simple sitches. 

my youngest son took this photo of me on the hat's first outing

The pattern will be available at half price (ONLY £1.80!) for 1 week only - you can find it to download as a pdf in my Ravelry Store

I do hope you like my first pattern of 2018, I am looking forward to lots more pattern releases throughout the year!

Happy hooking,

Marta xx


Wednesday, 24 January 2018

Yarn Review: Koigu Mori

Hello! Today I am going to review a recent addition to my yarn stash - Koigu Mori. I bought 3 skeins of this amazingly soft yarn from loveknitting.com in their January sale and when I opened my parcel I did a little dance because it was stunningly beautiful!

skeins of Koigu Mori with some sunny daffodils

The colours in the yarn instantly made me think of daffodils - of both their flowers and their folliage - the perfect colours as we look forward to Spring in the northern hemisphere. I chose colourway 533 (they are all numbered rather than named) for its fresh look but there is a massive range of colours to choose from, both variegated like this one and solid colours. You can view the entire collection on the Koigu website here.

The composition of the yarn is 50% merino wool and 50% mulberry silk giving it excellent stitch definition and a luxurious sheen. The silk content makes it wonderfully lightweight and drapy so an idea began to form in my head for a scarf design. Inspired by a swatch in a 70s crochet book I began to play with a filet pattern which incorporated a daffodil like motif. 

early stages of the design process

The yarn worked up beautifully without snagging or splitting and the stitches stand out really prettily. The colour changes in the variegated yarn are very short producing a mottled rather than a stripy effect which I like. 

fast progress on this shawl

Based a few hours outside Toronto, Canada, Koigu Wool Designs is a small family run business. It started up specialising in 4ply 100% merino and the demand for this yarn became so great that the business expanded and introduced other bases, still focusing on 4ply something which makes the brand stand out. Today the yarn is a vailable worldwide.

wonderful stitch definition

So, my plans are to continue with this scarf design, write it up, send it to testers, do the final edit and then share it with you in time for Spring!

Happy hooking,

Marta xx

NB. This blog post has not been sponsored by Love Knitting or Koigu, the viewpoints are entirely my own.


Wednesday, 17 January 2018

My creative January so far ...

Hello and Happy New Year! My first blog post of the year is all about my creative adventure so far this month and a look ahead at the ideas I have for the rest of the year. Firstly, I have renewed my commitment to bullet journaling with a shiny new notebook from Paperchase. So far, it's going really well and I have had lots of hand lettering and layout practice. The size of this notebook is 26cm x 20cm which is almost twice the size of my previous one and I am finding the extra space brilliant for jotting down more ideas and giving more room for my weekly Bible quotes. Of course it hasn't all gone smoothly - I spent an hour on some lovely lettering for my "January 2018" title page only to discover as I stood back to admire it that I had stupidly titled it 2017!! However, I fixed it in a creative way, allowing this to be the start of many errors because if I sought 100% perfection I would never put pen to paper in the first place!

going with the flow!

Here's another photo showing my weekly spread at the end of Week 1. I have also been sharing lots of photos over on Instagram and adding the ideas which work best to my Pinterest board. If you want to find out more about the bullet journaling craze, check out this video.

bullet journal, Week 1

I have been doing lots of crocheting too of course! I began the year by finishing a pair of socks that I began on Boxing Day. They were a stash busting project, following Joanne Scrace's Mamble Socks pattern. I found it a really relaxing pattern to follow, perfect to crochet along whilst watching family movies! I finished them last week and they fit my youngest son's fast growing feet (he's currently a UK 11 and they're not stopping there so I have allowed for some growth room).

my stripy Mamble Socks

My next crochet project was a continuation with many of the 4ply colours from the socks. I decided to make a doll from Kerry Lord's Edward's Crochet Doll Emporium book - a book I have had on my shelf since October but not made anything from. My first doll is for my very best friend Gwen and I am trying to make it look like her!

crochet work in progress (WIP)

The third crochet project of the year is a new design - a filet crochet shawl, crocheted in Koigu Mori a 50% merino/ 50% mulberry silk 4ply yarn. This yarn is one of the smoothest, softest yarns I have ever squished and I can't wait to share more of this project in a future email. If you haven't come across Koigu yarn before check out their website for an absoloute feast for the eyes!

new shawl design underway

So, after a good start to the year, I have lots of plans to continue my creative journey - a new crochet pattern to be released once a month, more bullet journaling - possibly with printables for downloading, maybe even crochet workshops and plenty of blog updates!

Until next time,

Marta xx


Friday, 29 December 2017

Free Crochet Pattern: Cosy Icicles Beanie

Hello! As promised I am back with my 3rd pattern release in a row - this time my Cosy icicles Beanie! I designed this slouchie hat for Crate Crochet, an australian crochet subscription box company, for their May 2017 box (timed for the southern hemisphere's winter). As well as being available in my Ravelry Store to download as a FREE pdf, I am going to publish the pattern right here in this blog post ...


Cosy Icicles
Slouchy Beanie Hat Crochet Pattern

A two colour slouchy beanie hat, crocheted in the round using
a mix of double crochet stitches and spike stitches. I have
chosen Morris & Sons Empire for this design firstly because it
is soft and gentle against the skin and secondly because it
gives excellent stitch definition for the spike stitches. The hat
is worked from the brim to the crown and finished off elegantly
with a faux fur pompom.

This is an INTERMEDIATE level pattern, written in UK terms.

You will need ...
3 x 50g balls of Morris & Sons Empire, (a 10ply merino, 90m/ 50g) in the
following colours;
Kingfisher x2 (colour A) and Glass x1 (colour B)
faux fur pompom
thread for attaching pompom
5.5mm crochet hook
large needle for sewing in ends
sewing needle for attaching pompom
stitch marker or scrap yarn to keep track of rounds

You can buy Morris and Sons yarn here directly from their yarn store and it's
currently on sale!

Tension
17 stitches x 20 rows per 10cm  (main pattern, in rounds)

Finished Size
Brim circumference; 54cm
Length (excluding pompom); 27cm

Abbreviations (UK terms)
ch chain
ss slip stitch
dc double crochet
dcSp double crochet spike (see notes)
dcBrim double crochet into brim (see notes)
dc2tog double crochet 2 stitches together
dec decrease
inc increase
cont continue
st stitch
beg beginning
rep repeat

Notes
Spike stitches are like long double crochet stitches: in this pattern, instead of
working into the stitch in the row below work into the stitch 2 rows below. Here
is a link to an excellent photo tutorial if you are new to this technique
https://www.craftsy.com/blog/2013/10/crochet-spike-stitch-tutorial/

The spike stitches in Round 3 (dcBrim) is worked right around the brim of the
hat; bring hook from front to the back under the brim of the hat: yarn over, pull
yarn up a loop to the height of the new round (2 loops on hook), insert hook
into dc stitch, yarn over, pull up a loop (3 loops on hook), yarn over, pull
through all 3 stitches. 1dcBrim made. Top tip: It is important to keep a very
even tension throughout this round to create a smooth effect on the brim, do
not attempt this section if you are stressed out or distracted!

Invisible decreases are an excellent way to decrease in crochet. In the pattern
where I have indicated dc2tog: insert hook through front loop only (flo) of 1st
stitch to be decreased (2 loops on hook), do not yarn over, insert hook through
flo of 2nd stitch to be decreased (3 loops on hook), yo, pull through 2 loops
(2 loops left on hook) yo, pull through both loops. 1 invisible decrease made.
If you are new to crochet and want to keep things simple, dc2tog in the standard
way. Here is a link to a blog post with a photo tutorial - it uses the US term single
crochet to describe the UK double crochet stitch but the photos are so clear this
should not matter. http://www.allaboutami.com/invisibledecrease/

It may help to have a stitch marker or contrasting length of wool to mark the
beginning of each round.

Top tip: when changing yarn colours there is no need to cut the yarn, simply

carry it up on the inside for when it’s next required, ensuring that it is neither too
tight, or too slack to keep the tension even. I do however recommend cutting
yarn B at the end of Round 21 before the larger block of colour, it’s a bit too long
to carry up.


Pattern

Using A, ch 81, ss into first ch to form large ring (top tip: make sure it is not twisted!)

Round 1  ch1, 1dc into next ch, 1dc in each ch across, ss into ch1 at beg of round (80dc)

Round 2  ch1, 1dc into each dc around, then changing to B, ss into ch1 at beg of round

Round 3 (cont B) ch1, *1dc in next dc, 1dcBrim working over next st and round brim* rep from * to * until end of round, ss into ch1 at beg of round

Round 4 ch1, 1dc into each dc around, ss into ch1 at beg of round  
Round 5  ch1, 1dc into each dc around, then changing to A, ss into ch1 at beg of round
Round 6 (cont A) ch1, *1dc in next dc, 1dcSp in next dc in Round 4* rep from * to * until end of round, ss into ch1 at beg of round
Round 7 (inc) ch1, *1dc in each of next 3dc, 2dc in next dc* rep from * to * until end of round, ss into ch1 at beg of round  (100dc)
Round 8 - 9 ch1, 1dc into each dc around, ss into ch1 at beg of round
Round 10 ch1, 1dc into each dc around, then changing to B, ss into ch1 at beg of round
Round 11 (cont B) ch1, *1dcSp in next dc in Round 9, 1dc in next dc* rep from * to * until end of round, ss into ch1 at beg of round
Round 12  ch1, 1dc into each dc around, ss into ch1 at beg of round
Round 13  ch1, 1dc into each dc around, then changing to A, ss into ch1 at beg of round
Round 14 (cont A) ch1, *1dc in next dc, 1dcSp in next dc in Round 12* rep from * to * until end of round, ss into ch1 at beg of round
Round 15 - 17 ch1, 1dc into each dc around, ss into ch1 at beg of round
Round 18 ch1, 1dc into each dc around, then changing to B, ss into ch1 at beg of round
Round 19 (cont B) ch1, *1dcSp in next dc in Round 17, 1dc in next dc* rep from * to * until end of Round, ss into ch1 at beg of round
Rounds 20 ch1, 1dc into each dc around, ss into ch1 at beg of round
Round 21 ch1, 1dc into each dc around, then changing to A, ss into ch1 at beg of round. Cut yarn B
Round 22 (cont A) ch1, *1dc in next dc, 1dcSp in next dc in Round 20* rep from * to * until end of round, ss into ch1 at beg of round
Rounds 23 - 35 ch1, 1dc into each dc around, ss into ch1 at beg of round
Round 36  ch1, 1dc into each dc around, then changing to B, ss into ch1 at beg of round
Round 37 (cont B) ch1, *1dcSp in next dc in Round 35, 1dc in next dc* rep from * to * until end of round, ss into ch1 at beg of round
Round 38 (dec) ch1, (1dc in each of next 8dc, dc2tog) 10 times, ss into ch1 at beg of round (90dc)
Round 39 ch1, 1dc into each dc around, ss into ch1 at beg of round
Round 40 (dec) ch1, (1dc in each of next 7dc, dc2tog) 10 times, ss into ch1 at beg of round (80dc)
Round 41 ch1, 1dc into each dc around, then changing to A, ss into ch1 at beg of
round
Round 42 (cont A) ch1, *1dc in next dc, 1dcSp in next dc in Round 40* rep from * to * until end of round, ss into ch1 at beg of round
Round 43 (dec) ch1, (1dc in each of next 6dc, dc2tog) 10 times, ss into ch1 at beg of round (70dc)
Round 44 ch1, 1dc into each dc around, ss into ch1 at beg of round
Round 45 (dec) ch1, (1dc in next 5dc, dc2tog) 10 times, ss into ch1 at beg of round (60dc)
Round 46 ch1, 1dc into each dc around, ss into ch1 at beg of round
Round 47 (dec) ch1, (1dc in next 4dc, dc2tog) 10 times, ss into ch1 at beg of round (50dc)
Round 48 (dec) ch1, (1dc in next 3dc, dc2tog) 10 times, ss into ch1 at beg of round (40dc)
Round 49 (dec) ch1, (1dc in next 2dc, dc2tog) 10 times, ss into ch1 at beg of round (30dc)
Round 50 (dec) ch1, (1dc in next dc, dc2tog) 10 times, ss into ch1 at beg of round (20dc)
Round 51 (dec) ch1, dc2tog until end of Round, ss into ch1 at beg of round (10dc)
Cut yarn, leaving a 15cm tail. Thread yarn on tapestry needle, weave through each of the 10dc of last round, pull to close gap, finish off to secure on the inside of hat.

Finishing off
Weave ends in on reverse. Using sewing thread attach faux fur pompom securely.


I do hope you enjoy following this pattern. Please share your projects with me on Ravelry or on Instagram (add the hashtag #mrsdaftspaniel and I will be sure to see it).

Happy hooking,

Marta xx


Need a quick last minute crochet gift idea?

Hello!  Are you in need of a quick, last minute crochet gift idea?  Don't stress, I have you covered! Here are 3 of my favourite quick m...