Thursday, 14 December 2023

Join Me For Vlogmas - New Video Every Day!

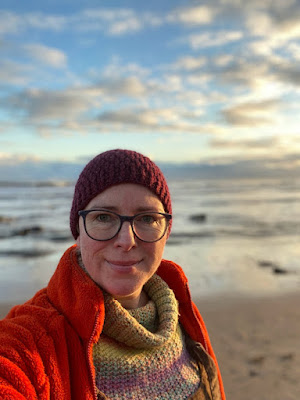
Selfie of a middle aged woman, on the beach, wearing a wooly hat, wooly jumper and fleecy coat


Hello! This year, for the first time ever, I'm joining in with vlogmas!! It's an idea that my dear friend Claudia casually dropped when she said "are you doing vlogmas?" in our recent Instagram live. I replied, "er ...? I haven't thought about it", but the idea was planted and a few days later I was recording my first episode!

For those of you who don't know, vlogmas is a series of (usually daily) video vlogs in the run up to Christmas. Some even continue to the end of December, since it's my first year I think I'll stop at the 24th, but I may combine a few days and upload one more between Christmas and New Year, we'll see. It's always good to have a nosey at how other people celebrate Christmas, right?

So far, my episodes seem to have gone down well. Looking at my YouTube anaylitics the view duration is good and I'm gaining far more subscribers than usual. I can also see that I have a high percentage of returning viewers on these episodes, so I'm really happy about that. I'm a realitively young channel and this past year I feel that I'm beginning to find my voice and I can see an improvement in my videos. I have plans for next year, but I'll keep them up my sleeve for now!

If you haven't been watching, click the link to view here. Episodes are around 10 to 15 minutes long, nice little bite size videos for you to dip into!


close up of a crocheted shawl in progress. Colours are muted greens and browns


If you've been with me since the start of the year, you may rememeber that I started saving up £2 coins to buy a yarn Advent calendar. This was a brilliant idea, I counted up the other day and I have £158 in my little felted pouch! Obviously, the claendar had to be paid back in April, but it just goes to show that these coins soon add up and they're not missed from your wallet. I'm going to keep doing it in future because I LOVE my yarn Advent calendar so far!
 
I chose The Hobbit themed calendar from Skein And The Stitch and so far the colourways have been stunning! Each day follows the story of Bilbo's adventure through the book and the colourway corresponds to what he gets up to. We started with fresh greens of the Shire and today's was a very dark grey to symbolise the goblin cave he's currently stuck in.
 
So, the format of my vlogmas is to film a short clip first thing in the morning with me opening the advent calendar, film a few snippets of my day, then film a concluding bit at the end of the day - usually showing off the shawl I'm crocheting (above) with the latest colourway worked in. 
 
If this sounds like your kind of thing, please check it out here, I'm sure you'll enjoy it!

Until next time, happy crocheting,

Marta xx

Thursday, 7 December 2023

New Pattern Published In The Journal Of Scottish Yarns!


Hello! I'm really pleased to be able to share one of the secret projects I was working on in June this year - I have a new pattern published in The Journal Of Scottish Yarns!

It's called the Sunset Song Top and it's a vest style sweater which can either be worn alone or used as a layering piece. I took my inspiration from the many beautiful sunsets I watch from my window as I crochet and from the novel Sunset Song by Lewis Grassic Gibbon.

I'm especially happy with the styling on this one and the way the garment suits both men & women and both young & old; it's very adapdable depending on the look you're going for!

I chose a lightweight yarn from J. C. Rennie, their Supersoft 4ply which is 100% wool, in 3 colours to create the look. The garment is crocheted from the bottom up in 2 pieces which are worked flat and then seamed together using mattress stitch. Instructions have been carefully graded for 9 sizes - a big thank you to the tech editor Samira Hill for her help with this.


In the photo above you can see the beginnings of my design journey. When I started the ribbing worked out exactly as planned and then I swatched to see if the stitch idea I had would work well in the J. C. Rennie yarn - looking particularly at the drape and stretch. I was pleased with this so went ahead with stitch and row calculations for the body of the top.

 
All in all, I'm chuffed with how this design worked out. There's opportunity to go as wild as you like with the colours or to go super simple and crochet it all in one colour! Like I said last week - the choice is yours! 
 
You can buy The Journal of Scottish Yarns, issue 4 on their website and in many local yarn shops in Scotland and beyond.

Until next time, happy crocheting,

Marta xx
PS. Be sure to tag me on social media if you make a Sunset Song Top!

Wednesday, 29 November 2023

How To Add Your Personality To Your Crochet Projects


Hello! As a crochet designer, I love nothing more than to see others following my patterns and creating something from them with a touch of their own personality. We're all unique and the choices we make will lead to us creating something different from everyone else, even if we follow the same pattern. 

Yarn choice is an obvious example. There are all sorts of reasons for not choosing the same yarn the designer did (eg. stash busting/ budget/ availability) and this is probably one of the biggest ways to crochet your project differently.

Then there are decisions such as sleeve length on a jumper, number of rounds on a hat or how big to make a blanket. There are even more subtle options if we start to think about the number of stripes or how many repeats we do.

I haven't even started on colour choices yet - that throws things wide open! 

Can you see how one pattern can be crocheted up in millions of different ways? 

If you're looking for guidance to adding your own personality  I actually list 4 or 5 options at the end of my designs with ideas for getting you started. As an example, here are the ideas to personalise your Perth Beanie (a free pattern here on my blog):

  • Use 4ply yarn and add more increases to create a finer version of the hat.
  • Use a second colour for the brim.
  • Can you design something else entirely using the Alpine Stitch pattern? (I’ve given you the instructions for working in rows in the Tension section too).
  • Gillian, one of my testers, suggested making the brim section extra long and then wearing it doubled over.
  • Simply add a pompom!

If personalising in this way is something you're keen to start doing, check out my crochet patterns today and take the first step towards being more creative!

Don't want to miss my posts? Subscribe to my mailing list today and have them delivered staright to your inbox. 

Until next time, happy crocheting,

Marta xx

Wednesday, 8 November 2023

Mother-daughter Getaway In Amsterdam!


Hello! I'd like to share a little about my recent trip to Amsterdam with my mum - what an amazing trip that was! We sailed on the overnight ferry from North Shields just outside Newcastle to IJmuiden just outside Amsterdam. It rained non-stop on our first day which spoiled things a little but we still found our way (after many wrong turns!) to Stephen & Penelope - the yarn shop which inspired the whole trip!

The shop was absolutely everything we'd hoped it would be. The yarn was all set out beautifully: there were samples hanging everywhere for you to see; the staff were super friendly, knowledgeable & helpful; they had all sorts of notions and books; AND it was dry inside - a welcome haven from the rain!

I bought 2 skeins of yarn and a few souvenir bits and pieces - I was very restrained, but I've never been one for keeping an extensive stash! Before I went, I knew I wanted a skein of Tandem from West Yarns, but when I got there the colour range was so vast I almost couldn't choose! With help from my mum I chose a colour I wouldn't normally go for - Dijon - a mustard/ olive colour which is very autumn! With this DK merino skein I plan to design a crocheted hat. I'm beginning to see the pattern forming in my head, will give it time to develop before I begin. 

The other skein was from a German dyer called Punk Rock Unicorn whom I had heard of via Claudia (Sunbird Crochet) and others. Her yarns did not disappoint either - the colours were stunning! I was looking for some colour changing yarn to knit socks and I chose something bright and colourful - can't wait to see how it knits up! 

My other purchases were a wooden needle gauge and a trio of notions nests. Two very practical items to keep as souvenirs and remind me of my trip to Amsterdam with my mum.


After our Stephen & Penelope visit we grabbed some very sweet and indulgent waffles smothered in Nutella and broken Oreo pieces - YUMMY! We continued exploring until it began to get dark and we found a cosy Italian restaurant for dinner. Everyone we came across in Amsterdam was so friendly and helpful, it's such a lovely city to be in. 

Back at our hotel we took our knitting and crochet to the bar area in the hotel and unwound over some wine, chatting all about our day and planning the next day.

The following day (also our last day, it was a whirlwind trip!) the rain had stopped and it was so good to see everything properly! We headed to the Rijksmuseum via the Metro - what an amazing museum! I think you could spend a week inside there and still not see everything! I really enjoyed the paintings by Rembrandt and the more modern exhibits, including a dress by Yves Saint Lauren.

There was time to squeeze in some more coffee & cake and a little more wandering (gazing at canals never became dull!) before it was time to meet up with our bus for the drive back to the ferry. If you ever have the opportunity, I'd definitely recommend a trip to Amsterdam! Stephen & Penelope yarn shop is delightful and the rest of the city is too!

If you'd like to receive my blog posts staright to your inbox, please subscribe to my mailing list. You'll be sent my free pdf 25 Top Tips Every Crocheter Needs To Know when you do! 

Until next time, 

Marta xx


Monday, 30 October 2023

Wise Words From My Nana


Hello! When I was a girl I would spend a week every summer holidays staying with my Nana who lived 2 and a bit hours away by car, down in in the Scottish Borders. For me this was a magical time because it was just the two of us and my Nana really encouraged me to be creative.

One of my favourite things to do was to spend the whole week making teenie tiny things for my dolls and doll houses. Everything was thrifted! I reused the tiny Kellog's cereal boxes to make wardrobes. I glued together bits of tinfoil from sweetie wrappers to make ornaments. I used scraps of material from my Nana's stash to sew clothing and bedding - sewing on her vintage, hand-turned Singer sewing machine of course!

These were such happy days. My Nana was always so full of encouragement and kept coming up with creative ways to reuse things which would otherwise be thrown away. She had a cupboard called her Glory Hole which she used to store all these treasures, because she said "you never knew when this might come in useful".

Today, I definitely have my Nana's wise words in my head when I snip off ends of yarn and store them up for stuffing or when I stash away little oddments of wool for making a scrappy blanket. It's all just too good to throw away!

Crocheting and knitting scrappy blankets has become something I LOVE to do and I'm sure my Nana had a big influence on this way of working. I've even written 3 patterns for crocheted scrappy blankets and all 3 are available on this blog, for FREE!


In this blog post I'm going to highlight my Scrappy Blanket II, but if you pop "scrappy blanket" into the search bar above you'll find all 3 free patterns.

I crocheted my sample in 4ply/ sock weight yarn but if 4ply yarn isn't your thing, fear not! I've done the maths to enable you to create this blanket in 4ply, DK, aran and chunky! Not only that, I also took the time to calculate the number of stitches & rows for 5 different sizes of blanket, from pram to single bed size!
 
Take a look at this stunning blanket via the link below, start saving up your scraps if you haven't already, and get crocheting!

Until next time, happy crocheting,
Marta xx
 

Friday, 20 October 2023

Help Me Choose My Next Design!


Hello! That's right, I need your help to decide which way forward I should go with this design! On day one I started crocheting and it was going to be a new sock design - I was super pleased with the way the stitches looked in this yarn. All was well and going to plan!

Then on day 2, I was on a live Instagram chat with Claudia (@sunbirdcrochet across social media) and when I went to share my progress with Claudia I popped the sock on my hand to show it off better. Suddenly I thought "oh, this could be a mitt design!"

So, you see my dilema? I'm not going to produce both designs, for me it's a one or the other situation - but which one? I put a poll on my Instagram stories asking my followers there to decide and the result was a 50/50 split, aaarrgghhhh! I'm hoping you can give me a clearer answer because right now my head is a muddle and I can't choose!

If you're wondering, I'm using one of Zauberball Crazy colourways from Schoppel (no. 1153 to be specific!). It's 75% virgin wool, 25% nylon 420m/ 100g ball.

Click this link to my super quick Google form and cast YOUR vote. Thank you in advance for your help!


Marta xx

Monday, 16 October 2023

6 Tips For Better Crochet Photography

Image shows a large russet coloured sunflower beside a close up of a piece of crochet in progress


Hello! I'm here in this post to share my 6 top tips for better crochet photography because in the last week or so I've put in more of an effort to take better photos and it's paid off because I've seen an increase in reach and engagement on social media, yay!

As you know, crochet is such a beautiful craft, and it's only natural that we should want to share our finished projects with the world! But taking good crochet photos can be troublesome, especially if it's not something which comes naturally to you.

Here are my 6 tips to help you take better crochet photos:

1.  Use natural light. Natural light is ALWAYS the best light for photography, so try to take your photos outdoors or as near as you can to a window (if that means rearranging the furniture, do it!). However, avoid using direct sunlight, as this can create harsh shadows. Instead, opt for soft, indirect light. I have thin blinds in my photo spot which I can pull down to diffuse the light. A piece of muslin taped to the window would work well!

2.  Choose your background wisely. The background of your photo is just as important as the crochet project itself. Choose a background that is neutral and uncluttered, so that your crochet project stands out. Try using a plain white or light-coloured wall, or a piece of fabric. If you're outside, brickwork, folliage, on the beach, large doorways are all good options.

3.  Stage your photo carefully. Once you have chosen your background, take some time to stage your photo,  arranging your crochet project in a way that is visually appealing. You may want to use props to help showcase your project, such as a basket of yarn, crochet hook, cup of coffee, seasonal objects that resonate with your viewers.

4.  Use the right camera settings.  If you're using an up-to-date smartphone camera, you can adjust the exposure and brightness settings (Google or YouTube are your your friends here if you need to learn). If you're using a DSLR camera, take some time to learn about the different manual settings. You'll need to adjust the aperture, shutter speed, and ISO in order to get the best possible photo (again, you know where to go for help!)

5.  Take multiple photos. Don't be afraid to take multiple photos - this will give you more to choose from when you're editing your photos. Try different angles - you may be surprised at how different angles can change the look of your photo.

6.  Edit your photos. Once you've taken your photos, it's always worth editing them to make them look their absolute best. There are many different photo editing programs available, both free and paid. You can use these programs to adjust the brightness, contrast, and colours of your photos. You can also use them to crop and straighten your photos, and to remove any unwanted objects. My favourite editing app is called Snapseed - it's FREE!

Here are a few bonus tips to keep in mind:

  • Use a tripod to keep your camera steady. This is especially important if you're using a DSLR camera or if you're shooting in low light.
  • Be sure to focus on your crochet project, not your props. Make sure that your project is in sharp focus, the star of the show, and that the background is slightly blurred.
  • Have fun! Taking crochet photos should be enjoyable. And never be afraid to experiment and try new things.

With a little patience & practice, you'll be taking beautiful crochet photos in no time! Of course, if you're taking a photo of a crochet project made following one of my patterns, don't forget to tag me when you share it so I can see! 


Until next time, happy crocheting and happy snapping!

Marta xx

PS. Are you subscribed to my mailing list? My emails are packed with info and a few free patterns too! You can sign up here.

PPS. I have another blog post all about flatlay photography - if you'd like to dive deeper into that, click here.


Need a quick last minute crochet gift idea?

Hello!  Are you in need of a quick, last minute crochet gift idea?  Don't stress, I have you covered! Here are 3 of my favourite quick m...