Wednesday 26 August 2015

Free crochet pattern; wave pattern beanie hat

This beanie hat pattern was first published in the "free patterns" section on the Lemonadeyarns shop website. Since then, due to the fabulous increased range in the online shop (seriously, go check it out!), there is no longer room for the free pattern section. I am now able to share the pattern with you here, I hope you like it! 


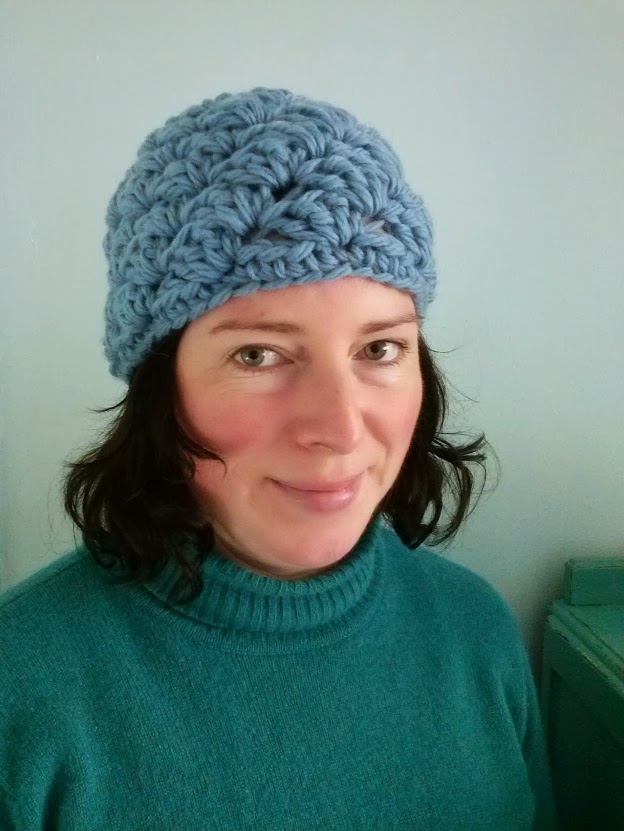
This textured hat is crocheted with super chunky wool and works up really fast. It is worked in the round from the brim to the crown.

Materials

1 hank Erika Knight maxi wool (I used shade no. 32, “steve”)
10 mm crochet hook
stitch marker / contrasting piece of yarn
large needle for sewing in ends

Tension

11 stitches x 4.5 rows per 10 cm²

Abbreviations (UK terms)

ch chain
ss slip stitch
dc double crochet
dc2tog double crochet 2 stitches together
tr treble
prev. previous
beg. beginning

Advice

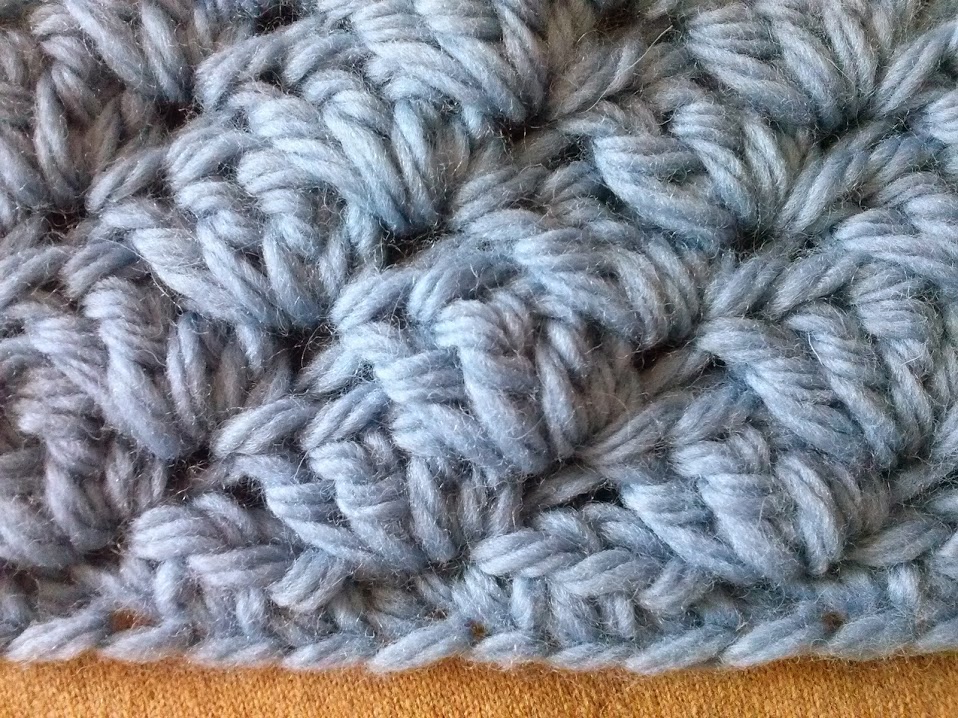
The wave pattern is created by crocheting 4 stitches into the dc of the previous round. It may help to have a stitch marker or contrasting length of wool to mark the beginning of each round.


Pattern

Ch 40, ss into first ch to form large ring (making sure it isn’t twisted)

Round 1  ch1, dc into each ch, ss into ch1 at beg. of round 1 (40 stitches)

Round 2  ch1, *(1dc, 3tr into dc), miss 3dc* repeat 9 times, (1dc, 3tr into ss of round 1), ss into ch1 at beg. of round 2

Rounds 3 - 6  ss into dc, ss into 1st tr, ch1, *(1dc, 3tr into next dc)* repeat 9 times, (1dc, 3tr into ss of prev. round), ss into ch1 at beg. of round

Rounds 7 - 8  ss into dc, ss into 1st tr, ch1, *(1dc, 2tr into next dc)* repeat 9 times, (1dc, 2tr into ss of prev. round), ss into ch1 at beg. of round (31 stitches)

Round 9  ss into dc, ch1, *(1dc, 1tr into dc)* repeat 9 times, (1dc, 1tr into ss of round 8), ss into ch1 at beg. of round 9 (21 stitches)

Rounds 10 ch1, dc, dc2tog to end, ss into ch1 at beg. of round 10 (16 stitches)

Round 11 ch1, dc2tog to end, ss into ch1 at beg. of round 11 (9 stitches) Leaving a long tail, weave in and out of front loops of remaining stitches, pull closed, fasten off.

Finishing off
Secure ends and weave in on reverse side.


Beanniehat.jpg

I can assure you this pattern has been thoroughly tested. I am happy to share it with you for your personal use, but please respect my original design and do not reproduce this pattern or the hat made from it for your own financial gain. Please comment below if you make a beanie hat, I would love to see your projects. Happy hooking!

Wednesday 19 August 2015

Summer Projects

Oh dear, I seem to have neglected my blog over the summer! To help ease myself back into the habit I'll start with this easy post and share a few photos of some of the items I have made over that period.


At the start of the summer I made this 'Sunday Shawl' as a retirement present for my mum.


This is the first childen's garment that I have designed and crocheted.


I made 2 pairs of Happy scrappy Wrist Warmers. This pair is still available in my Folksy shop


I upcycled a handful of curtain pole hoops into cute little brooches, this is one of them.


Not a finished piece of work but a work in progress! This is my 'Sophie's Universe' blanket.


My first ever knitting design! A knitted washcloth with crochet border, in soft linen yarn.


Finally, my latest finished item; a Happy Scrappy Crocheted Scarf. I have just listed this in my Folksy shop 

That is a quick update of what I have been up to. I hope you have enjoyed my colourful photos because colour is such a key part in my creative work! You can keep up with my crafty adventures by 'liking' my Facebook page or following me on Instagram

Saturday 30 May 2015

Adding Colour to the Playground, Part 2

I managed to dodge the heavy showers this week and install the yarnbombs at my boys' school! I did have to run in for cover half way through and there was an extremely heavy shower of rain and hail just after I finished, good timing!

 entrance to the fairy garden

I worked quickly, hoping that I wouldn't be spotted by the children because I wanted them to find the pieces for themselves at lunch time. I sewed the crocheted rectangles around fence posts and willow tunnel branches.

 another fence post piece


 several were sewn onto the willow branches

I had to twist and turn into all sorts of funny positions to fit in the child sized willow tunnel, it was good to stretch full height afterwards!

a much longer yarnbomb

 I love the shrinkies the children coloured!

In another area of the playground I installed 3 yarnbombs with amigurumi monsters attached to them! 

monster yarnbomb 

I crocheted the monsters for fun over 5 years ago without any real purpose in mind for them. Since then they have been moved around my studio space gathering dust. I thought this project would literally breath some fresh life into them!

a happy smile

I hope the children enjoy interacting with these small pockets of colour in their playground. I know they have plans to further transform the area and I look forward to seeing what they come up with!

Tuesday 19 May 2015

Adding Colour to the Playground, Part 1

I was approached by staff at my younger boys' school to add some colour by creating yarnbombs for a small area of the school playground. This project was perfect for me! Primary 1 had made shrinkies with fairy, bug and alien designs on them for me to incorporate into the work. I hope it will be fun for them to go around and find their own mini piece of art combined with something much bigger.


 1st two pieces made, surrounded by shrinkies

I made sure I chose a mix of bright colours which would appeal to both boys and girls. I had plenty of acrylic wool in my stash and the school provided me with some more - I had fun picking out colours!

different textures

I crocheted rectangles of varying sizes and created stripy patterns as a backdrop for the shrinkies. I wanted the pieces to be really eye catching and colourful!

 finished crochet swatch

Once the ends were tied in I sewed on the shrinkies (they had a hole punched through them). Now I have a pile of 8 swatches, ready to be attached to rails, benches and trees in the playground. 

all finished and ready to attach

I plan to visit the playground later this week to sew the pieces in place, depending on the weather of course!! Part 2 of this series will show the finished work ...

Wednesday 29 April 2015

Badge Bombing!!

Last Friday I took a trip to Dundee to go badge bombing for the first time! I went around the centre of Dundee and attached small badges to places for other people to come along, find them and keep them!

the finished badges, day before my trip

For a while now I have been following the adventures of @dymagate and @whimsicallush on Instagram and they both inspired me to leave something small of my own in a public place for someone else to stumble upon. I chose to make little badges with big smiley faces to brighten up someone's day.

 badge left near Dundee train station

I kept the badges simple, just button eyes and an embroidered mouth, and I hand stitched the word "Daft" on the back (my Instagram name is @mrsdaftspaniel but that was too long to stitch!). 

this one made me smile!

There were plenty of places to leave the badges, for example attached to fencing or abandoned cord and I pinned one to a yarnbombed tree!

 I like this one, blending with background colours

I had also brought a sample of weaving with me to sew onto a lamp post or something and I found the bench in the photo below to be the perfect size for it! I sat on the bench and sewed it on during lunch hour, I wonder if anyone even saw me?

and of course I did a yarnbomb!

As soon as I could I uploaded photos of my badge bombing to my Instagram and Facebook pages and was surprised to see that the badges were quickly found by people! Of the 5 badges I placed I know that 3 were found and brought a smile to those who found them, which makes it all worthwhile!

Help me!!

I am already planning my next adventure when I will set another load of badges free! Follow me on Instagram if you would like to stay updated :)


Tuesday 10 March 2015

A little bit of this and a little bit of that!


I've been jumping about from project to project recently and thought I would share a few photos of what I have been up to on here.

I'm still making hexipuffs!


hexipuff blanket so far


my youngest son made the raccoon, I made the fox


started something completely different
 with an embroidery hoop


close up of finished hoop art, it's a present, 
can't show any more just now!


finished deep pile crocheted rug


close up of the rug showing the textured finish

I hope to be back soon with a fresh update. Happy crafting in the meantime! 


Thursday 26 February 2015

New Patterns in Progress!

I have been really busy forming two new patterns over the last few weeks. Both projects use Erika Knight wool, one of my favourite brands due to Erika's strong belief of "treading lightly on the earth and celebrating and supporting traditional British skills". One pattern uses maxi wool, a chunky yarn, similar to Rowan big wool. I decided that I wanted to create something with a lot of texture to really show off the luxurious quality of this wool. 

first night's work

One of the ways that I come up with new ideas for patterns is to look through crochet stitch guides, I have several of them! I use the stitch pattern swatches as a starting point and usually add a twist, eg introducing another colour or changing the number of repeats. In this case I took the astrakhan stitch and changed from working in rows to working in the round. I tried it out using double knitting scrap wool and crocheted up 4 rounds to see if my idea would work - it did! I quickly wound the hank of yarn into a ball (the husband's strong arms work well here) and started work immediately. Because the wool is chunky the pattern worked up quickly and I had a clear idea of the end result.

rug in progress, on my table

In the above photo the rug measures 47cm in diameter and is 5cm deep! I have just ordered fresh supplies of yarn from Wool and Co. in Dundee (http://www.woolandco.co.uk/index.php) and I will finish this with more rounds in the main colour. 

I am having fun with this one!

The other project I am working on is proving to be my trickiest pattern writing challenge so far! It's a small child's cardigan loosely based on a technique Kat Goldin used in her cabled yoke cardigan design where the length of yoke is worked first and the neckline and bodice branch off from there.

original sketch

I am using a stepped pattern with raised trebles for the cable yoke and working it in a contrast colour to give a strong shape to the garment.

starting to branch off from the yoke

Working out the decreases to form the neckline gave me a real headache!! I spent a lot of time scribbling away on a piece of paper, calculator to hand before I got it right! Maths was never my strong point!

success with the decreases

Now I have almost finished crocheting the body and have also moved on to the arms. Without a small child to try this on for me, my next step is to look up dressmakers size guides online to insure the garment has the correct proportions. Despite it's brain exhausting qualities I am gaining great satisfaction from creating something more complicated and hope this is the start of many clothing patterns that I will write.

nearly there!

In other news my child's chevron cowl has passed the first pattern test, thank you again to Anthea at  http://www.talesfrommountpleasant.com/ :)

Crochet and Sustainability: Your Guide to Being More Eco-Friendly

Hello! Are you l ooking for ways to reduce the environmental impact of your crochet? There are so many opportunities to create what we do in...