Showing posts with label crochet advice. Show all posts

Thursday, 14 March 2024

How To Make Do And Mend With Crochet

Text:  4 tips, How To Make Do And Mend With Crochet. Graphic image shows balls of wool with a crochet hook pushed the central one.

 Make Do And Mend With Crochet

Hello! This week I'd like to focus on one of my core values when it comes to crafting: How To "Make Do And Mend"! Crocheting opens up a world of creativity for us, but what about those leftover bits of yarn and those clothes with minor tears? Don't toss them aside, instead embrace the culture of "Make Do and Mend" with crochet. There are many ways that we can make the most of what we have and in this blog post I'm going to share my top 4 tips to breathe new life into your crochet.


1. Conquering the Leftovers:

We've all been there - our project is complete, but now we have a basket overflowing with colorful yarn scraps. These beauties are perfect for creating all sorts of small projects such as amigurumi or hats. You may need to get creative in the way you combine your yarns, but that's all part of the fun! My Air Balloon Beanie is a two colour pattern which could be made in multiple colours to use up your leftovers. Find the pattern on my website here.


2. Patching Up Perfection:

A small snag doesn't have to spell doom. Crochet patches are both a fun and functional way to extend the life of your favourite garments and reduce landfill waste. Choose contrasting or complementary colours to create a unique design element. My Sunshine & Showers pattern set might be ideal for your next cover up! Find the pattern on my website here.


3. Visible Mending Magic:

Embrace the current trend of visible mending! Instead of trying to hide your repair, use contrasting yarn to mend tears in a bold and artistic way. My dad is constantly bringing me his woollen socks to darn and initially I would choose yarns that were similar in colour to the original, but now I just go wild with my colour choices!
Mending in this way adds a personal touch to your clothes and promotes sustainable practices by letting others see your "Make Do And Mend" attitude. Win-win!


4. From Scraps to Spectacular:

Tiny yarn ends don't have to gather dust either; you can turn them into a vibrant scrappy blanket! This classic project is one of my favourites because it's perfect for using up even the tiniest scraps. You can experiment with colour combinations and create a unique masterpiece for your home.
The thing I like most about scrappy blankets is that as I use each yarn I get to remember the original project I used it in. I have 3 scrappy blankets free here on my blog, this is my most recent one but you can use the search bar at the side to easily find the others. 


Don't forget to share your mending journey online! The online crochet community thrives on inspiration and resourcefulness. Share photos of your visible mends or quirky scrap yarn creations. You might inspire others to embrace the "Make Do and Mend" spirit with crochet! Tag me on Instagram @marta.mitchell.designs and I'll share your photos to my stories.
 
By incorporating my 4 tips, you'll save yourself money, reduce waste and also unlock a whole new realm of creative expression. So, dig out those leftover yarns & scraps and get crochetingit's a sustainable and rewarding way to keep your love for crochet thriving.

If you like these tips, please consider signing up to my mailing list, when you do so, you'll automatically be sent my PDF with 25 top tips that every crocheter should know! 


Until next time, happy crocheting,


Marta xx


Monday, 2 October 2023

How To Cheat At Swatching!

Text reads How To Cheat At Swatching, image is of an L shaped piece of crochet in mint coloured yarn with a crochet hook and ball of yarn to the right of it.


Hello! This is one of the best crochet hacks I've ever shared on Instagram, it received a tonne of engagement - How To Cheat At Swatching - and I thought I'd share it with you here in case you missed it (you know how fickle the algorithm can be!).

The hack is simply to crochet an L shape instead of a square, which cuts down on about 30% of the crochet time!

To do this; start as usual & crochet 3 to 5 rows, then start the next row but turn after about 5 stitches, leaving the remaining stitches unworked, crochet into these 5 stitches only until your height is about the same as your width.

A few things to note! 

  • You will need to work less rows for thicker yarn/ more for thinner yarn before beginning the leg of the L.
  • Again, thicker yarn may only need 4 stitches and thinner yarn more like 7 - use your judgment here.
  • This hack is not suitable if you need to get a good idea of drape, simply because there's less fabric to play with.

To watch my reel on Instagram, click here.

If you'd like to dive deeper into the topic of gauge swatches you can read my popular post; 6 Top tips For Better Swatches here.

Learn the rules then break them like a pro! 

Until next time, happy crocheting,

Marta xx

PS. If you'd like even more crochet hacks from me, sign up to my mailing list and I'll send you a pdf with 25 Top Tips Every Crocheter Needs To Know

Thursday, 4 May 2023

My 6 Top Tips For Better Swatches


Hello! If you're new to crochet and not sure what swatching is, it's the process of crocheting a small sample to test your gauge. It's a valuable step at the start of any crochet project, but it's extremely important for projects that require a specific fit, such as garments.

So, what is gauge?

Gauge, also known as tension, is the number of stitches and rows (usually per 10cm) in any piece of crochet. The gauge for each project is determined by the designer and should be found near the top of the pattern instructions.

Why is swatching so important?

I know, I know! It's a step we often want to skip, but there are several reasons why swatching is important.

  • To ensure that your finished piece of crochet will be similar to the designer's finished piece. If it's a jumper for example, this is important - even a small difference in tension can make a BIG difference in the size of your finished project.
  • To make sure that your crochet work will look the way you want it to. Different hook sizes can produce different textures and drapes. The process of swatching allows you to experiment with different hook sizes to find the hook and yarn that produces the results you want.
  • To help stop you running out of yarn. When you swatch and your tension matches up with the designer's tension you can be confident that your yarn use will be more or less the same.

Ok, I'm listening, how do I swatch?

To make a swatch; crochet a square using the yarn, hook size and stitch pattern that you plan to use for your project.

Most patterns will specify the size of swatch that is required and the stitch pattern you should use for them. I recommend making your swatch at least 12cm x 12cm so that you are well clear of the edges when you take your reading.

Once you have crocheted your swatch, measure the number of stitches and rows per 10cm. If your gauge does not match the gauge specified in the pattern, you can adjust your tension or change the hook size until you get the desired gauge. If you have less stitches/ rows per 10cm you need to move down to a smaller hook. If you have more stitches/ rows per 10cm you need to move up to a bigger hook.

Friday, 24 March 2023

4 Ways To Get Help With A Crochet Pattern

Text: 4 ways to get help when you're stuck with crochet, read more on my ad-free blog. Image: man with yarn wound and tangled round his fingers, balls of yarn to his right.

4 Ways To Get Help With A Crochet Pattern

Hello! This week I'm here to pass on some crochet wisdom to you: my 4 ways to get help with a crochet pattern when you get stuck! It will of course apply to kniting and other crafts, so it will be super useful I hope!

If you find yourself in a pickle with a crochet stitch or pattern I have 4 top tips to help you get out of your tangle.

1. YouTube is a fantastic resource:

YouTube is your friend for pretty much every stitch and stitch combo out there! Just be careful to follow videos in UK terms if your pattern is in UK terms/ US terms if your pattern is in US terms or you could find yourself in an even bigger mess!  

2. Ask a crochet friend:

Maybe you know someone who crochets, ask them - they'll be happy to help. If you haven't joined a crochet & knitting group, I thoroughly recommend you do! Not only will you have hands on help to any problem, you'll meet like-minded people and gain some awesome new friends!

3 women are sitting, holding their crochet or knitting and chatting together

3. Check for errata:

Patterns bought online will be updated by the designer if mistakes are spotted after publication and a new copy of the pdf should be made available. If the pattern is in a magazine there will be an errata section on their website or sometimes in the next issue. 

4. Ask the designer: 

If you're completely stuck with a crochet pattern, the designer might be able to see where you're going wrong or it's possible that there's an issue with the pattern. Always be polite; remember pattern designers are humans too!

If you're more of a beginner, it will be super helpful for you to read my 'How To Read & Understand A Crochet Pattern' blog post which you'll find here.

I hope these tips are useful for you! If you'd like to receive my weekly wisdom straight to your inbox, sign up to my newsletter here. 

Until next time, happy crocheting,

Marta xx 

Friday, 17 March 2023

The never-ending quest to learn new crochet skills!


Hands crocheting and balls of wool


Hello! A question I'm asked all the time is "how long did it take you to learn how to do that?". The person is looking at the skill involved in one of my pieces and they think they'll never be able to reach that level.

This often makes me realise just how far I've come on this crochet journey, with thoughts like "two years ago I certainly couldn't have done this" going through my head.

I'm here to tell you that anything is possible if you are 1) willing to learn and 2) put that learning into practice. 


This time last year I was learning how to do mosaic crochet, a completely new skill for me and I remember the charts looked scarily complex! However, I started on row 1 and followed the instructions to create a gorgeous blanket (pictured above) which I'm so proud of! 

Next on my list of things to learn is tapestry crochet! I know it's similar to mosaic crochet but that colour changes happen mid row, maybe even twice mid row (eeek!).


My To The Park Cardigan (released this week and pictured above) is an intermediate level crochet pattern but there are possibly new skills for you to try;

  • A crocheted cable goes down the back and two cables go down either side of the front opening.
  • The ties are crocheted I-cord.
  • There are foundation crochet stitches used when splitting for the sleeves.
If these techniques are new to you, don't worry, the pattern has bonus video tutorials to keep you right! I'm also available for pattern support should you have any questions.

This pattern is available on my website and on Ravelry and there's currently a 10% off early bird offer! Use the code CARDILOVE at the checkout to receive your discount.

Until next time, happy crocheting,

Marta xx


Friday, 28 October 2022

Your Guide To Choosing The Right Crochet Hook

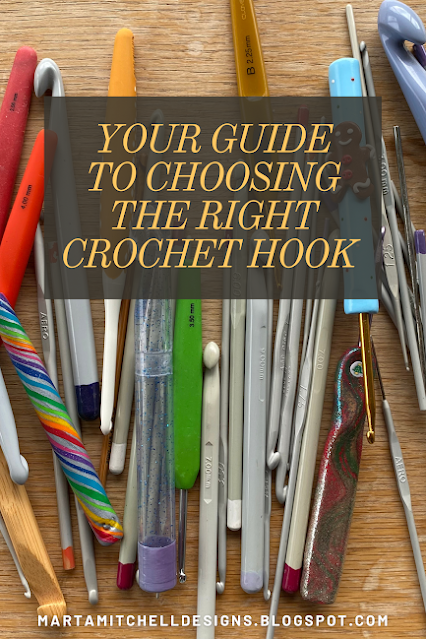
Text - Your Guide To Choosing The Right Crochet Hook appears over a background of crochet hooks of various shapes and sizes


Hello! With so many crochet hooks out there to choose from, maybe you're confused on which type to go for? Maybe you've tried a few different types and would like to explore further options? Here's my guide to choosing the right crochet hook ...

In this blog post, I'm listing the variety of materials that hooks can be made from and giving you a little info on each one. I also turned this post into a YouTube video if you're more of a visual learner you might want to check that out here.

1) Steel: these are generally super fine hooks (0.5mm - 2mm) which are ideal for working with thread and very thin yarn

2) Aluminium: are a good all rounder! They are cheap to buy and smooth to use. They come in a large range of sizes and are easy to find in charity shops.

3) Bamboo: an excellent choice if you prefer natural materials. Bamboo hooks come in a wide range of sizes, all except the really fine and the super chunky. Personally I have found that these hooks can catch on yarn, especially the finer ones (up to 4mm), but I do enjoy the feel of working with them.

4) Plastic: nice and light to work with. The smaller hooks are solid plastic, larger sizes are hollow plastic. Like aluminium hooks they are cheap to buy. You may want to avoid these if you're considering the environmental impact (unless second hand of course!).

5) Ergonomic: this is where your options explode open! There's a huge range of ergonomic hooks on the market, starting from very cheaply produced ones to luxury ones which feel so good to hold. The handles are formed of soft pastic moulded around an aluminium hook.

6) Hand crafted: these hooks are lovely if you're looking for something a little bit different. A polymer clay is added around an aluminium hook to create a chunkier handle. These hooks range from plain colours to quirky & fun!

7) Hand carved: if you're looking for something special, this is your option! These hooks are lovingly and expertly hand carved from wood. They usually have a bees wax finish to keep them supple and smooth.

8) Resin: Another luxury hook! A quick scroll through Etsy brought up so many pretty options, many of which are combined with wood. These tend to have a chunky ergonomic handle.

9) Interchangeable: A slightly different option; these hooks come with one ergonomic handle and a range of hook sizes to click or screw in place. I haven't tried them, but they are popular.

10) Light up: Similar to interchangeable hooks but with a light up tip. The hook itself is made of clear plastic with a light in the end, these click or screw onto a USB rechargeable handle.

Phew! Did you realise there were this many options?

Which type do I prefer?

Do you know, I tend to default to my trusty aluminium hook for most projects; it's probably because they're what I started crocheting with and they feel familiar to me.

I do also use a range of ergonomic hooks, particularly if I'm doing finer work. For super chunky and T-shirt yarn I like to use a hollow plastic hook because it's lighter. Basically, I mix things up!

A beautiful handcarved or resin hook is definitely on my WISH LIST! (I wonder if the hubby will read this?)

I've deliberately not linked to any hooks here. If there are any types you'd like to look up they're only a quick search away.

As well as different materials for hooks, there's also a difference in the design of the hook head and neck. However, I feel this needs a diagram to explain the technicalities and is probably a whole other blogpost for another day!

Until next time, happy crocheting,

Marta xx

PS. If you'd like to receive practical crochet info like this straight to your inbox, sign up to my mailing list here. There's a free pdf for you when you do - 25 Top Tips Every Crocheter Needs To Know!


Thursday, 4 August 2022

Crochet hook size guide


Hello! Dropping in with some useful info for you about crochet hook sizes! You may have noticed in crochet patterns that sometimes hook sizes are referred to in metric terms, sometimes with a number and sometimes with a letter & number! This can all be a bit confusing, so I've put together a table with the most popular sizes for you to help keep you right.


The photo above is my collection of hooks, which I like to refer to in millimetres. Most patterns do state the hook size in metric terms (or a mix) so you shouldn't get in too much of a tangle over it!

I hope my table comes in useful for you - why not print it out and keep it to refer to! 

Until next time, happy crocheting,

Marta xx

PS. Sign up to my mailing list to get crochet posts like this one delivered straight to your inbox! 

Thursday, 21 July 2022

Crochet tip for you!


Hello! I'd like to share a useful little crochet tip with you today! It's a small change which can make a big difference. Tightness in the starting chain and first row was something I used to struggle with so I began to deliberately crochet my chains more loosely. But then I found this tip which works even better!


The secret is to go up a hook size for your starting chain! In the top swatch I used a 3.5mm hook throughout, causing the tightness along the starting edge. In the bottom swatch I used a 4mm hook for my starting chain and switched to a 3.5mm hook to begin row 1. Can you see the difference?


I hope this is a useful tip for you. Do let me know if you try it out and it works for you. 

Until next time, happy crocheting,

Marta xx

PS. There's a new podcast episode up on YouTube if you fancy watching. I share all my crochet and knitting WiPs and other yarny stuff! 


Need a quick last minute crochet gift idea?

Hello!  Are you in need of a quick, last minute crochet gift idea?  Don't stress, I have you covered! Here are 3 of my favourite quick m...