Showing posts with label crochet tips. Show all posts

Thursday, 14 March 2024

How To Make Do And Mend With Crochet

Text:  4 tips, How To Make Do And Mend With Crochet. Graphic image shows balls of wool with a crochet hook pushed the central one.

 Make Do And Mend With Crochet

Hello! This week I'd like to focus on one of my core values when it comes to crafting: How To "Make Do And Mend"! Crocheting opens up a world of creativity for us, but what about those leftover bits of yarn and those clothes with minor tears? Don't toss them aside, instead embrace the culture of "Make Do and Mend" with crochet. There are many ways that we can make the most of what we have and in this blog post I'm going to share my top 4 tips to breathe new life into your crochet.


1. Conquering the Leftovers:

We've all been there - our project is complete, but now we have a basket overflowing with colorful yarn scraps. These beauties are perfect for creating all sorts of small projects such as amigurumi or hats. You may need to get creative in the way you combine your yarns, but that's all part of the fun! My Air Balloon Beanie is a two colour pattern which could be made in multiple colours to use up your leftovers. Find the pattern on my website here.


2. Patching Up Perfection:

A small snag doesn't have to spell doom. Crochet patches are both a fun and functional way to extend the life of your favourite garments and reduce landfill waste. Choose contrasting or complementary colours to create a unique design element. My Sunshine & Showers pattern set might be ideal for your next cover up! Find the pattern on my website here.


3. Visible Mending Magic:

Embrace the current trend of visible mending! Instead of trying to hide your repair, use contrasting yarn to mend tears in a bold and artistic way. My dad is constantly bringing me his woollen socks to darn and initially I would choose yarns that were similar in colour to the original, but now I just go wild with my colour choices!
Mending in this way adds a personal touch to your clothes and promotes sustainable practices by letting others see your "Make Do And Mend" attitude. Win-win!


4. From Scraps to Spectacular:

Tiny yarn ends don't have to gather dust either; you can turn them into a vibrant scrappy blanket! This classic project is one of my favourites because it's perfect for using up even the tiniest scraps. You can experiment with colour combinations and create a unique masterpiece for your home.
The thing I like most about scrappy blankets is that as I use each yarn I get to remember the original project I used it in. I have 3 scrappy blankets free here on my blog, this is my most recent one but you can use the search bar at the side to easily find the others. 


Don't forget to share your mending journey online! The online crochet community thrives on inspiration and resourcefulness. Share photos of your visible mends or quirky scrap yarn creations. You might inspire others to embrace the "Make Do and Mend" spirit with crochet! Tag me on Instagram @marta.mitchell.designs and I'll share your photos to my stories.
 
By incorporating my 4 tips, you'll save yourself money, reduce waste and also unlock a whole new realm of creative expression. So, dig out those leftover yarns & scraps and get crochetingit's a sustainable and rewarding way to keep your love for crochet thriving.

If you like these tips, please consider signing up to my mailing list, when you do so, you'll automatically be sent my PDF with 25 top tips that every crocheter should know! 


Until next time, happy crocheting,


Marta xx


Monday, 2 October 2023

How To Cheat At Swatching!

Text reads How To Cheat At Swatching, image is of an L shaped piece of crochet in mint coloured yarn with a crochet hook and ball of yarn to the right of it.


Hello! This is one of the best crochet hacks I've ever shared on Instagram, it received a tonne of engagement - How To Cheat At Swatching - and I thought I'd share it with you here in case you missed it (you know how fickle the algorithm can be!).

The hack is simply to crochet an L shape instead of a square, which cuts down on about 30% of the crochet time!

To do this; start as usual & crochet 3 to 5 rows, then start the next row but turn after about 5 stitches, leaving the remaining stitches unworked, crochet into these 5 stitches only until your height is about the same as your width.

A few things to note! 

  • You will need to work less rows for thicker yarn/ more for thinner yarn before beginning the leg of the L.
  • Again, thicker yarn may only need 4 stitches and thinner yarn more like 7 - use your judgment here.
  • This hack is not suitable if you need to get a good idea of drape, simply because there's less fabric to play with.

To watch my reel on Instagram, click here.

If you'd like to dive deeper into the topic of gauge swatches you can read my popular post; 6 Top tips For Better Swatches here.

Learn the rules then break them like a pro! 

Until next time, happy crocheting,

Marta xx

PS. If you'd like even more crochet hacks from me, sign up to my mailing list and I'll send you a pdf with 25 Top Tips Every Crocheter Needs To Know

Thursday, 4 May 2023

My 6 Top Tips For Better Swatches


Hello! If you're new to crochet and not sure what swatching is, it's the process of crocheting a small sample to test your gauge. It's a valuable step at the start of any crochet project, but it's extremely important for projects that require a specific fit, such as garments.

So, what is gauge?

Gauge, also known as tension, is the number of stitches and rows (usually per 10cm) in any piece of crochet. The gauge for each project is determined by the designer and should be found near the top of the pattern instructions.

Why is swatching so important?

I know, I know! It's a step we often want to skip, but there are several reasons why swatching is important.

  • To ensure that your finished piece of crochet will be similar to the designer's finished piece. If it's a jumper for example, this is important - even a small difference in tension can make a BIG difference in the size of your finished project.
  • To make sure that your crochet work will look the way you want it to. Different hook sizes can produce different textures and drapes. The process of swatching allows you to experiment with different hook sizes to find the hook and yarn that produces the results you want.
  • To help stop you running out of yarn. When you swatch and your tension matches up with the designer's tension you can be confident that your yarn use will be more or less the same.

Ok, I'm listening, how do I swatch?

To make a swatch; crochet a square using the yarn, hook size and stitch pattern that you plan to use for your project.

Most patterns will specify the size of swatch that is required and the stitch pattern you should use for them. I recommend making your swatch at least 12cm x 12cm so that you are well clear of the edges when you take your reading.

Once you have crocheted your swatch, measure the number of stitches and rows per 10cm. If your gauge does not match the gauge specified in the pattern, you can adjust your tension or change the hook size until you get the desired gauge. If you have less stitches/ rows per 10cm you need to move down to a smaller hook. If you have more stitches/ rows per 10cm you need to move up to a bigger hook.

Friday, 24 March 2023

4 Ways To Get Help With A Crochet Pattern

Text: 4 ways to get help when you're stuck with crochet, read more on my ad-free blog. Image: man with yarn wound and tangled round his fingers, balls of yarn to his right.

4 Ways To Get Help With A Crochet Pattern

Hello! This week I'm here to pass on some crochet wisdom to you: my 4 ways to get help with a crochet pattern when you get stuck! It will of course apply to kniting and other crafts, so it will be super useful I hope!

If you find yourself in a pickle with a crochet stitch or pattern I have 4 top tips to help you get out of your tangle.

1. YouTube is a fantastic resource:

YouTube is your friend for pretty much every stitch and stitch combo out there! Just be careful to follow videos in UK terms if your pattern is in UK terms/ US terms if your pattern is in US terms or you could find yourself in an even bigger mess!  

2. Ask a crochet friend:

Maybe you know someone who crochets, ask them - they'll be happy to help. If you haven't joined a crochet & knitting group, I thoroughly recommend you do! Not only will you have hands on help to any problem, you'll meet like-minded people and gain some awesome new friends!

3 women are sitting, holding their crochet or knitting and chatting together

3. Check for errata:

Patterns bought online will be updated by the designer if mistakes are spotted after publication and a new copy of the pdf should be made available. If the pattern is in a magazine there will be an errata section on their website or sometimes in the next issue. 

4. Ask the designer: 

If you're completely stuck with a crochet pattern, the designer might be able to see where you're going wrong or it's possible that there's an issue with the pattern. Always be polite; remember pattern designers are humans too!

If you're more of a beginner, it will be super helpful for you to read my 'How To Read & Understand A Crochet Pattern' blog post which you'll find here.

I hope these tips are useful for you! If you'd like to receive my weekly wisdom straight to your inbox, sign up to my newsletter here. 

Until next time, happy crocheting,

Marta xx 

Tuesday, 26 July 2022

Crochet sock terms demystified!


Hello! I remember when I first started crocheting socks, I used to get in a right tangle about what all the different parts of the sock were called. Also, toe-up, cuff-down, after-thought heel? What were they all about? I'm here today to help demystify some of these terms for you and also to encourage you to give crochteted socks a go if you haven't already!

The diagram above has arrows pointing to all the different parts of a sock. Most of them you'll be familiar with, the less well known ones are the heel flap & turn, gusset and instep.

The heel flap is worked in rows of crochet and can be on the sole of the sock in some cases.

The heel turn is where the crochet fabric is manipulated to go around the heel - often decreases are used to join the heel flap to the body of the sock (this part is where my degree in Scuplture comes in super handy, I can visualise and design exactly the shape I want!).

The gusset is a series of increases (in a toe-up sock) or decreases (in a cuff-down sock) to allow more room in the heel section.

The instep is the bit which covers the arched upper part of the foot. It's often referred to in a pattern because these stitches are unworked while the heel flap is under construction.

An after-thought heel is used when a sock is crocheted as a tube, without any gusset or heel shaping and a slit is created for the heel. Once the sock is completed the stitches are worked into and then decreased to create the heel.

toe-up sock begins at the toe section and works up to the cuff.

cuff-down sock begins at the cuff section and works up to the toe.


Well, I hope this has helped to demystify crocheted socks for you! They really are a dream to crochet - especially because they work up so fast.

My Lazy Days Sock CAL starts in September with the exclusive kits open for pre-order this Friday! I hope you'll consider joining the fun! All the info you need was in my last blog post. Sign up to my mailing list to be notified of the release and to have tips like this delivered to your inbox. 

Until next time, happy crocheting,

Marta xx

Thursday, 21 July 2022

Crochet tip for you!


Hello! I'd like to share a useful little crochet tip with you today! It's a small change which can make a big difference. Tightness in the starting chain and first row was something I used to struggle with so I began to deliberately crochet my chains more loosely. But then I found this tip which works even better!


The secret is to go up a hook size for your starting chain! In the top swatch I used a 3.5mm hook throughout, causing the tightness along the starting edge. In the bottom swatch I used a 4mm hook for my starting chain and switched to a 3.5mm hook to begin row 1. Can you see the difference?


I hope this is a useful tip for you. Do let me know if you try it out and it works for you. 

Until next time, happy crocheting,

Marta xx

PS. There's a new podcast episode up on YouTube if you fancy watching. I share all my crochet and knitting WiPs and other yarny stuff! 


Friday, 8 April 2022

My 5 Tips For Crocheting (or knitting!) Socks

Text: My 5 Tips For Crocheting Socks. Image: close up of someone wearing socks by a woodburning stove

my Fiddle Sock pattern

My 5 Tips For Crocheting (or knitting!) Socks

Hello! Today I'd like to share my experience with you and give you my 5 top tips for crocheting (or knitting!) socks! Maybe you've never tried making socks before or perhaps you're a sock addict like me? Either way, there should be something here to help you on your crochet sock journey.


my Banjo Sock pattern

1.  Take each step as it comes. 

Don't go diving in, looking ahead at what comes up next and freaking out about how you're going to manage that heel! Simply look at row 1 or round 1 and take it from there. Follow that round exactly as the instructions tell you and then work onto round 2 and so on. I think when we leap ahead and see the big scary heel - that's when we're more likely to second-guess ourselves and make mistakes early on.


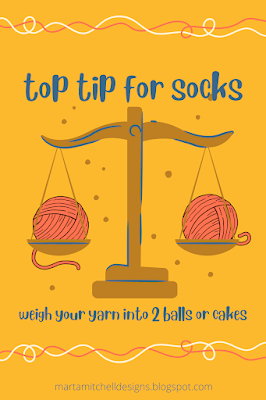
2.  Wind your yarn into two balls (or cakes). 

This is really easy if you're starting with a skein of sock yarn; I simply wind and when I reach the about halfway I pop the yarn on the scales and make sure that I end up with two balls, roughly 50g each. I've shared this tip before and it's one that I find very useful because then I know exactly how much yarn I have for each sock and I'm not panicking about running out of yarn.


3.  Choose yarn with 20 or 25% nylon content. 

This will ensure your socks are durable and washable. There are lots of different types of sock yarn on the market! Commercial sock yarn is a great choice and is typically 75% superwash merino/ 25% nylon. It's especially good for a beginner because it's less expensive meaning you're less likely to be upset when mistakes happen. There are lots of indie yarns dyers out there too, producing all sorts of gorgeous colours to choose from. These tend to have a 20-25% nylon content, perhaps with Blue Faced Leicester instead of merino. There are also smaller yarn companies producing more traditional sock yarn if you want to go for something fancier. At the moment I'm using a sock yarn with 80% Blue Faced Leicester/ 10% Yak/ 10% silk - it's gorgeous to work with!


4.  Work socks two at a time. 

I've shared this tip before and it's a good one to keep your motivation up. It's especially easy to do if you have measured your yarn into equal balls too! If you choose not to work two together it's a good idea, while your motivation levels are high, to jump straight in and start sock no. 2 as soon as you have finished sock no. 1. You can add the hashtag #nosecondsocksyndrome on Instagram - it's a popular one!


5.  Try on your sock as you go. 

This way you will have the perfect fit - you can get the length and width exactly right. Although most sock patterns are customisable you may need to make adjustments and this is easiest to do if you can try your sock on as you work.


my Synthesiser Sock pattern

Did you know that I have multiple crochet sock patterns available on my website and on Ravelry if you're curious and would like to give crocheted socks a go! Check them out today and remember that I'm always here to help if you have any questions.

I hope you found my 5 top tips for crocheting (or knitting!) socks helpful. Why not share with a friend who would find them useful too - help me spread the word.

Don't want to miss my posts? Subscribe to my mailing list today and have them delivered straight to your inbox. There's a FREE pdf waiting for you when you sign up too, with 25 of my best crochet tips!

Until next time, happy crocheting,

Marta xx


Thursday, 10 February 2022

February's crochet pattern of the month


Hello! Sorry if you missed my weekly blog post last week, I had Covid so I was taking it easy. Hubby had it too, despite us both being fully vaccinated. At the moment only our youngest is home and he seems to have escaped the virus, phew! I had a bit of a cough & sore throat, violent sneezes that pulled stomach muscles and generally just felt tired & achy. I tell you, I'm glad I had been vaccinated, it could have been a lot worse!

Anyway, the silver lining was the extra hours for crochet and knitting! It's times like these that I'm so grateful to have such creative and relaxing hobbies - I don't know what I'd do without them! The main project I've been working on is Dutch Houses Throw (below), a mosaic crochet pattern by Esme Crick. I'm using Scachenayr Merino Extrafine 120 and I love how this pattern is working up! 


Like I said, the over riding symptom I had with Covid was tiredness. I really had no energy for over a week, which I'm sure any of you who have had the virus can relate to. So, as well as lots of crochet time I have had time to think about my business and the direction I want it to grow in. I recently had a 1:1 business strategy session with Jenny from Female Entrepeneur School which was amazing! Jenny tells it as it is and praised me for what I was doing well, pointed out a few areas that need improving (and how to take action to sort them) and gave me some inspiration to take away and think about for the future. 

2022 is going to be a big growth year for my crochet business so stick around for what's coming next!

I shared the sock tip at the top of the page on Instagram this week and I thought you might find it useful too. I almost always make socks for big feet (size UK9 - 14 in this household!) so I find this tip really helpful, especially on a toe up sock - I can stop the leg when the yarn seems to be running out. Try it and let
me know how you get on!


February's crochet pattern of the month is my Bandwagon Mitts! The good news is that I've given the pattern a once over to bring it up to date and in line with my more recent patterns AND added US terms! Use the code FEB22 for 15% off the pattern on Ravelry! If you can't access Ravelry, have a look at the pattern on LoveCrafts and drop me a comment or a DM over on Instagram and I'll arrange the discount via email and PayPal.

Sign up to my mailing list to keep up to date with all my news, receive free patterns and for the biggest discounts! https://mailchi.mp/920715760d7a/striation

Until next time, happy crocheting,

Marta xx


Elevate Your Crochet Photoshoots with the Effective Use of Props

Hello! This week I've been taking photos of my crochet and i n this blog post I’m going to pass on my tips on how to make the best use o...